Tizen 6.5
Samsung Tizen 6.5 Installation
This guide provides images from the Samsung QB-B series running Tizen 6.5 however it should be applicable to any Tizen 6.5 based Samsung screen.
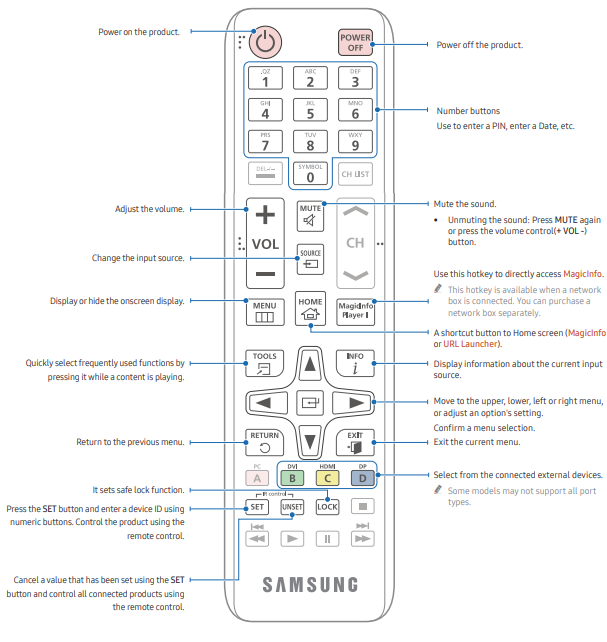
Remote
First Setup (Out of the Box)
Part 1
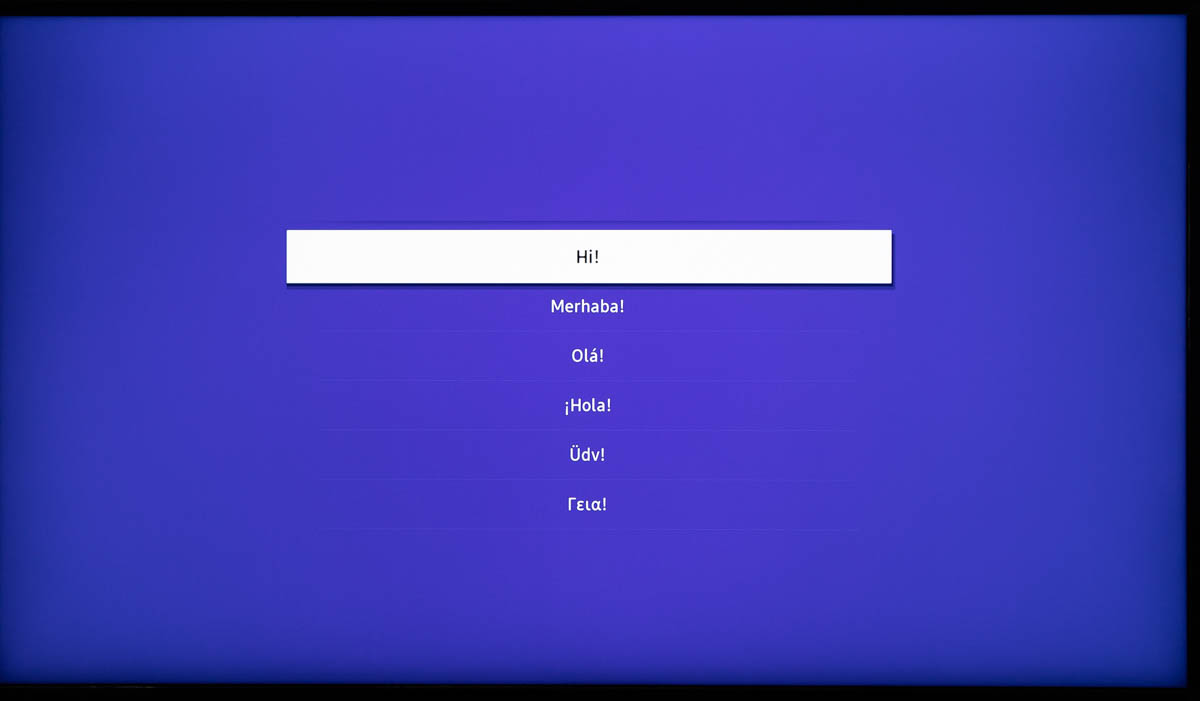
- 1. Select Language
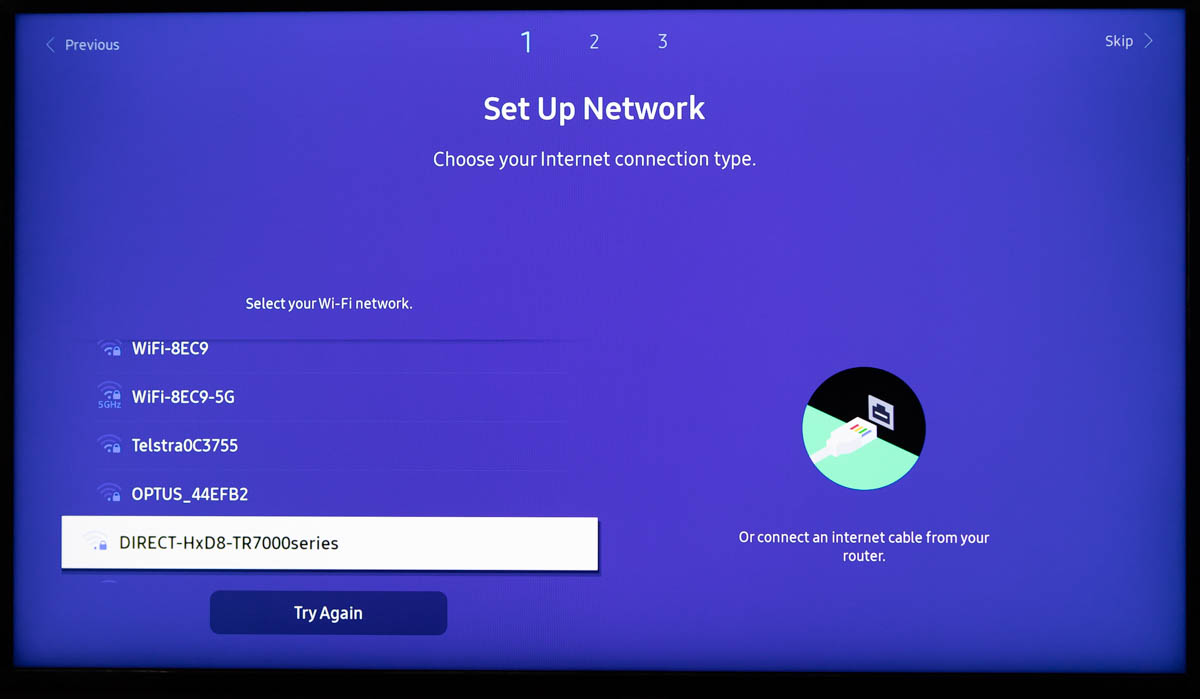
- 2. Network
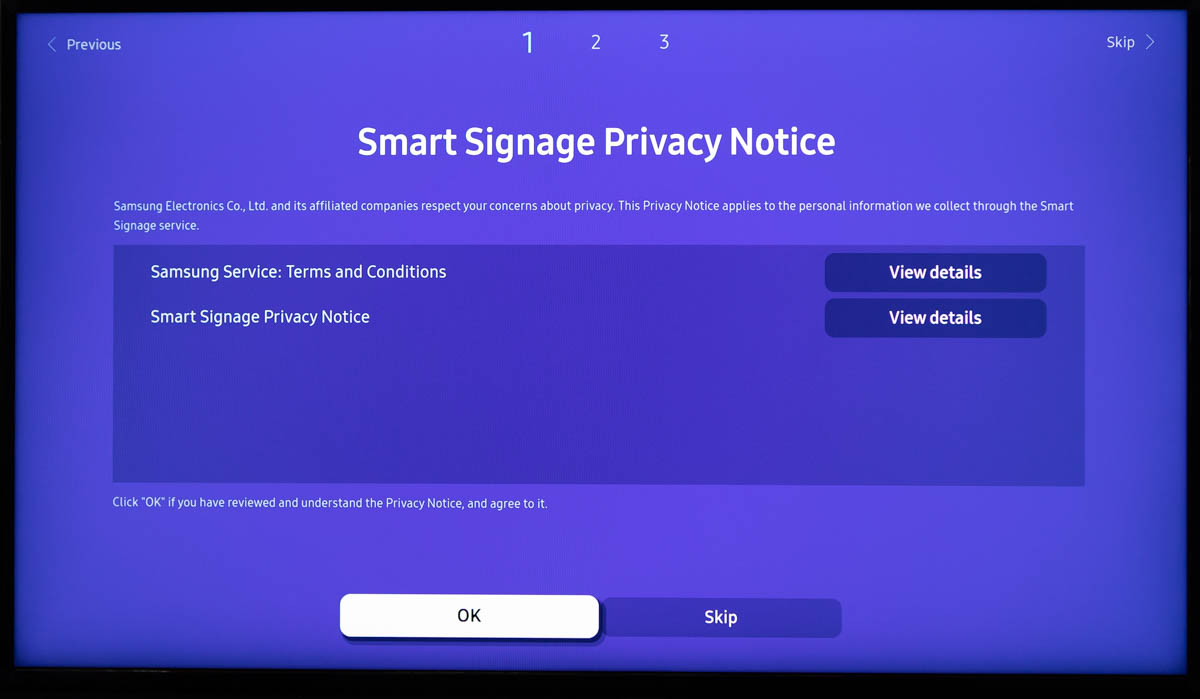
- 3. Privacy Policy
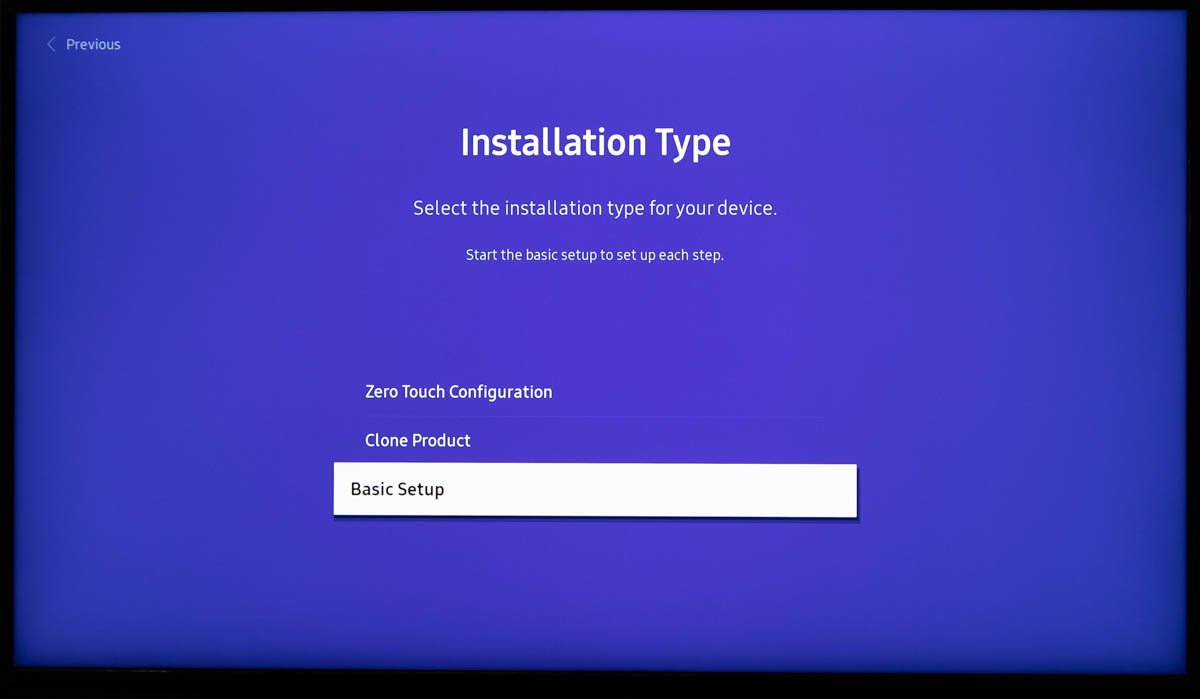
- 4. Basic Setup
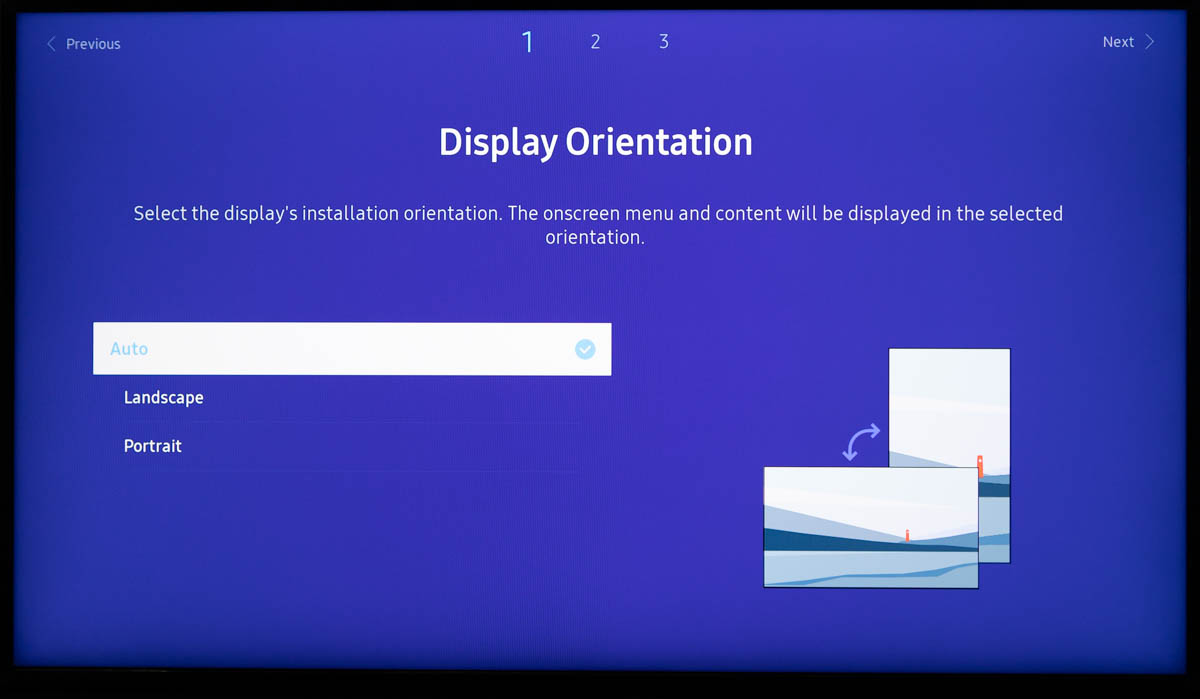
- 5. Orientation
- 6. Auto Power Off
1. Select Language
2. Choose Network (WiFi or Ethernet)
If your device is not connected to the internet then you will not be able to communicate with the Fusion Signage portals to receive your identity code.
3. Read and Accept Privacy Notice
4. For Installation Type, Select Basic Setup
5. Choose Display Orientation (or leave as Auto)
6. Select "Off" under Auto Power Off

Part 2
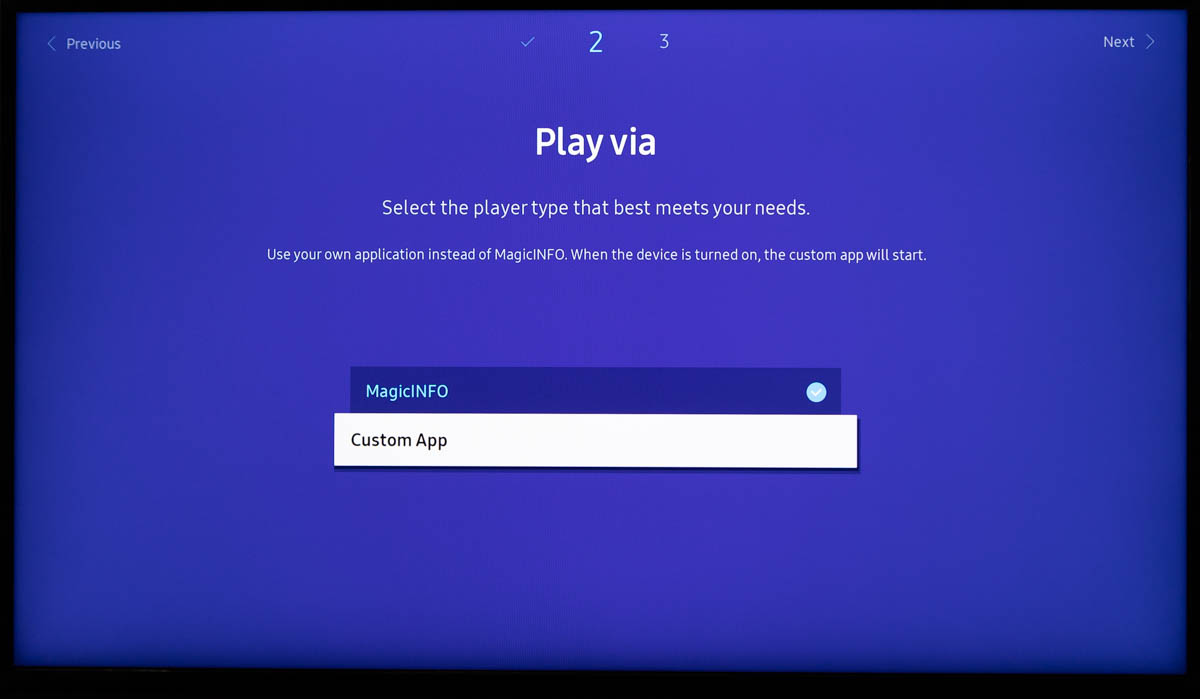
- 7. Custom App
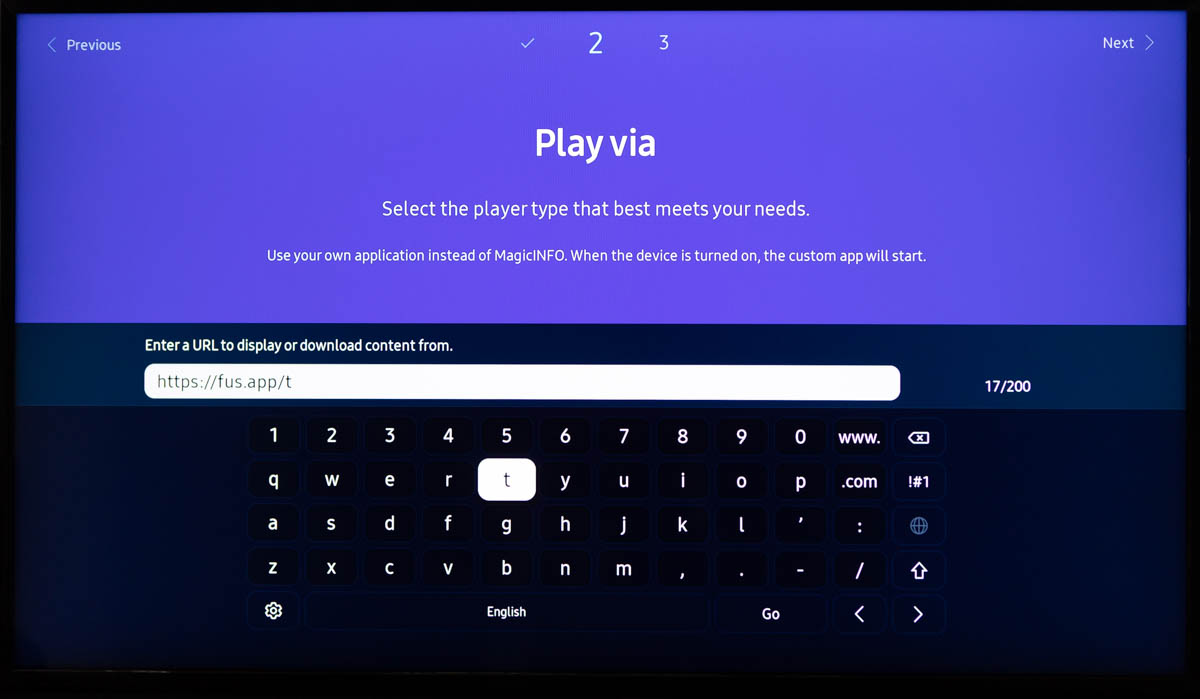
- 8. Enter URL
- 9. RM Server
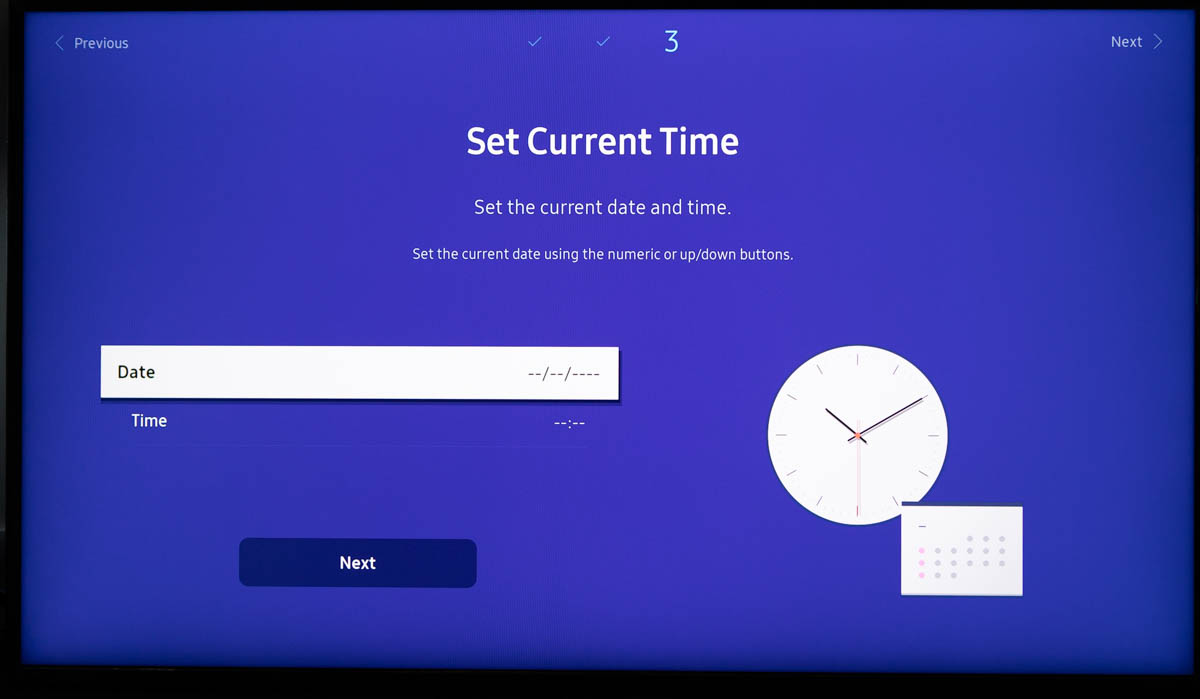
- 10. Time & Date
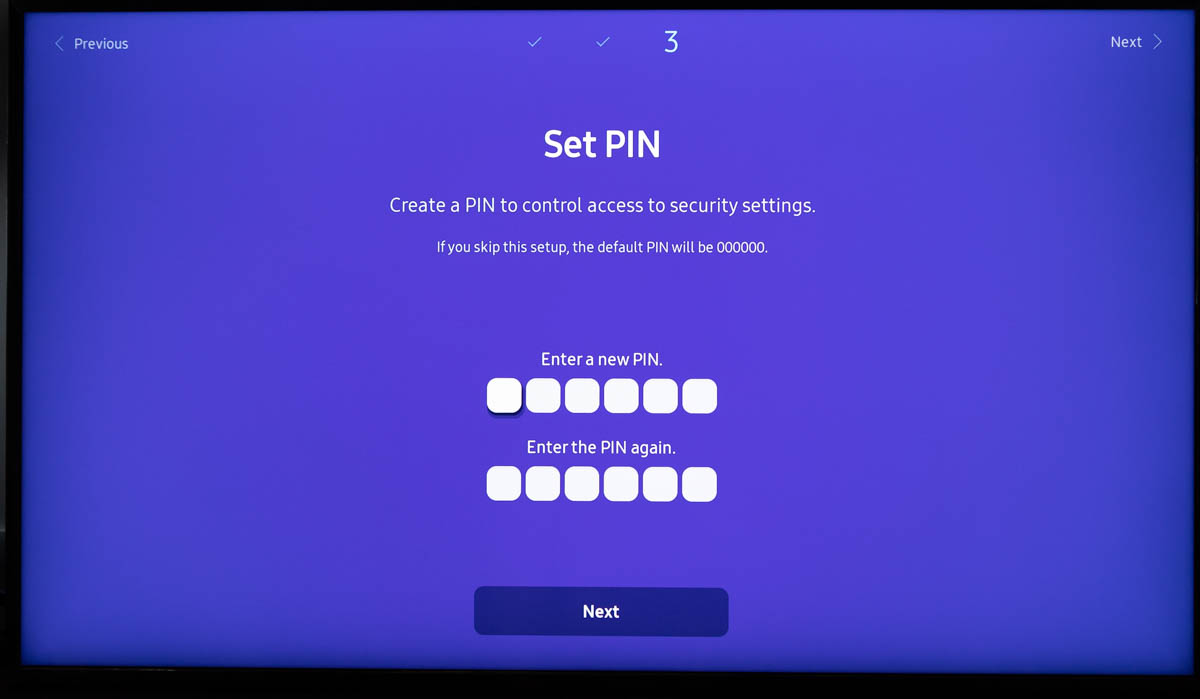
- 11. PIN
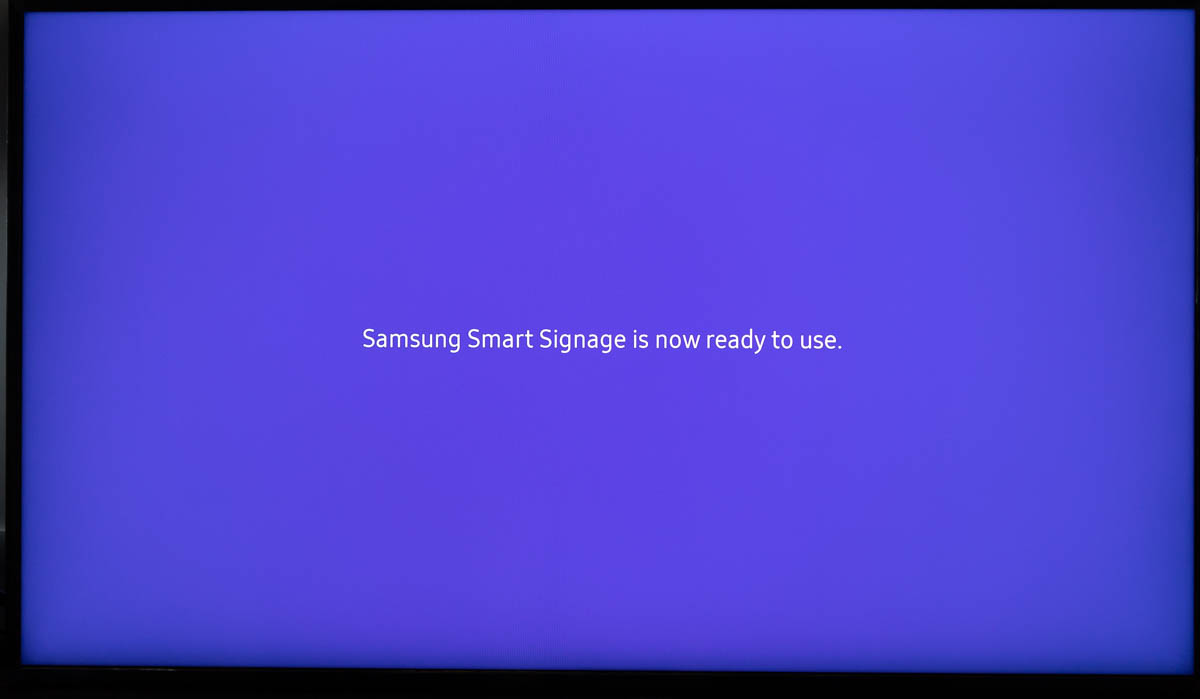
- 12. Done!
7. Select Custom App under Play via
9. Select Skip for RM Server

10. Set the current time and date
If the time and date is not set correctly, then your Fusion Signage Application will not communicate correctly with our server and will not receive and identity.
11. Set a PIN or leave it as the default (000000)
12. You have successfully set up your panel!
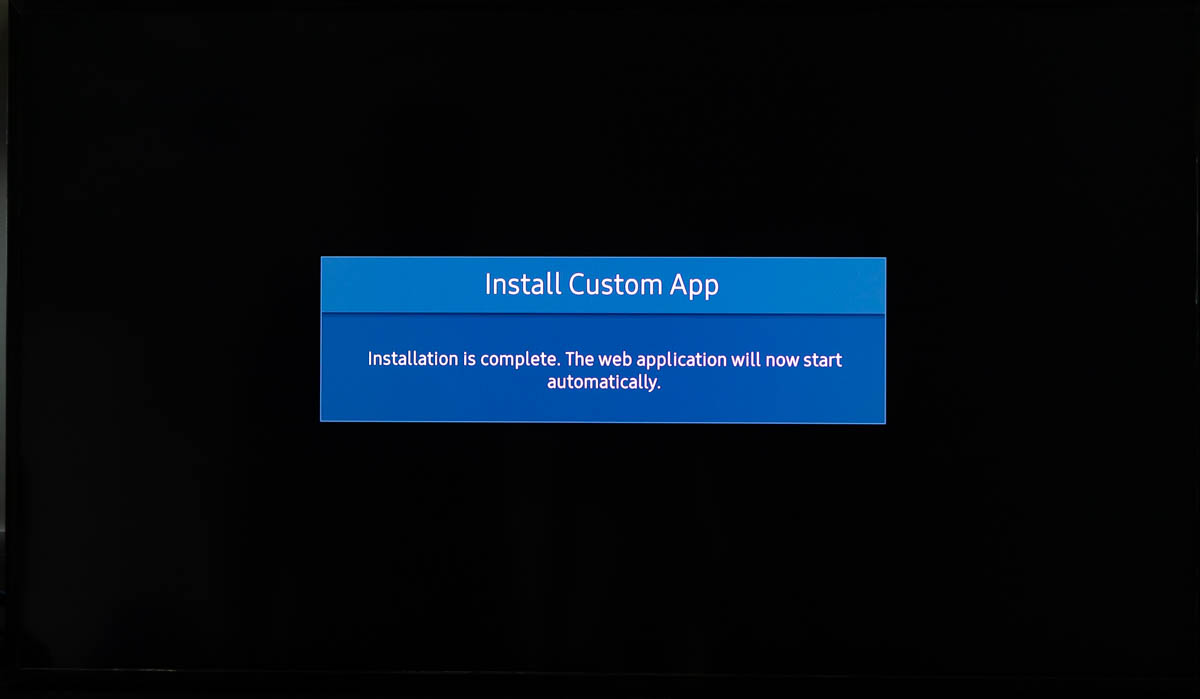
Install Custom App
Finish Installing Fusion Signage
Now that you have completed the initial setup, you will have to run Fusion Signage to install our application.
- 1. Finish Installation
- 2. Fusion Installed!
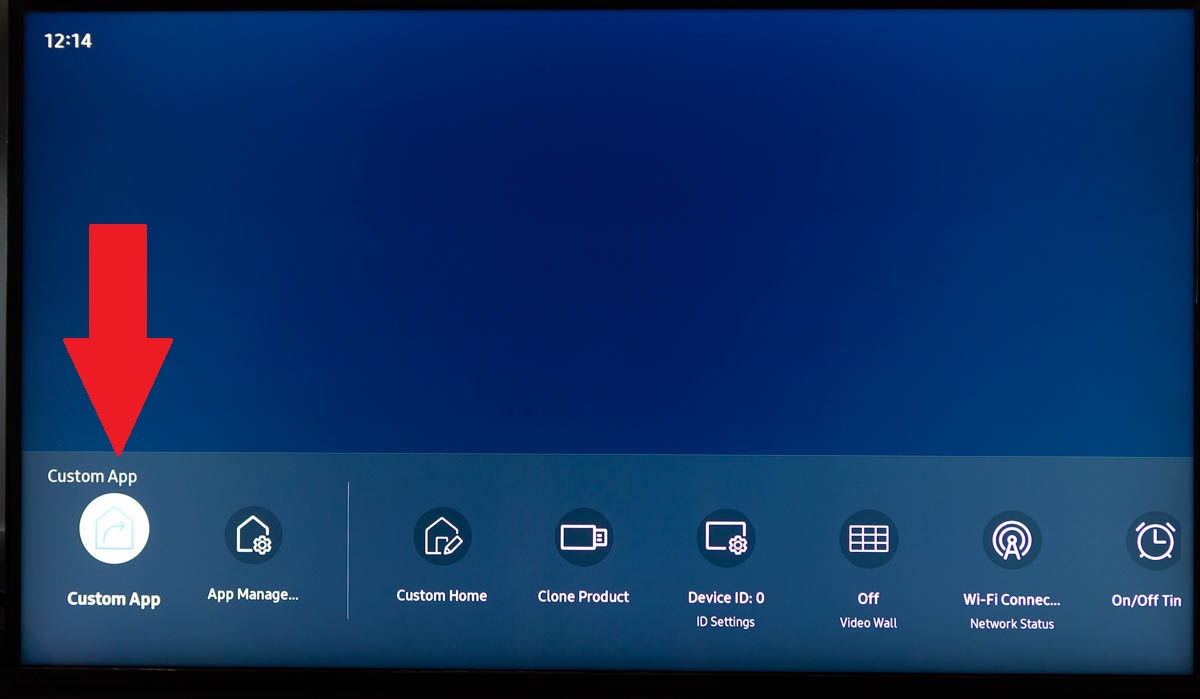
Press the Home button on your remote

Click on Custom App in the bottom left
Adding your screen to your account
The final step is adding your screen to your account.
- Navigate to your Deploy section in the Fusion Signage portal at https://app.fusionsignage.com.au/screens/single,
- Click on Add Screen in the top right hand corner.
- Enter the Identity code from your screen and
- Give your device a name,
- Select the available licence to associate with that screen
- Add the time zone where the screen will be installed
The screen will be added to the account and you can now assign your content!
If you don't see an identity here, or your device says offline, check your internet connection and your time & date settings.
Re-launching Fusion Signage
Fusion Signage will run when the panel is first turned on, however if you have closed down Fusion Signage while accessing the panel menus, you can easily get back to it in one of two ways:
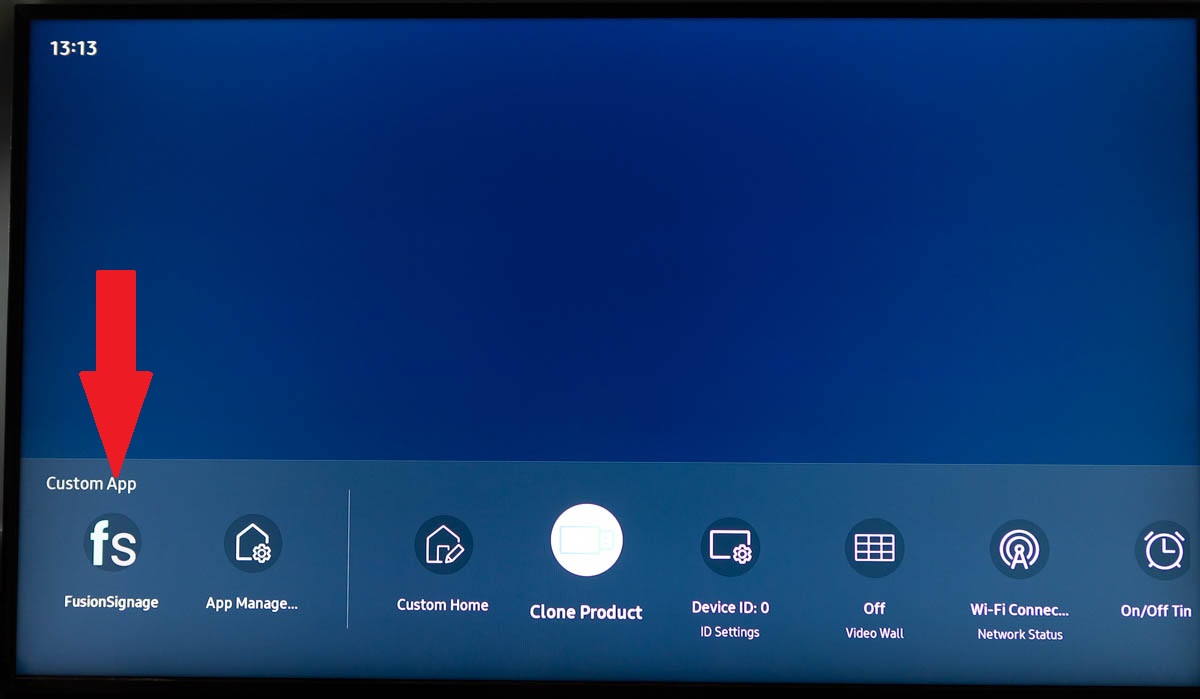
Home Button
- Press Home on your remote
- Press Fusion Signage under Custom App on the left
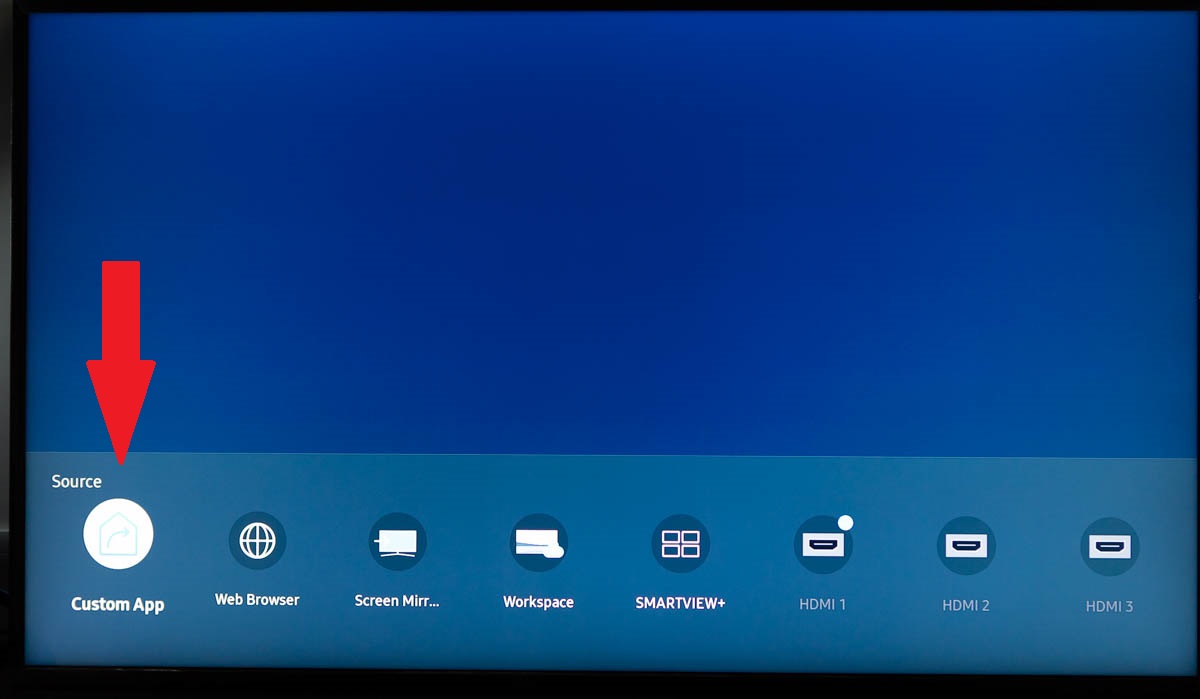
Source
- Press the Source button on your remote
- Select Custom App
Additional Settings
All of these settings can be reached by pressing the Menu button on your remote

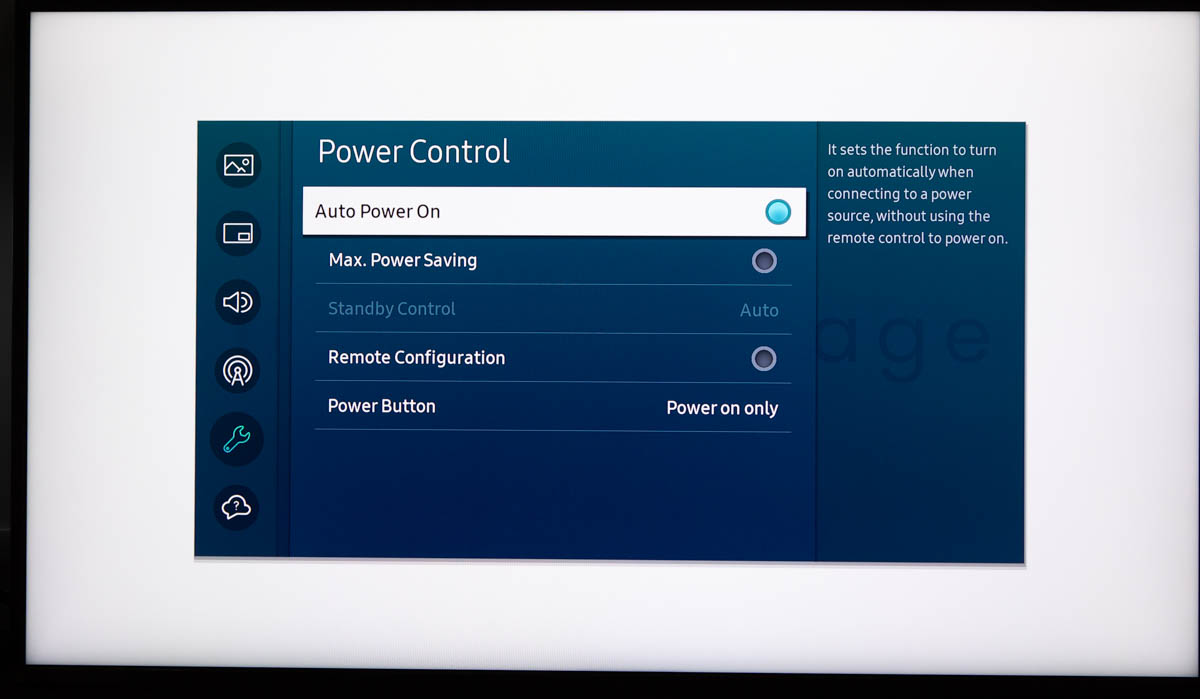
Auto Power On
This will allow your device to turn on automatically if the power is turned off and on
Set Auto Power On
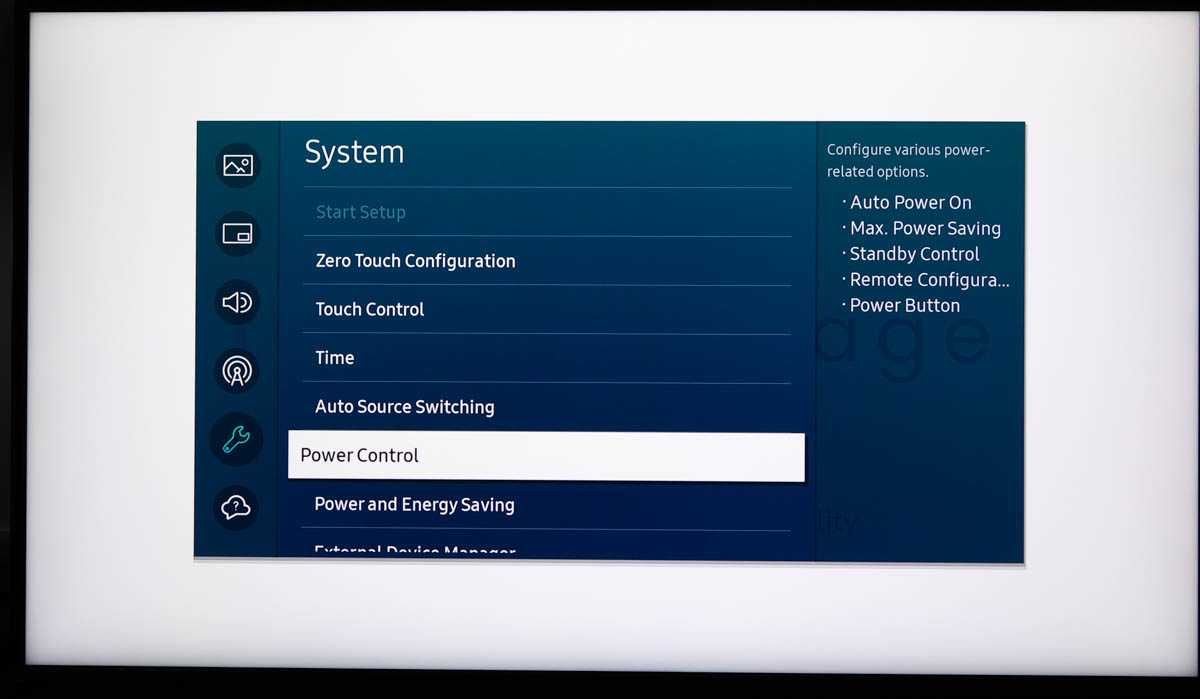
System -> Power Control -> Auto Power On = On
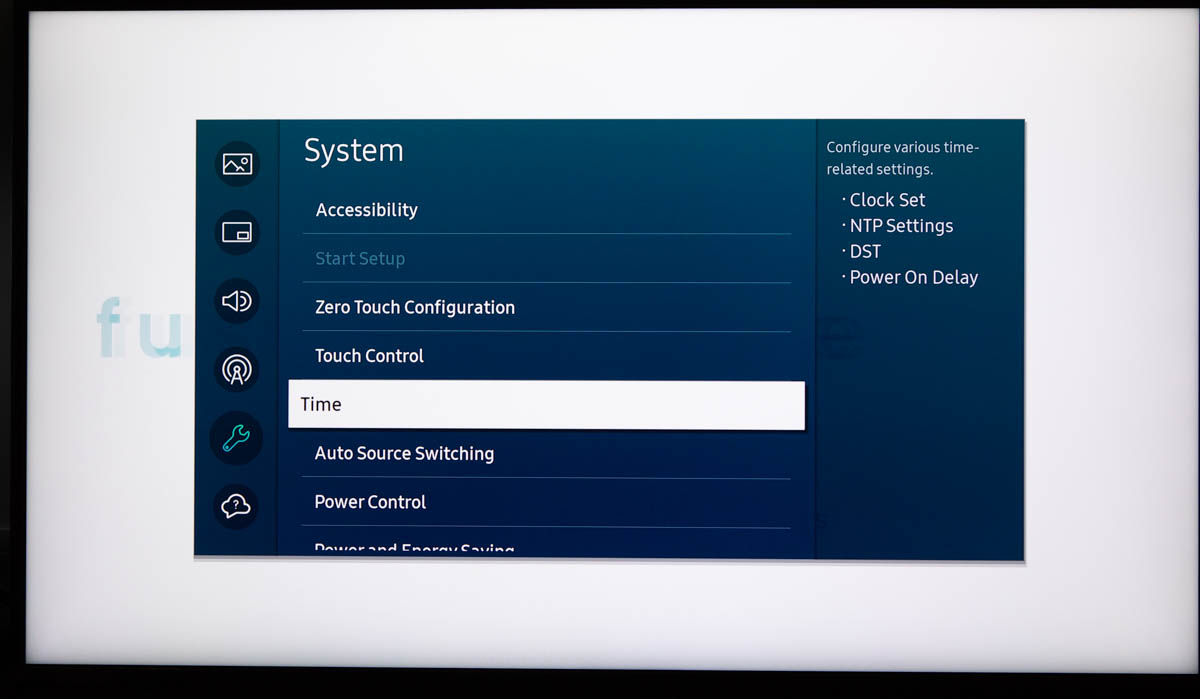
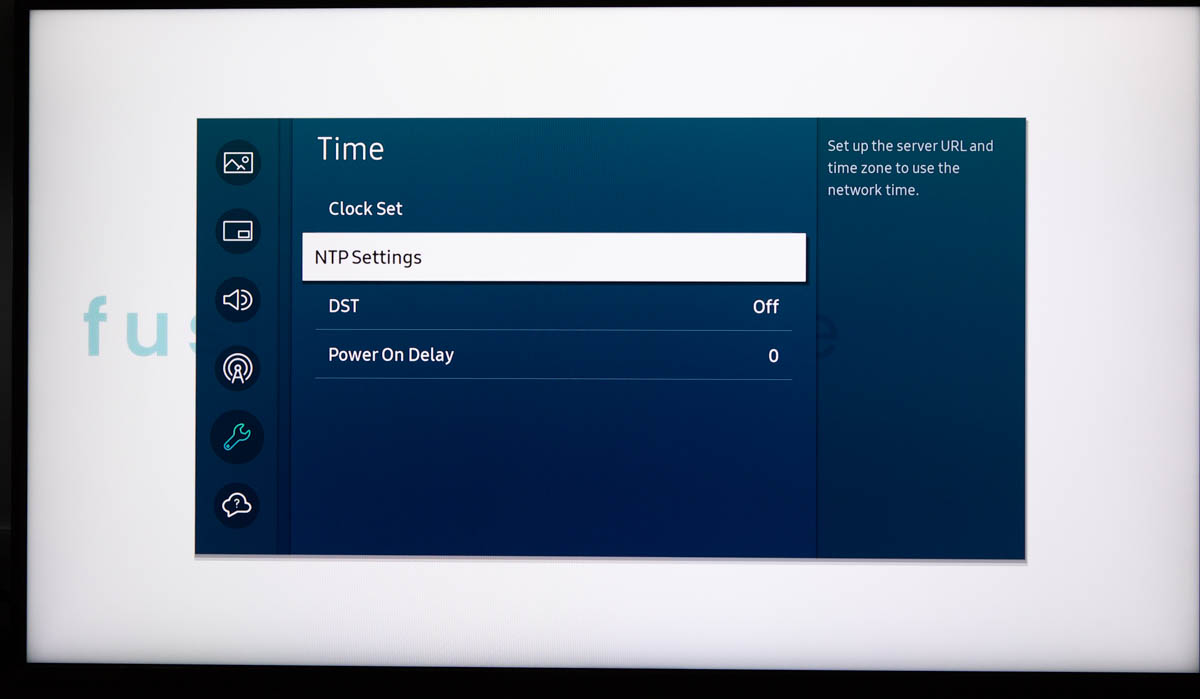
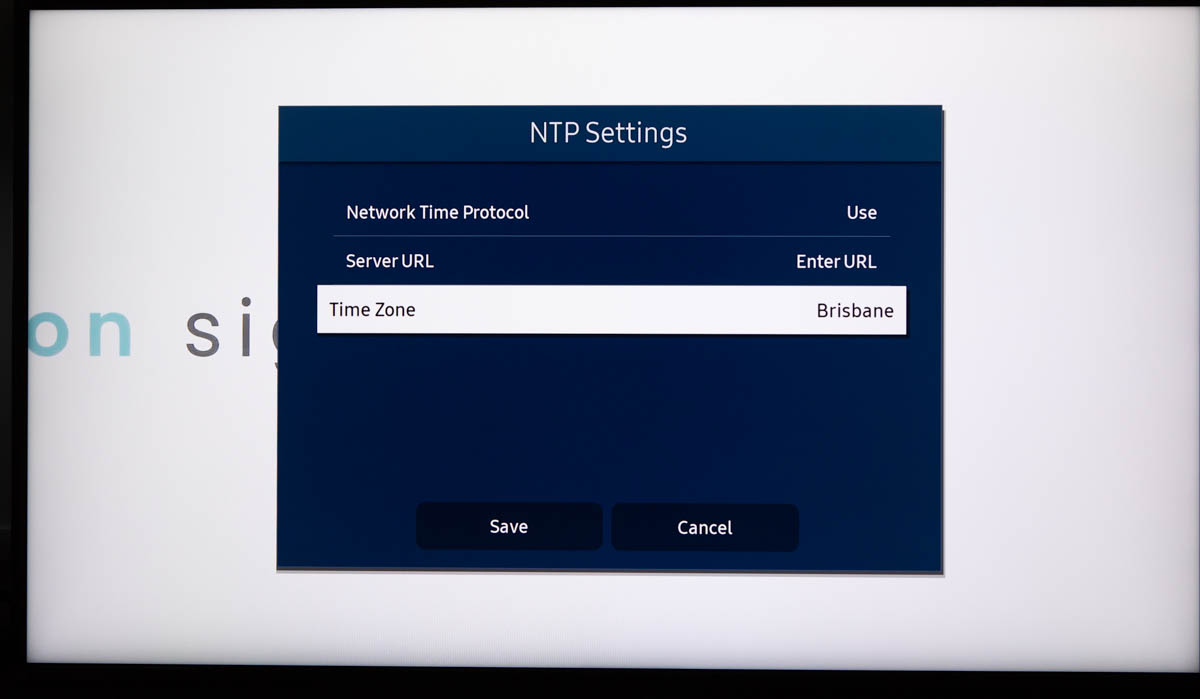
Set Time Zone
This will automatically change your time based on daylight savings
Set Time Zone
System -> Time -> NTP Settings -> Time Zone = Set to your Time Zone
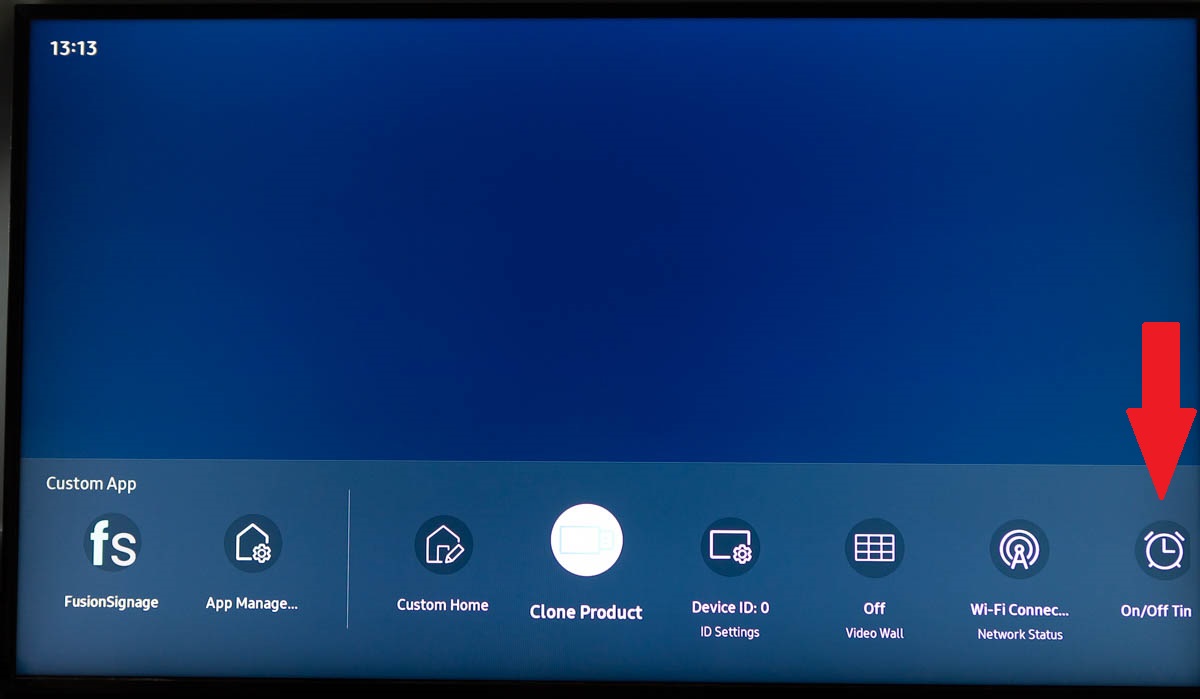
Scheduled On/Off Timer
This will automatically change your time based on daylight savings
Set Scheduled On/Off Timer
Home -> On/Off Timer
Fusion Signage Settings
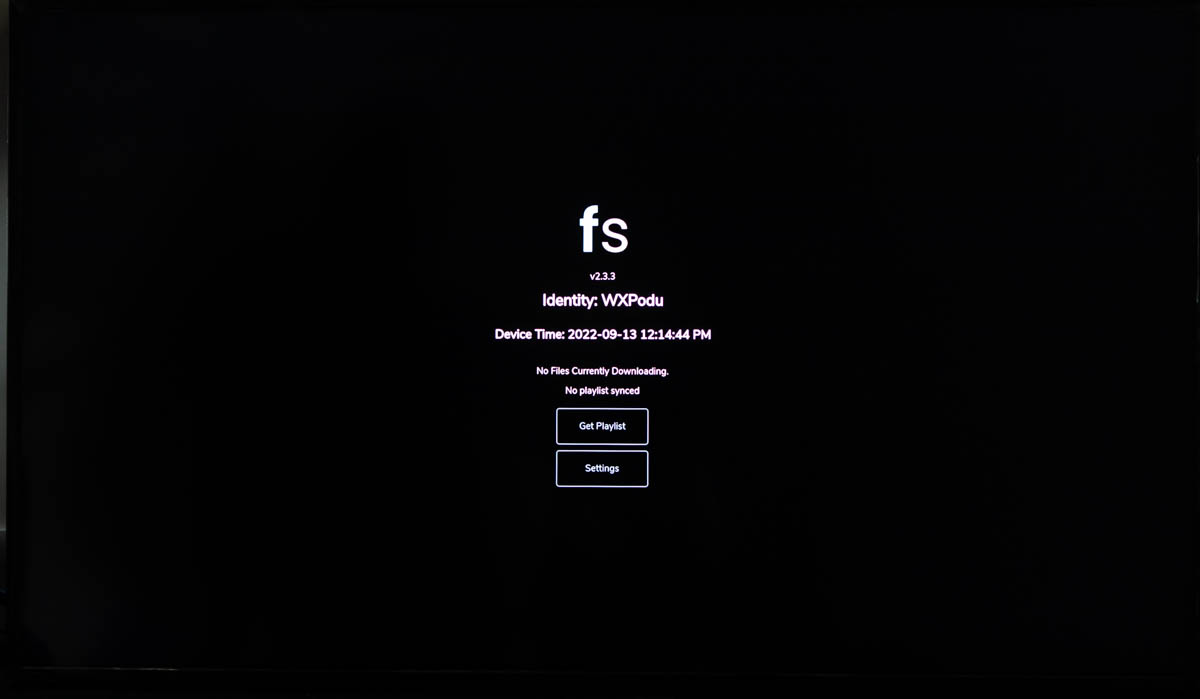
- While the Fusion Signage application is running, pressing the Enter button will bring up our Fusion Signage hidden menu. On this page you will see:
- Application version: 2.3.3
- Identity: WXPodu
- Device Time: 2022-09-13 12:14:44PM
- Files currently downloading
- Assigned Playlist
- Get Playlist button (to force download a new Playlist)
- Settings
- Pressing Settings will give you additional options for your screen
- Enable Auto Updates: allows our application to automatically update. Recommended to leave this on.
- Enable Video Sound: Turn off any audio within your video files
- Enable Menu Secure Access: When using touch screens prevents the menu from appearing when the screen is touched. Need to instead touch 5 times in quick succession to bring up this menu
- Enable Custom Screen Size: Used for LED's or odd resolution screens to set a custom resolution.
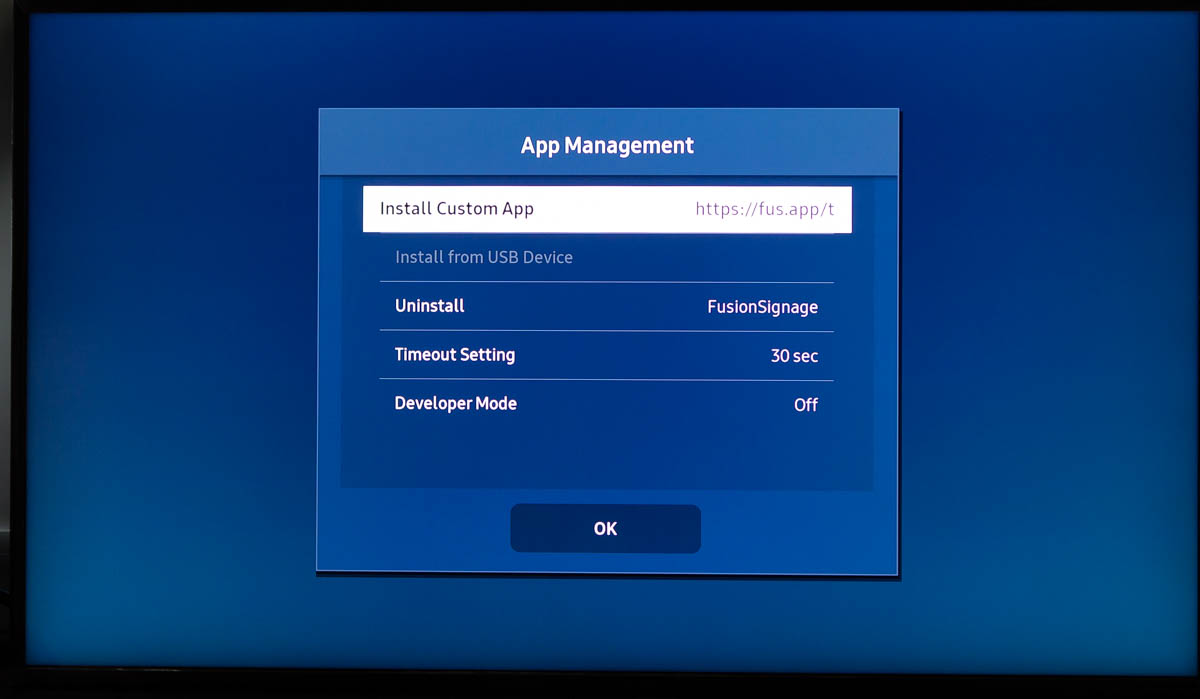
Uninstalling Fusion Signage
- 1. App Management
- 2. Uninstall
Press the Home button on your remote
Click on App Management in the bottom left

Navigate to Uninstall and follow the prompts