Philips Wave
Philips Wave allows you to remotely manage compatible Philips Professional Displays, including installing and launching Fusion Signage.
This guide will walk you through claiming your display in Philips Wave, checking that your firmware is up to date, installing Fusion Signage from the Wave ProStore, and setting Fusion Signage as the active input.
Before you get started
Before installing Fusion Signage, make sure:
- Your Philips display is connected to the internet.
- You have access to a Philips Wave account.
- Your display has been connected to Wave and is showing a 6-digit claim code.
Important: We recommend updating your display to the latest available firmware before installing Fusion Signage.
Creating a New Philips Wave Account
If you do not already have a Philips Wave account, you will need to create one before your display can be managed through Wave and connected to Fusion Signage.
1. Create Your Philips Wave Account
- Open your web browser and navigate to the Philips Wave portal.
- Select Sign Up or Create Account.
- Enter your business details and contact information.
- Create your login credentials and complete the registration process.
- Verify your email address if prompted.
- Log in to your newly created Wave account.
2. Add Your Philips Display to Wave
Before proceeding, ensure:
- The display is powered on.
- The display has an active internet connection.
- Philips Wave has been installed and activated on the display.
Once the display is connected to the internet:
- In the Wave portal, select Add Device.
- Enter the activation code displayed on the screen, or follow the device enrolment process shown within Wave.
- Assign the display a meaningful name and, if desired, place it into a device group.
- Confirm the registration.
The display should now appear within your Wave portal and show as online.
3. Configure Remote Management Settings
We recommend reviewing the following settings before proceeding with the Fusion Signage installation:
- Device name
- Time zone
- Display orientation (landscape or portrait)
- Network settings
- Software update preferences
Configuring these settings at the start can help avoid issues later when deploying content.
4. Install and Configure Fusion Signage
Once the display has been successfully enrolled in Philips Wave:
- Follow the installation steps in this guide to deploy Fusion Signage via Philips Wave.
- Create the Fusion Signage configuration as instructed.
- Deploy the application to your enrolled display.
- Wait for the installation to complete.
1. Claim your display in Philips Wave
- Open the Philips Wave portal and log in using your email address and password.
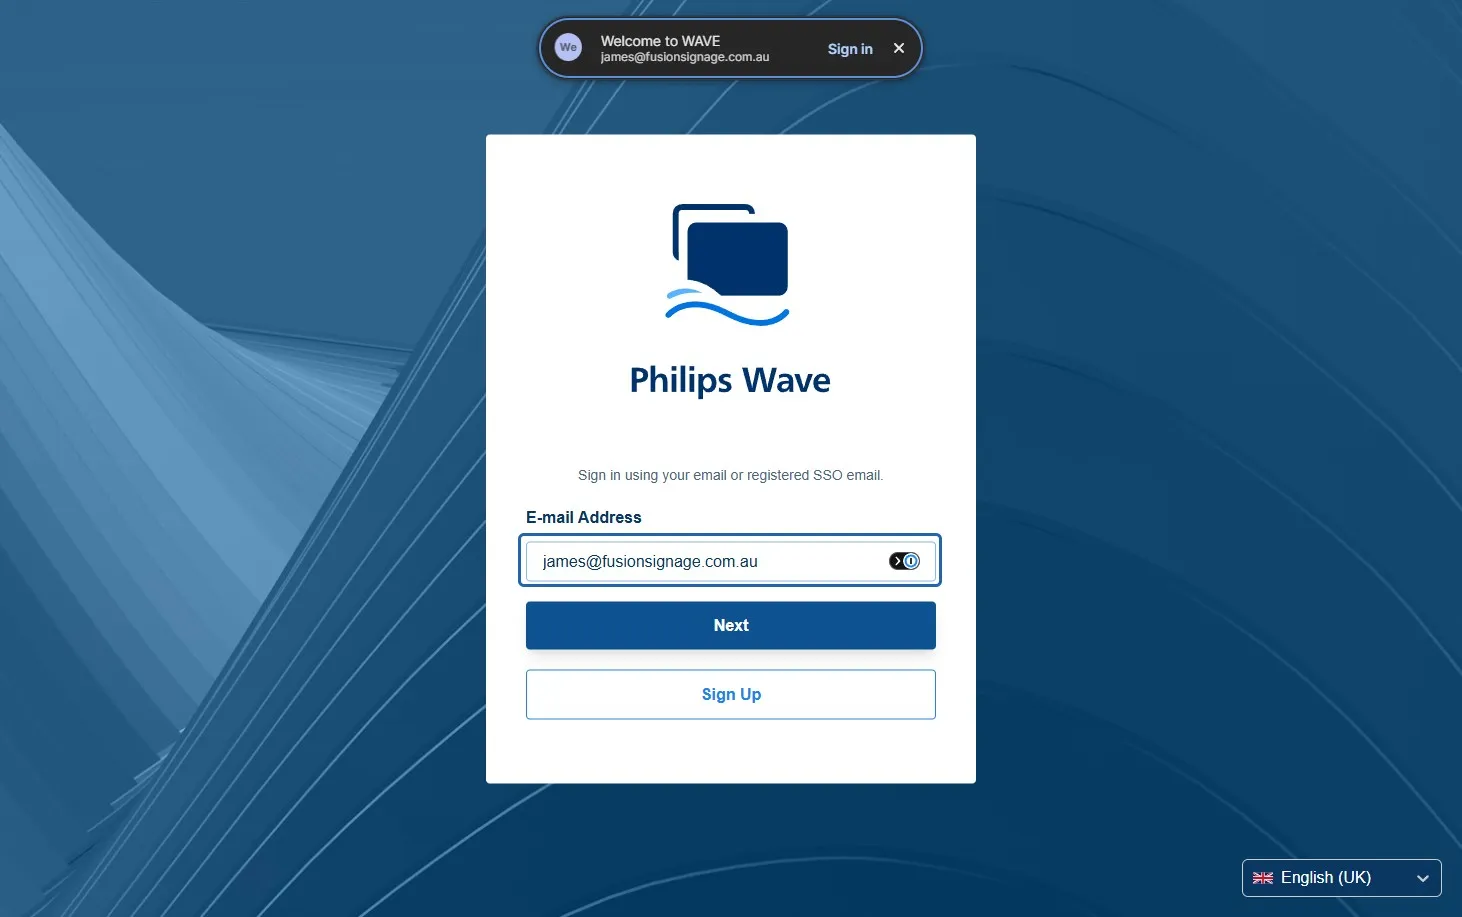
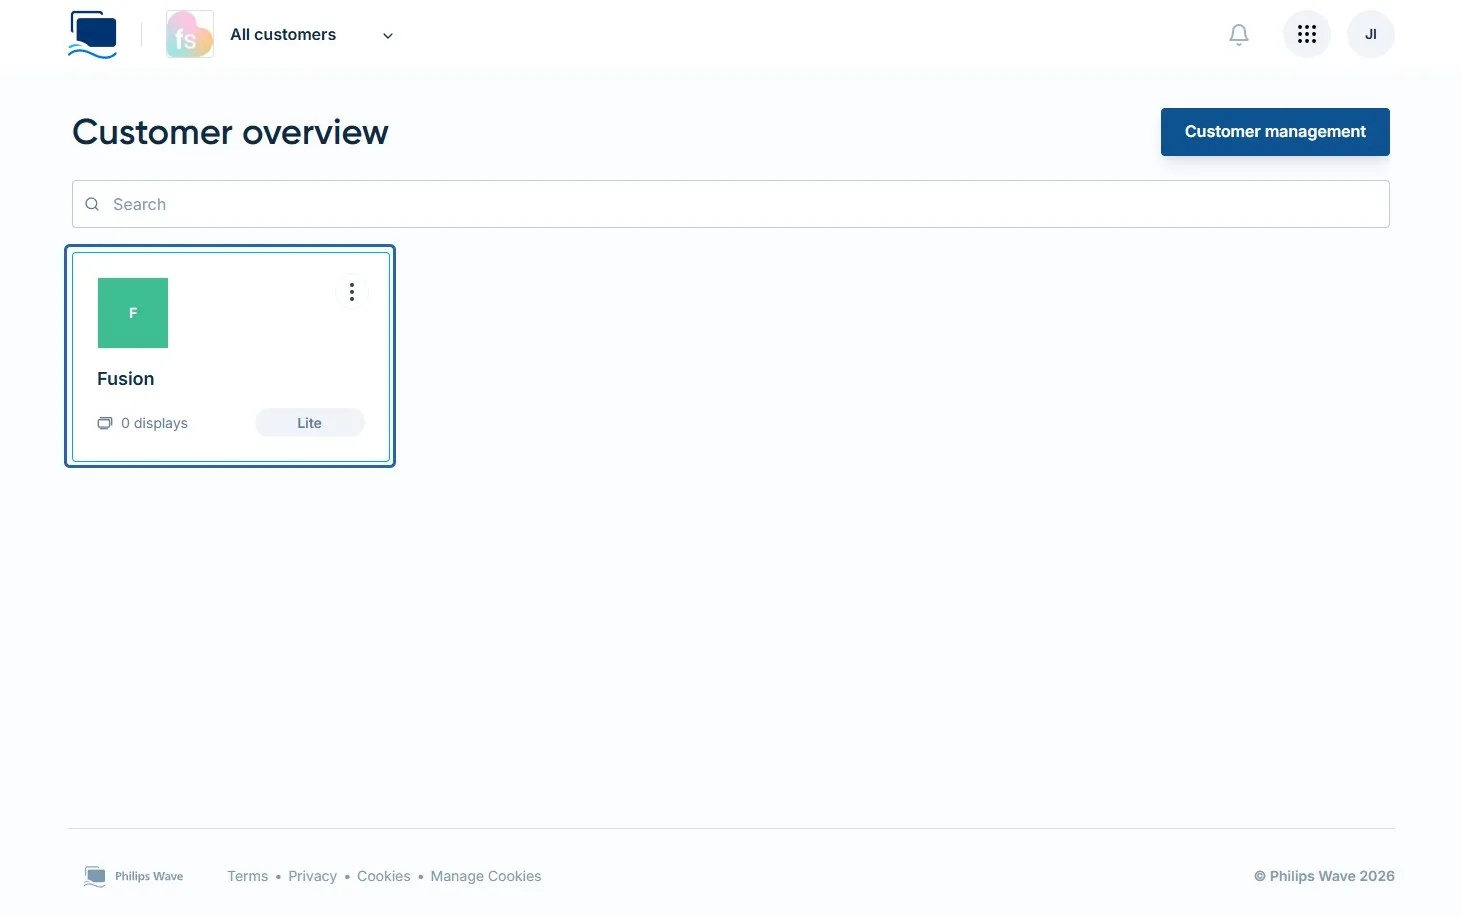
- Select the Company you would like to add the display to.
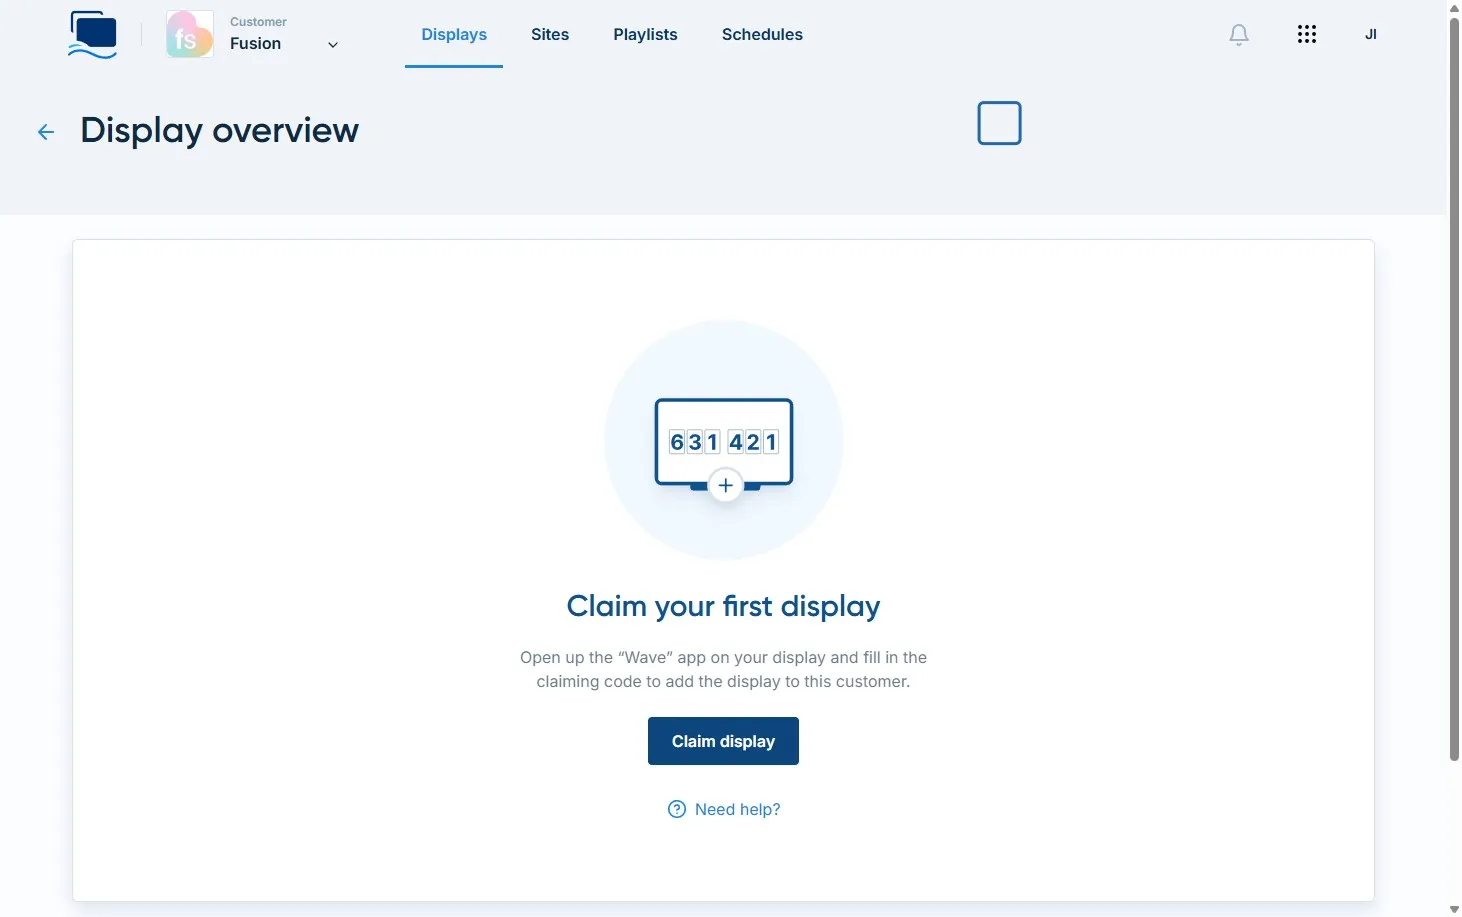
- Click Claim display.
- Enter the 6-digit code shown on your Philips display.
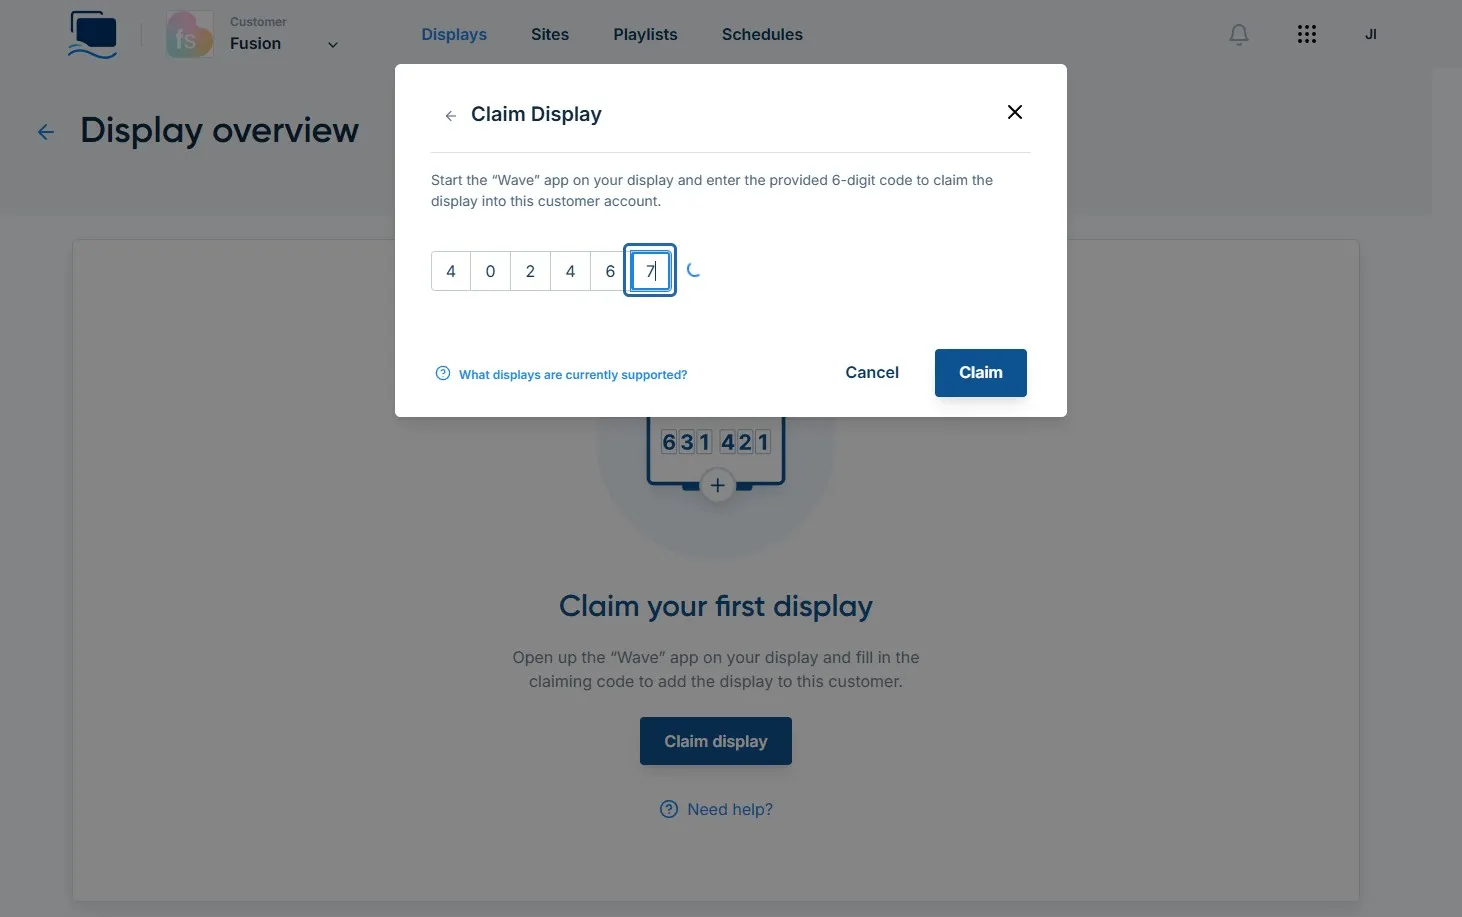
- Click Claim.
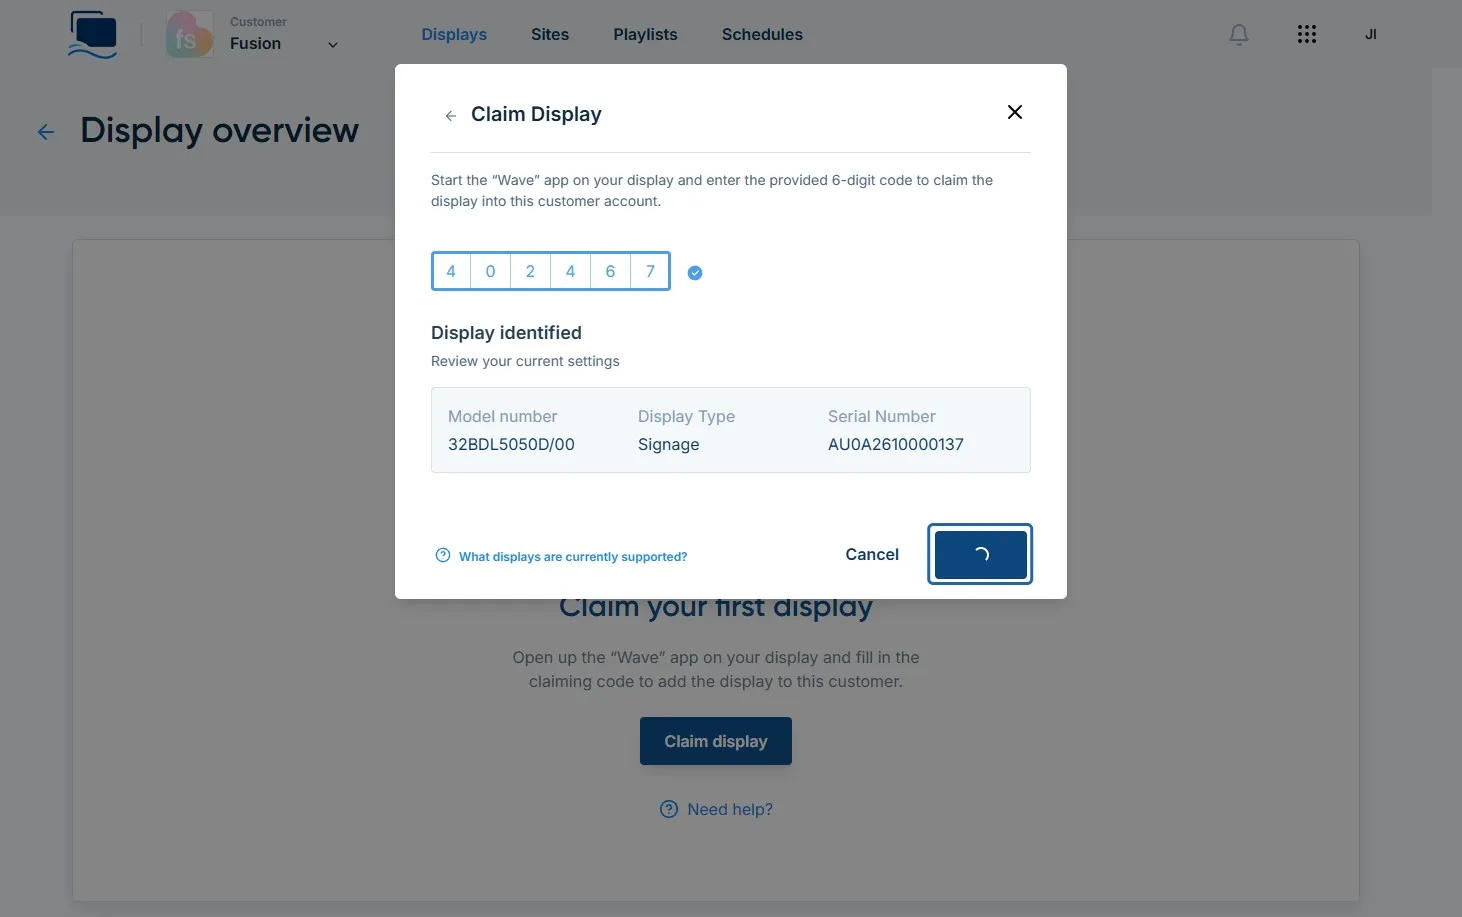
- Give your display a name.
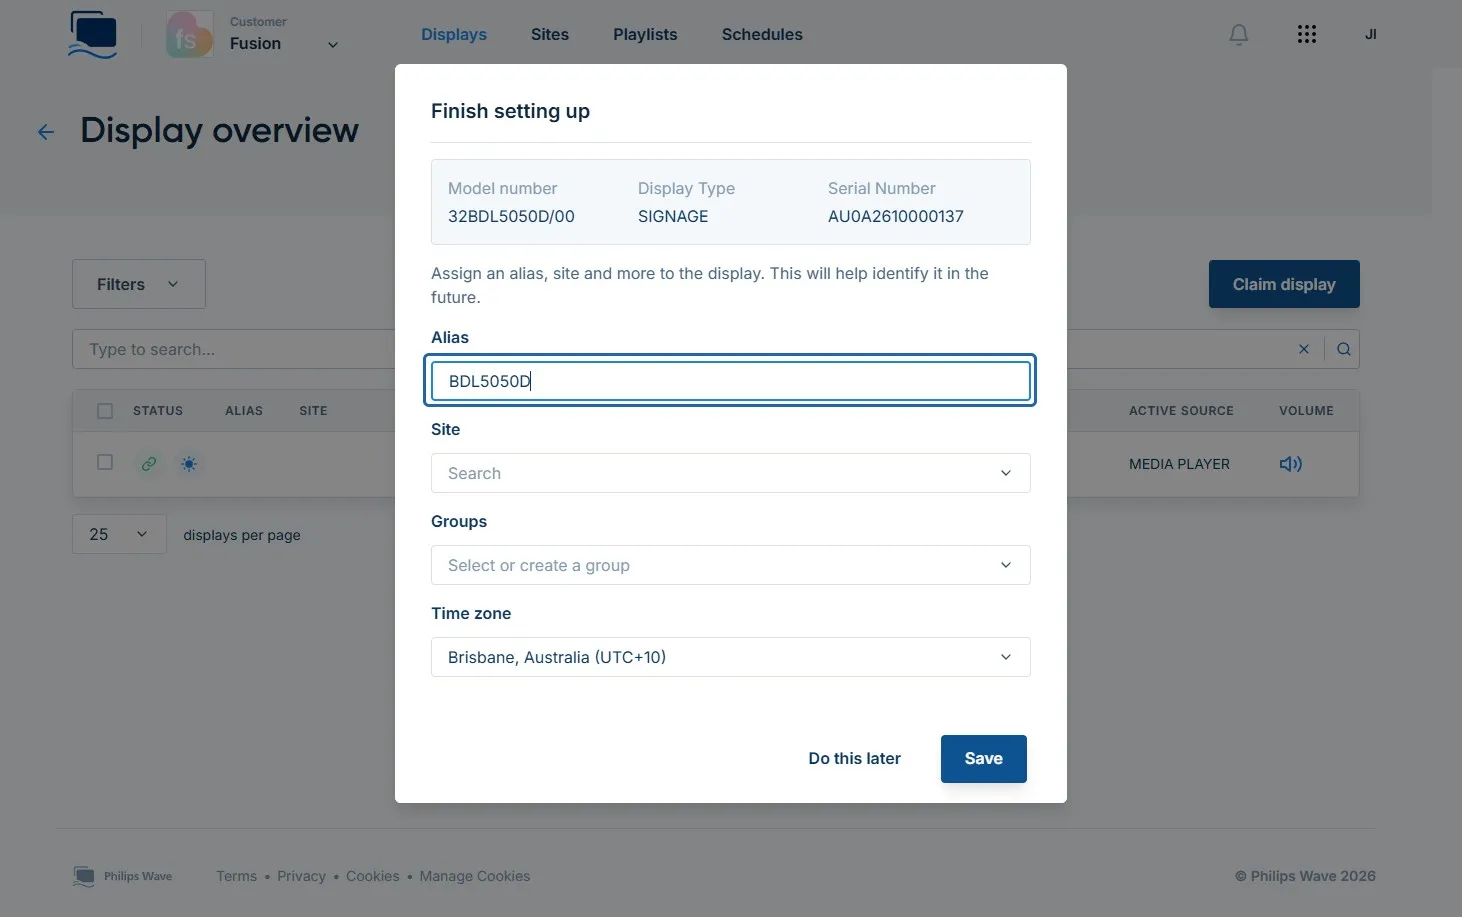
- Click Save.
Your display should now appear under your company in Philips Wave.
2. Check your display's firmware
Before installing Fusion Signage, check that the display is running the latest available firmware.
- In Philips Wave, open Settings.
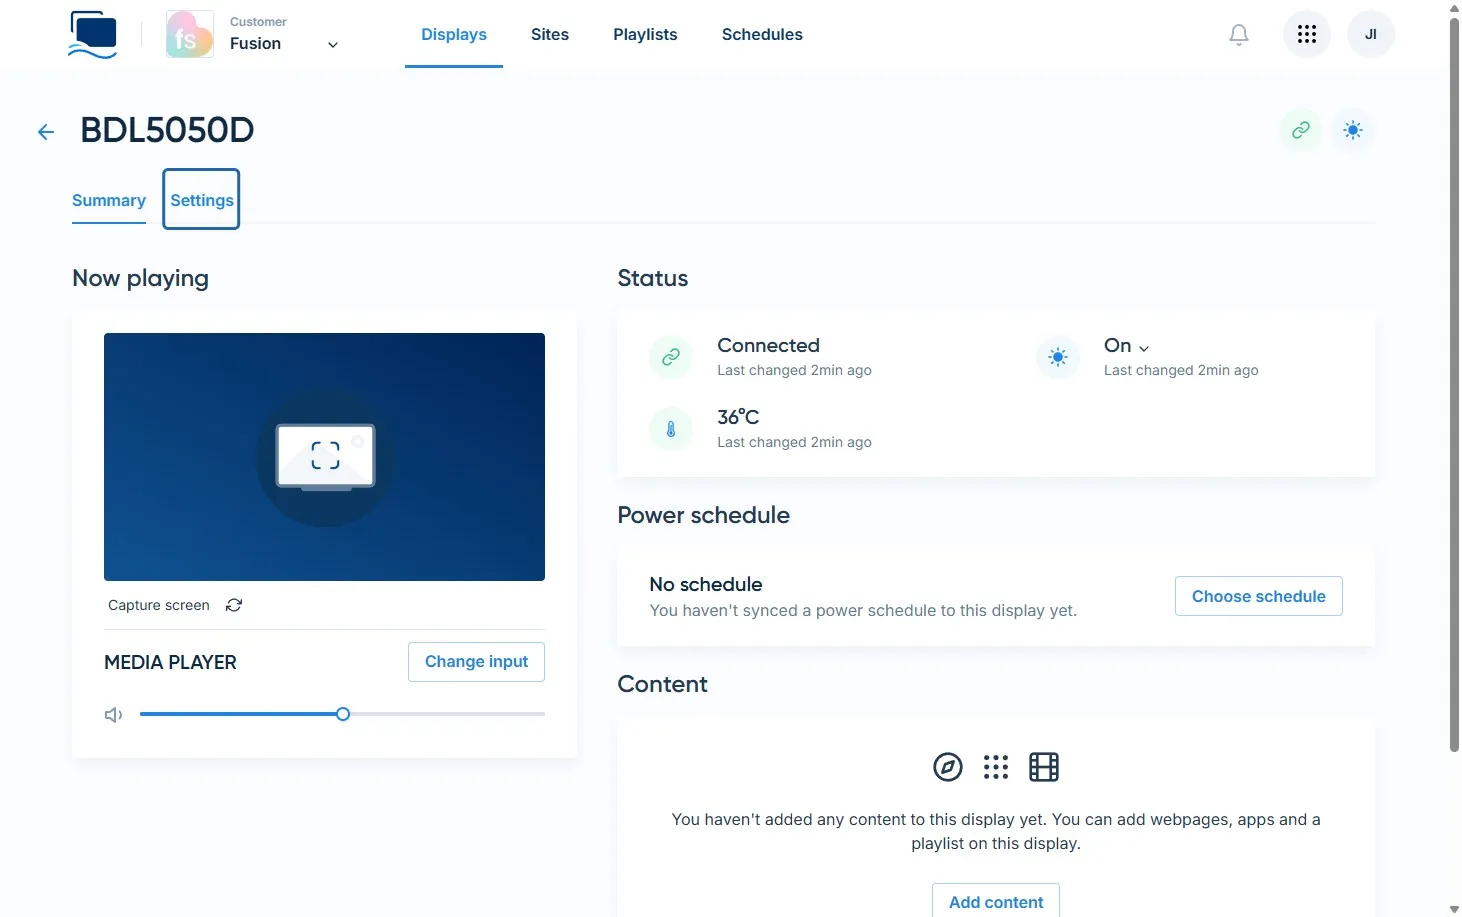
- Select Display information.
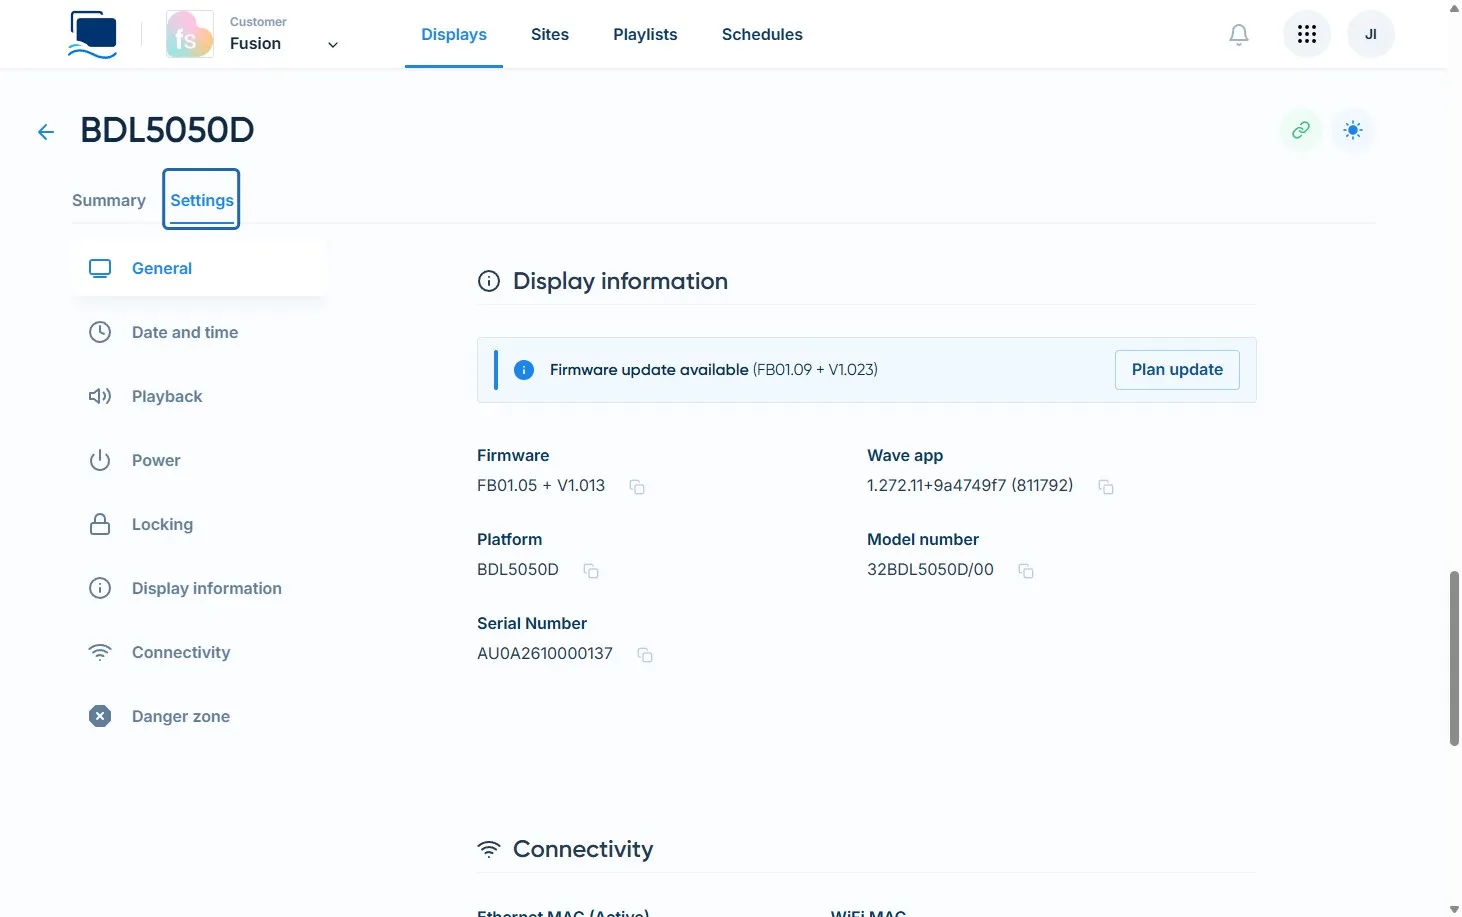
- Check whether a firmware update is available.
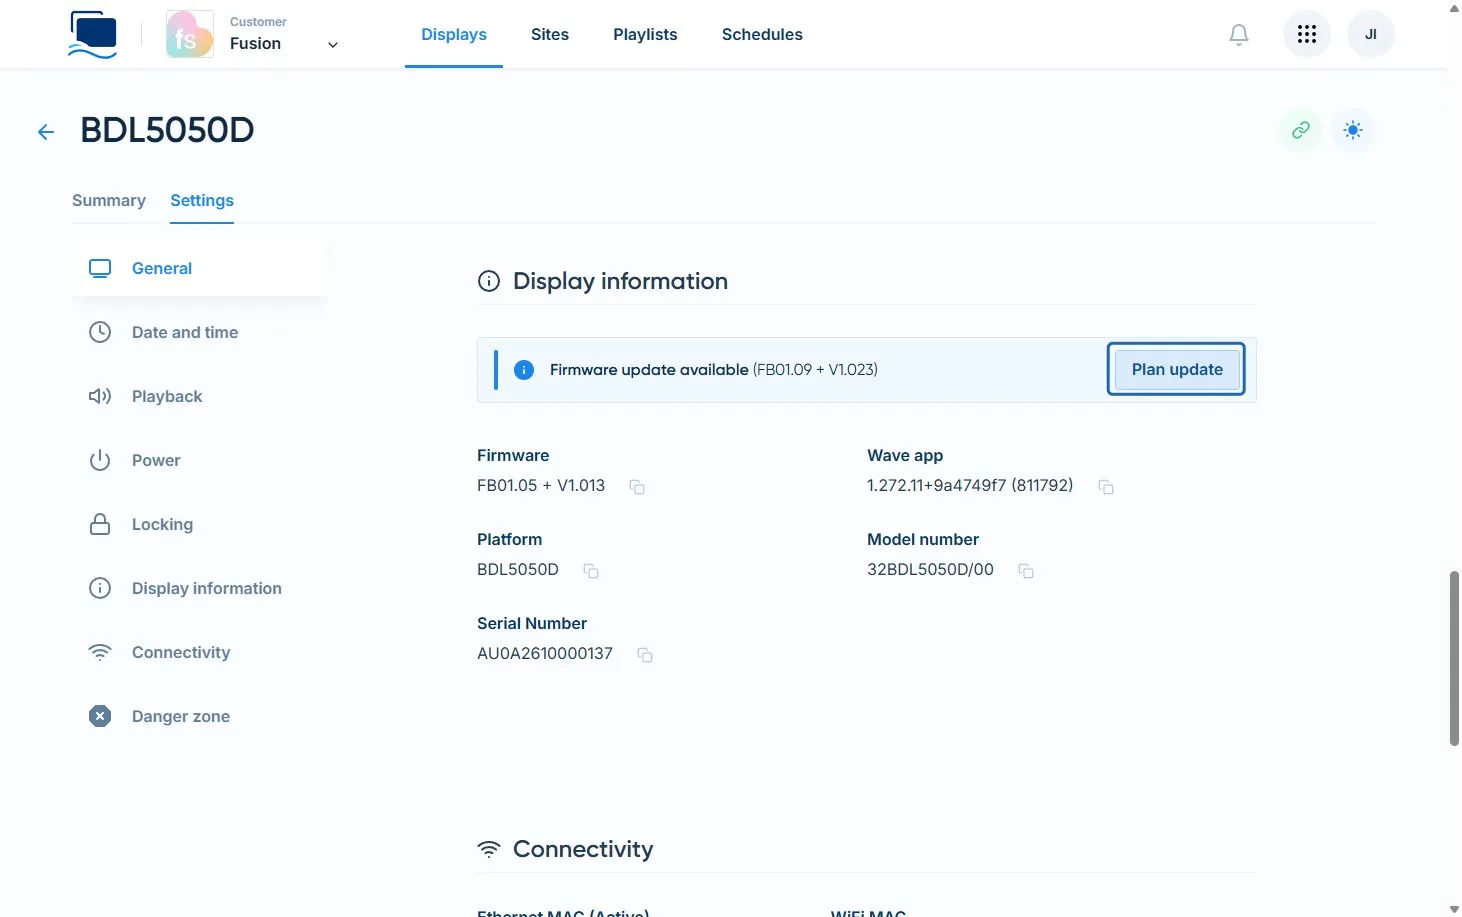
- If an update is available, click Plan update.
- Select the latest available firmware.
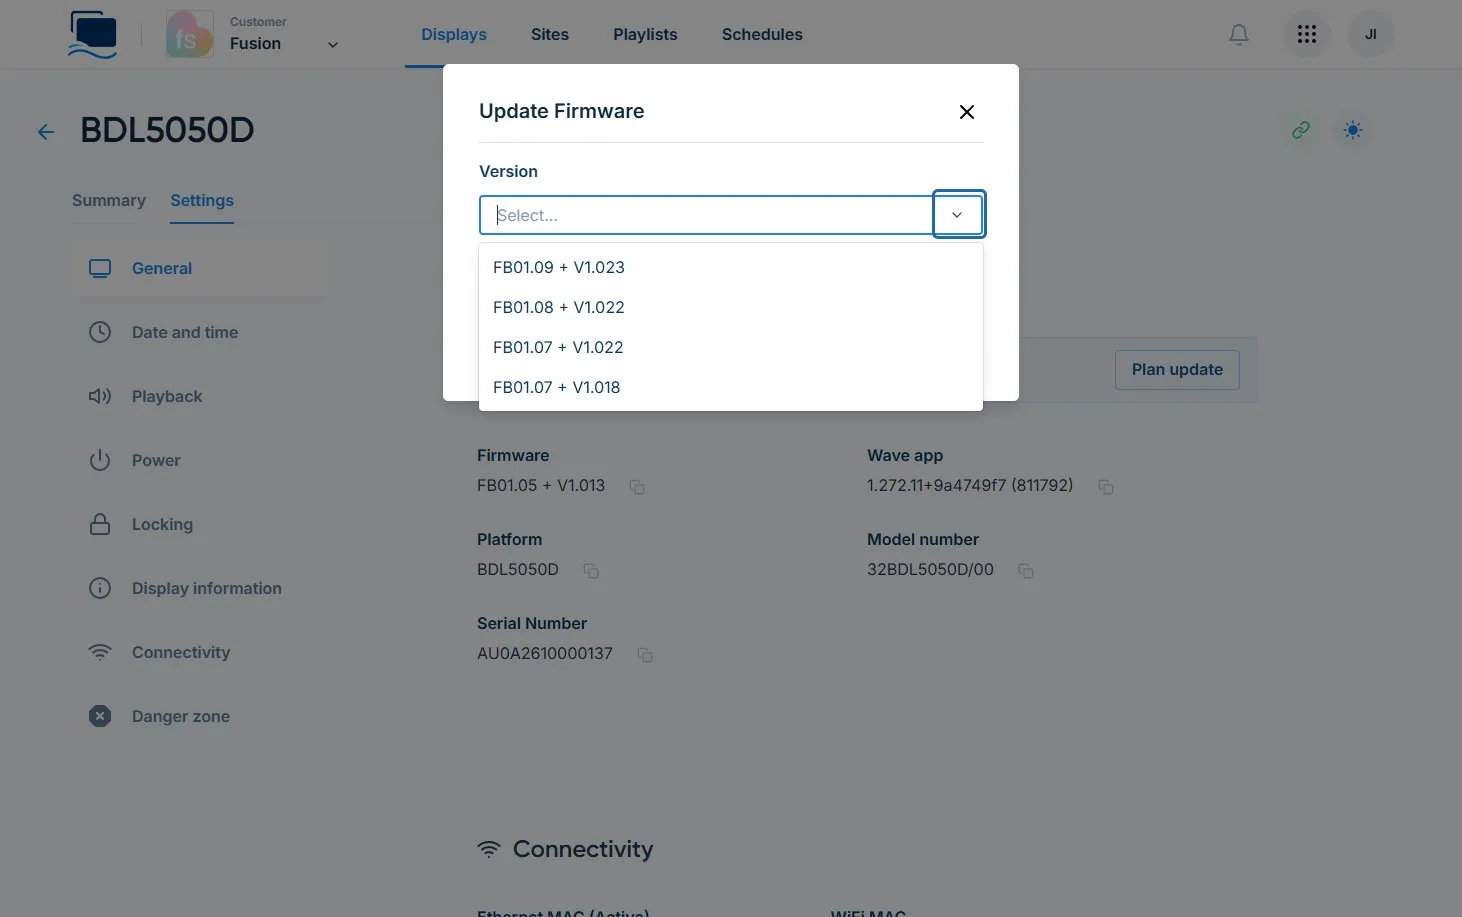
- Click Confirm.
Allow the display to complete the firmware update before continuing with the Fusion Signage installation.
Tip: Keeping your display firmware up to date can help avoid compatibility and performance issues.
3. Add Fusion Signage from the Wave ProStore
Once your display is up to date, you can add Fusion Signage to your Philips Wave account.
- Click the account dropdown in the top-right corner of Philips Wave.
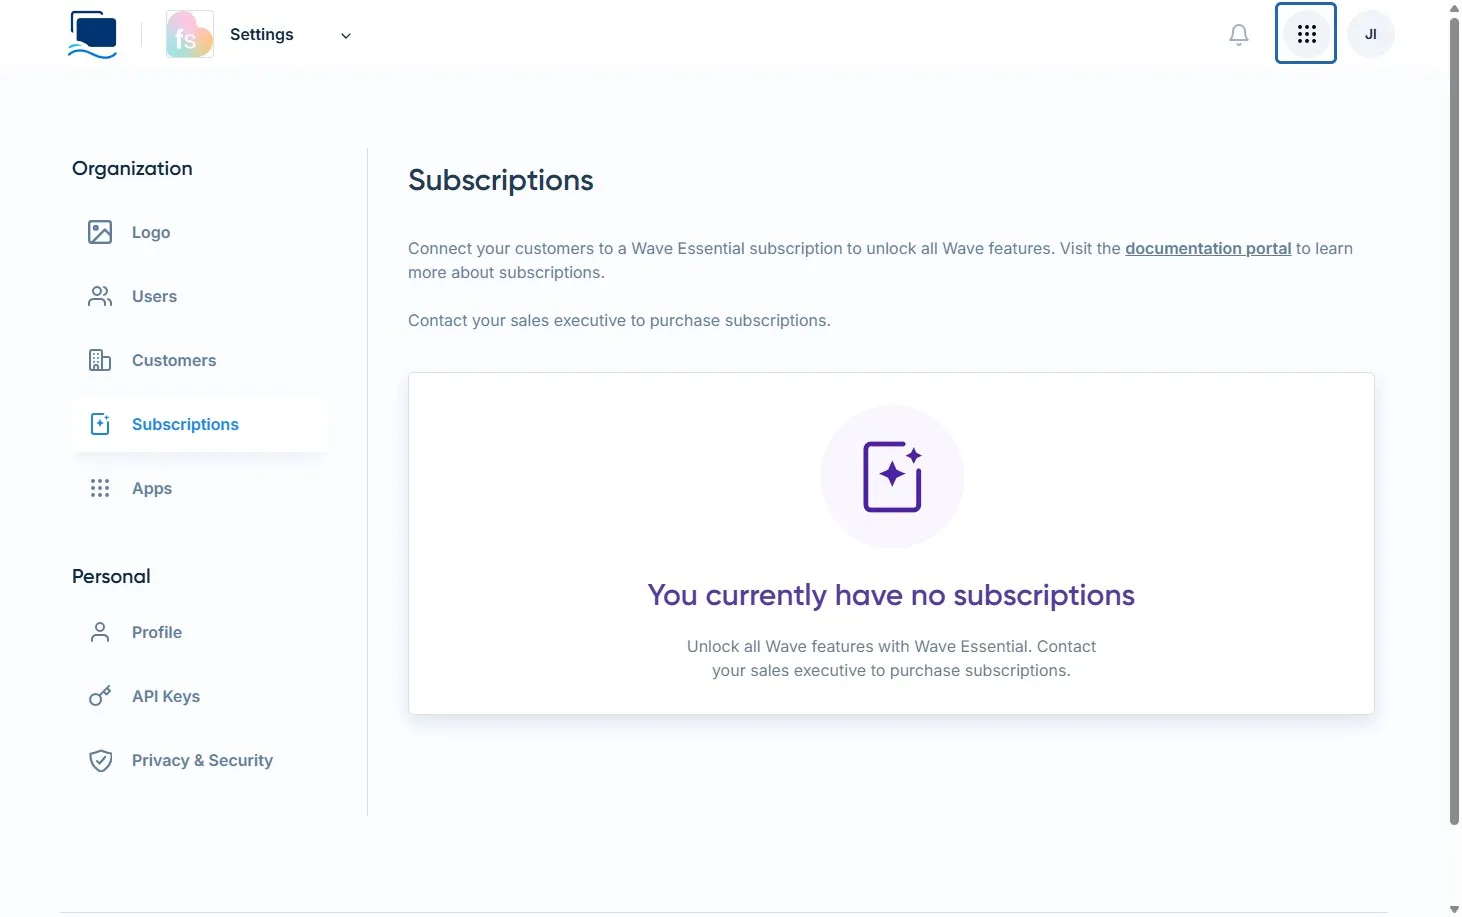
- Select Wave ProStore.
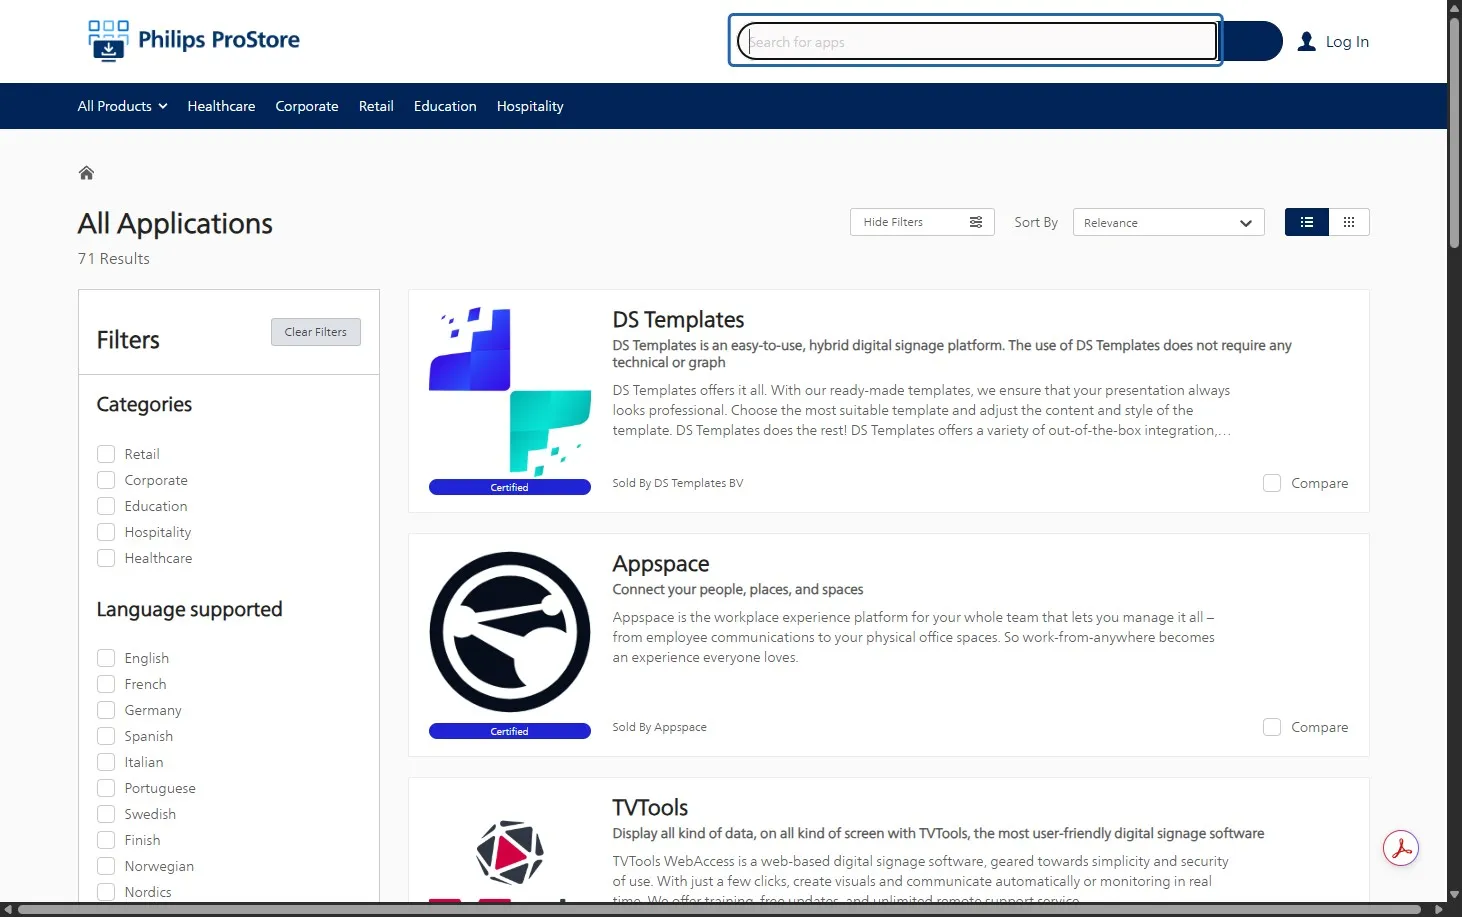
- Click Search.
- Search for Fusion Signage and select it from the results.
- Click Try the Free Edition.
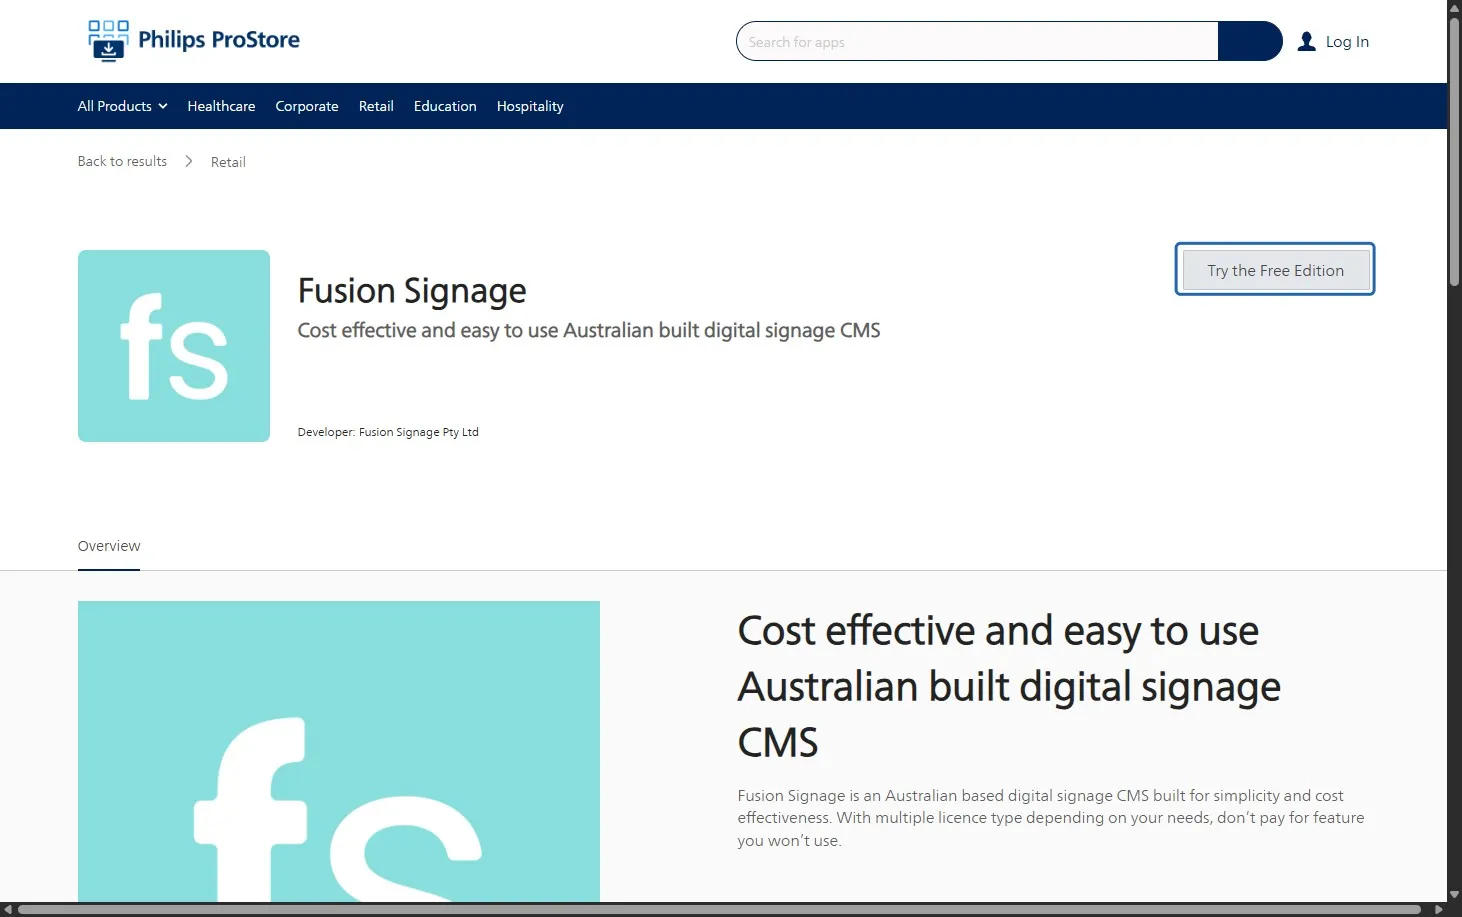
- If prompted, log in to Philips Wave again.
- Click Next.
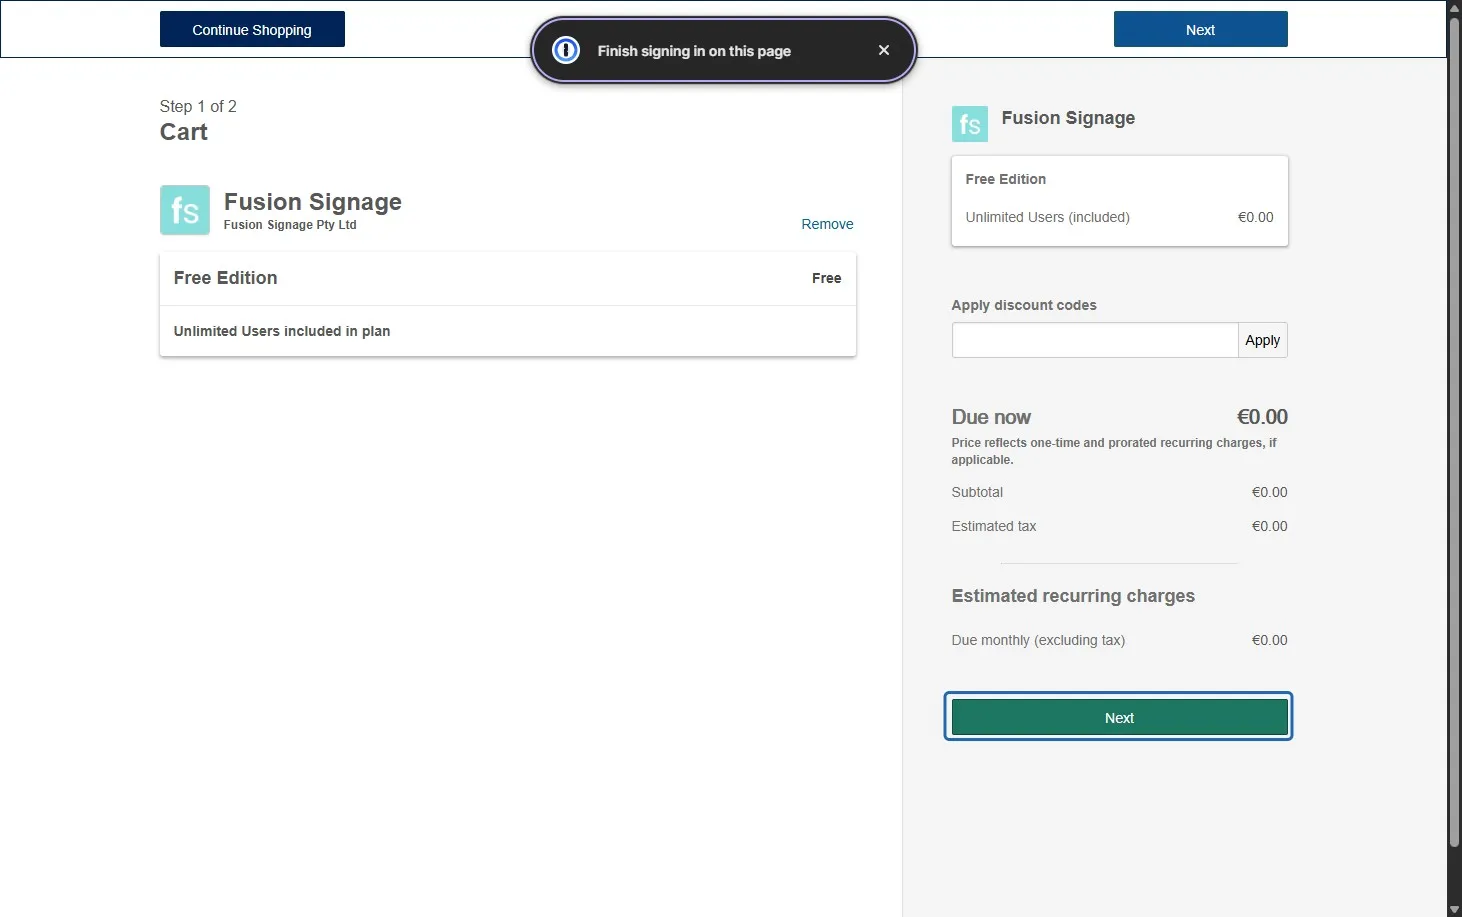
- Review and accept the Terms and Conditions and Privacy Policy.
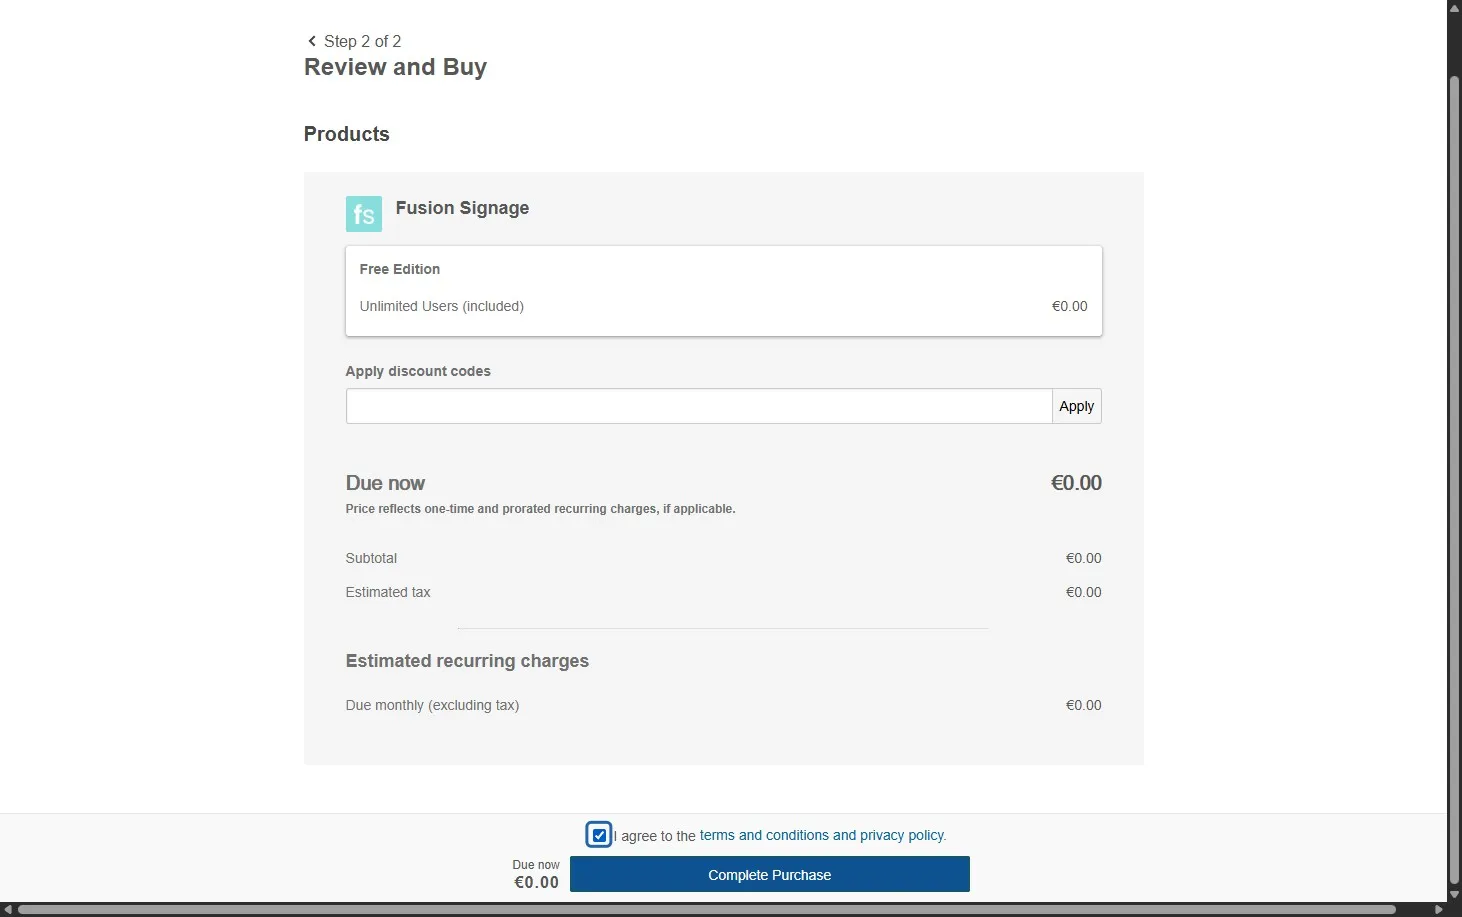
- Click Complete Purchase.
Selecting Try the Free Edition and completing this process simply adds the Fusion Signage application to your Wave account so it can be deployed to your display.
4. Install Fusion Signage on your display
Now that Fusion Signage has been added to your Wave account, you can deploy it to your screen.
- Return to your Company in Philips Wave.
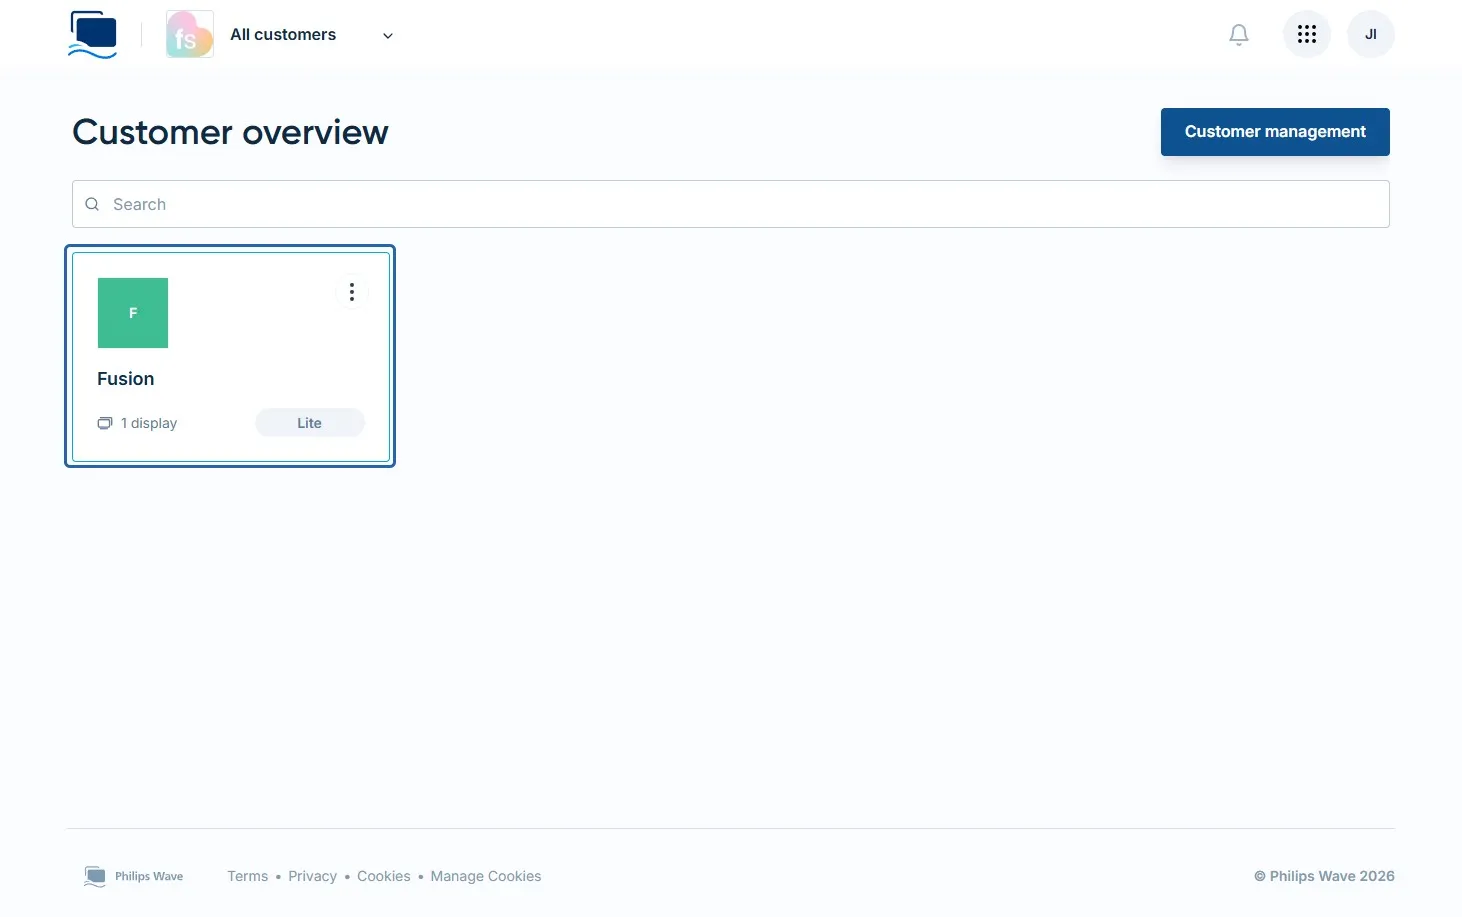
- Select the display you would like to install Fusion Signage on.
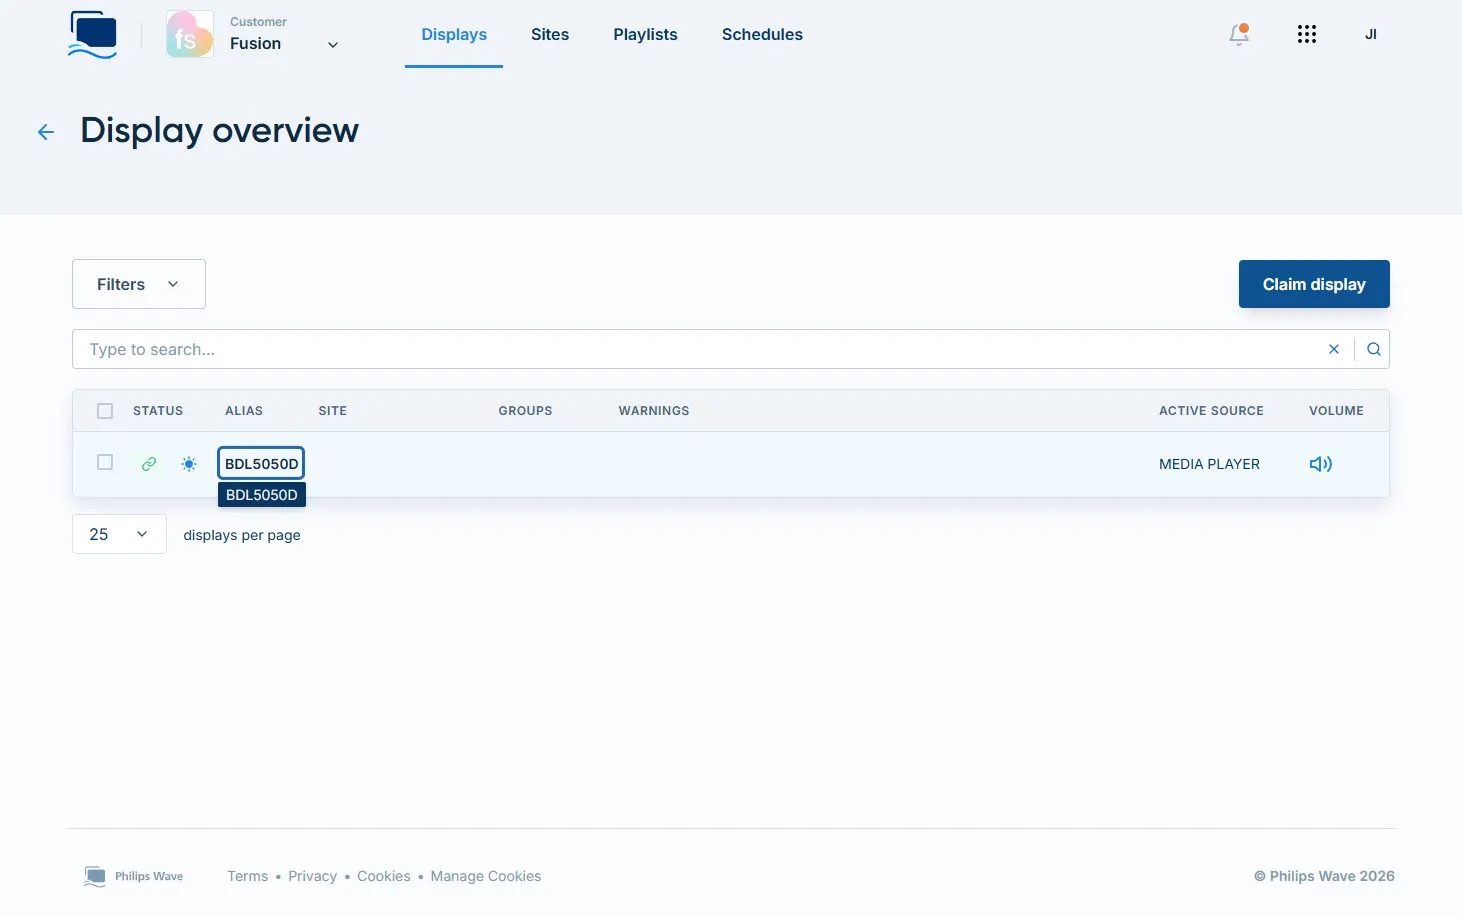
- Click Add content.
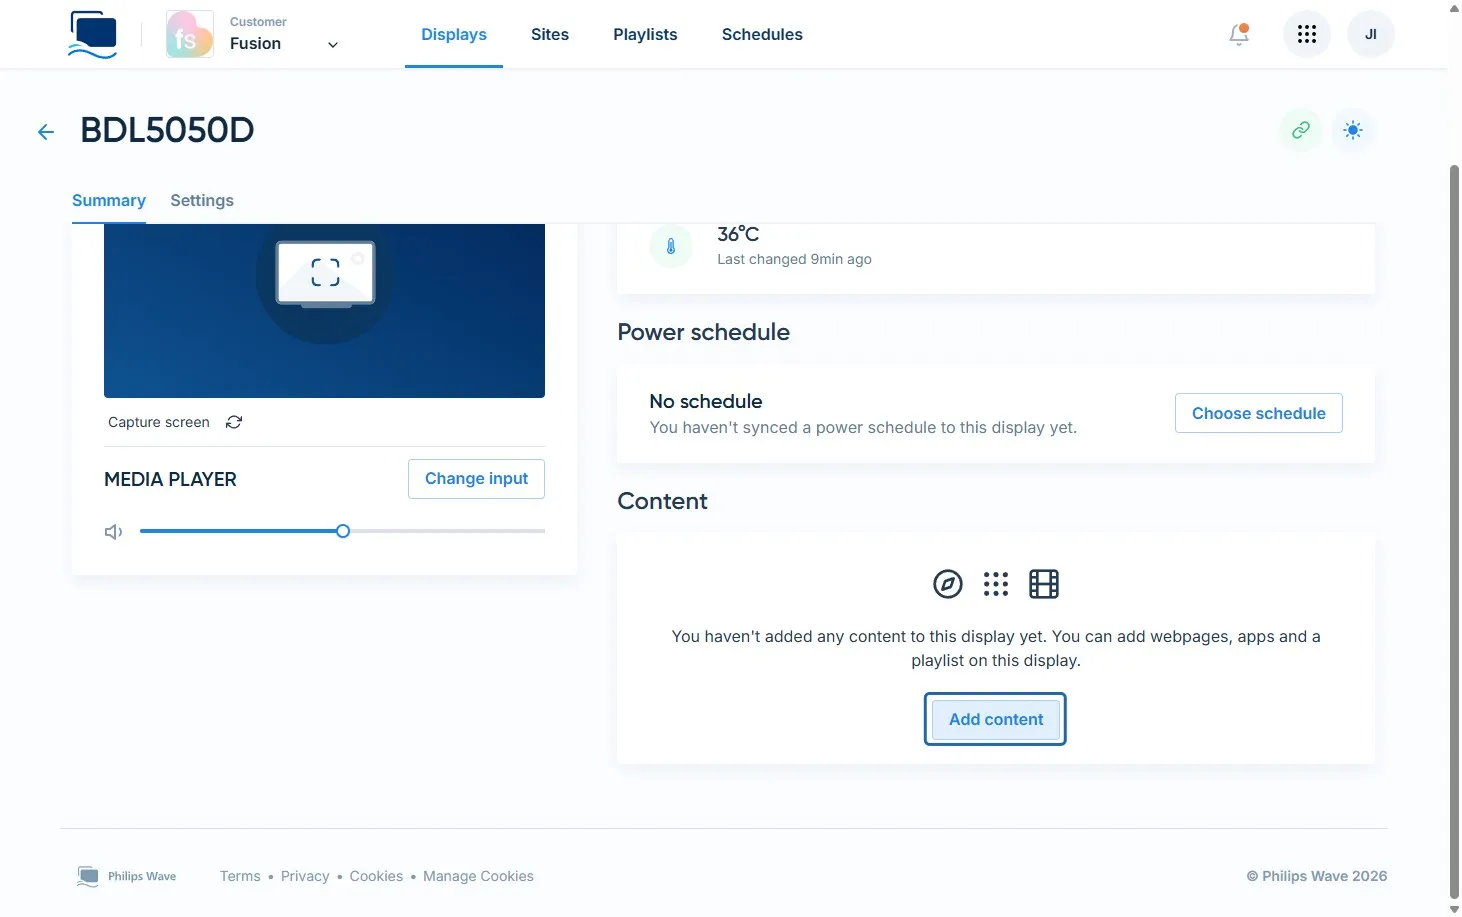
- Select Apps.
- Find Fusion Signage and click Add.
- Click Apply.
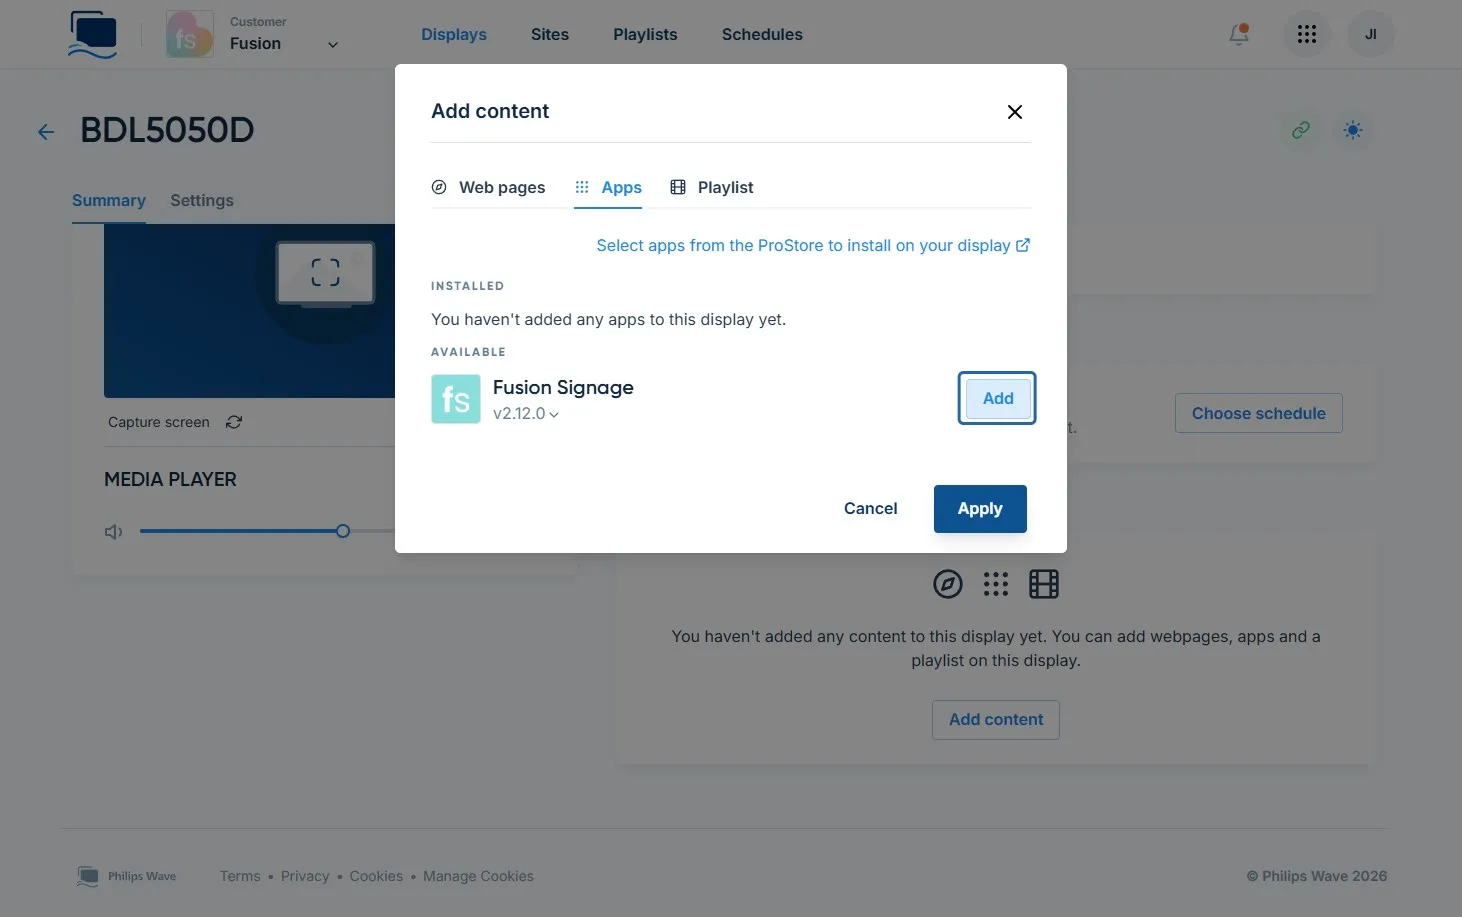
Once successfully installed, Fusion Signage will appear as content on the display in Philips Wave.
5. Set Fusion Signage as the display input
The final step is to tell the display to launch Fusion Signage.
- Select Change input.
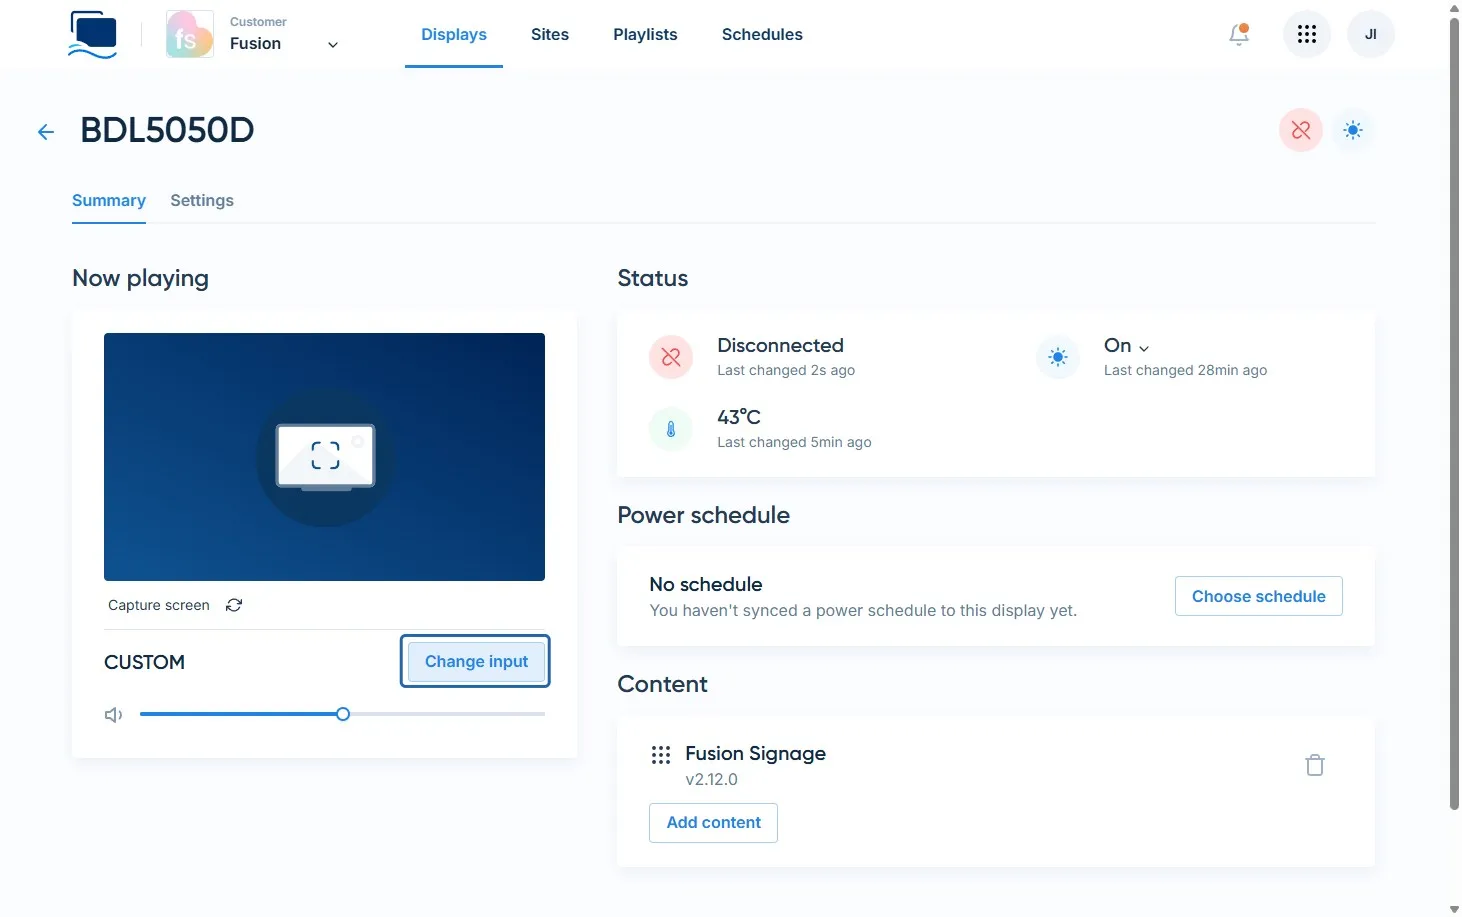
- Choose Fusion Signage from the available inputs.
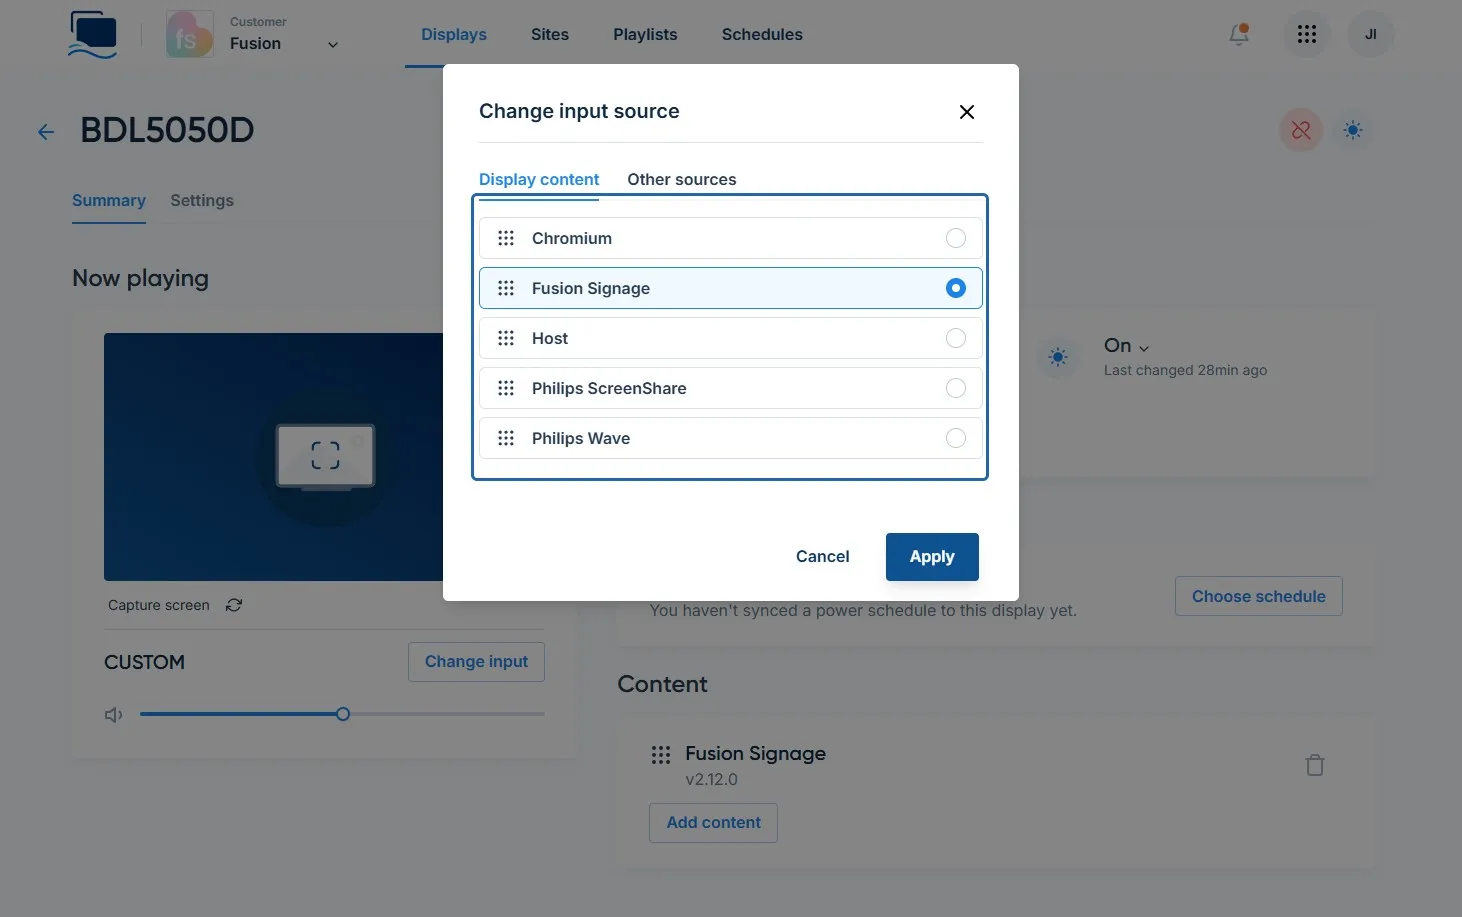
- Click Apply.
Fusion Signage should now launch on your Philips display.
What's next?
Once Fusion Signage launches, your display will show a Fusion Signage identity code.
Log in to your Fusion Signage account and add the screen using this identity code. Once the screen has been added, you can begin assigning and publishing content to it.
Need a hand?
If Fusion Signage doesn't appear, the application won't launch, or you run into any issues during installation, get in touch with our support team.
When contacting us, it helps to include:
- Your Philips display model
- The display's current firmware version
- A photo or screenshot of any error messages
- A brief description of where you got stuck
We'll be happy to help! 💜