Tagging
We are excited to introduce our brand-new, and long awaited tagging feature. This powerful tool is designed to streamline content management across multiple screens, reducing the need for numerous playlists and simplifying the process of targeting content to specific screens. Below, we'll guide you through the key aspects and functionalities of this feature, including step-by-step instructions to get you started.
What is the Tagging Feature
The tagging feature is designed to minimise the number of playlists required for managing unique subsets of content across multiple screens. Prior to this feature, each screen with different content requirements would need its own playlist. However, with tagging, you can add tags to screens and create tag rules, allowing content to be automatically assigned based on these tags.
How to use the Tagging Feature
Follow these steps to get started with the Tagging Feature.
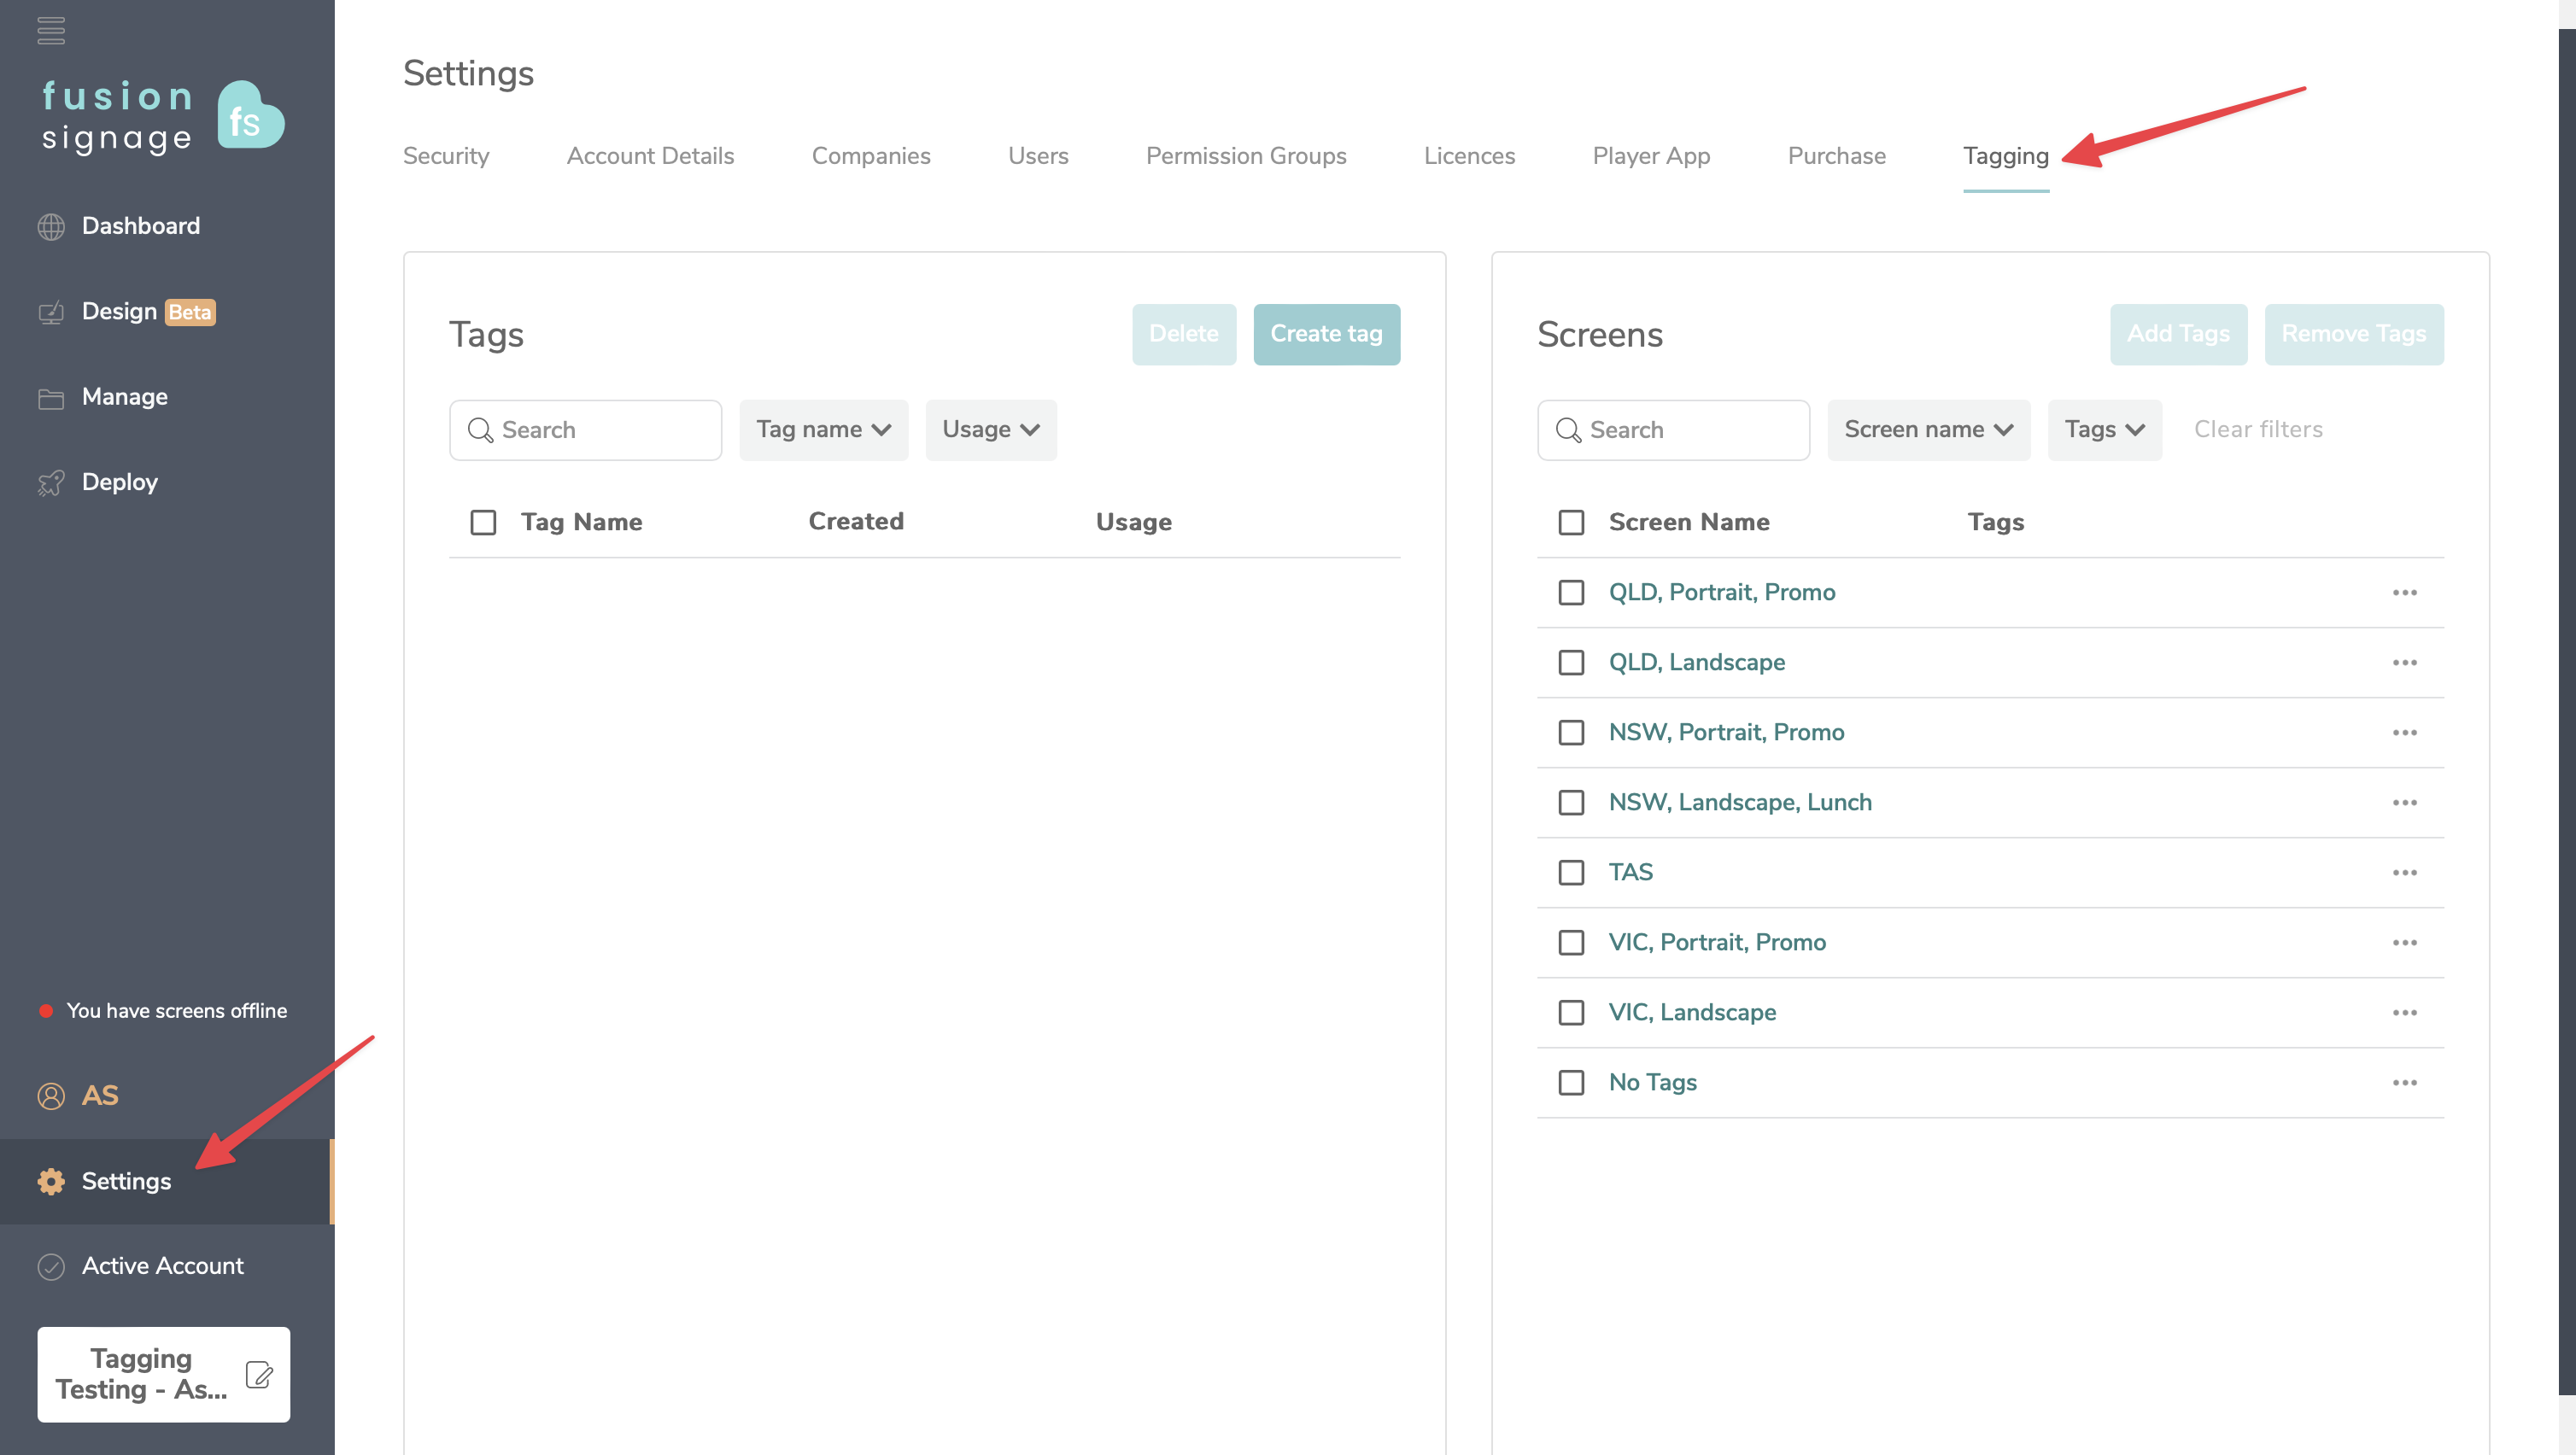
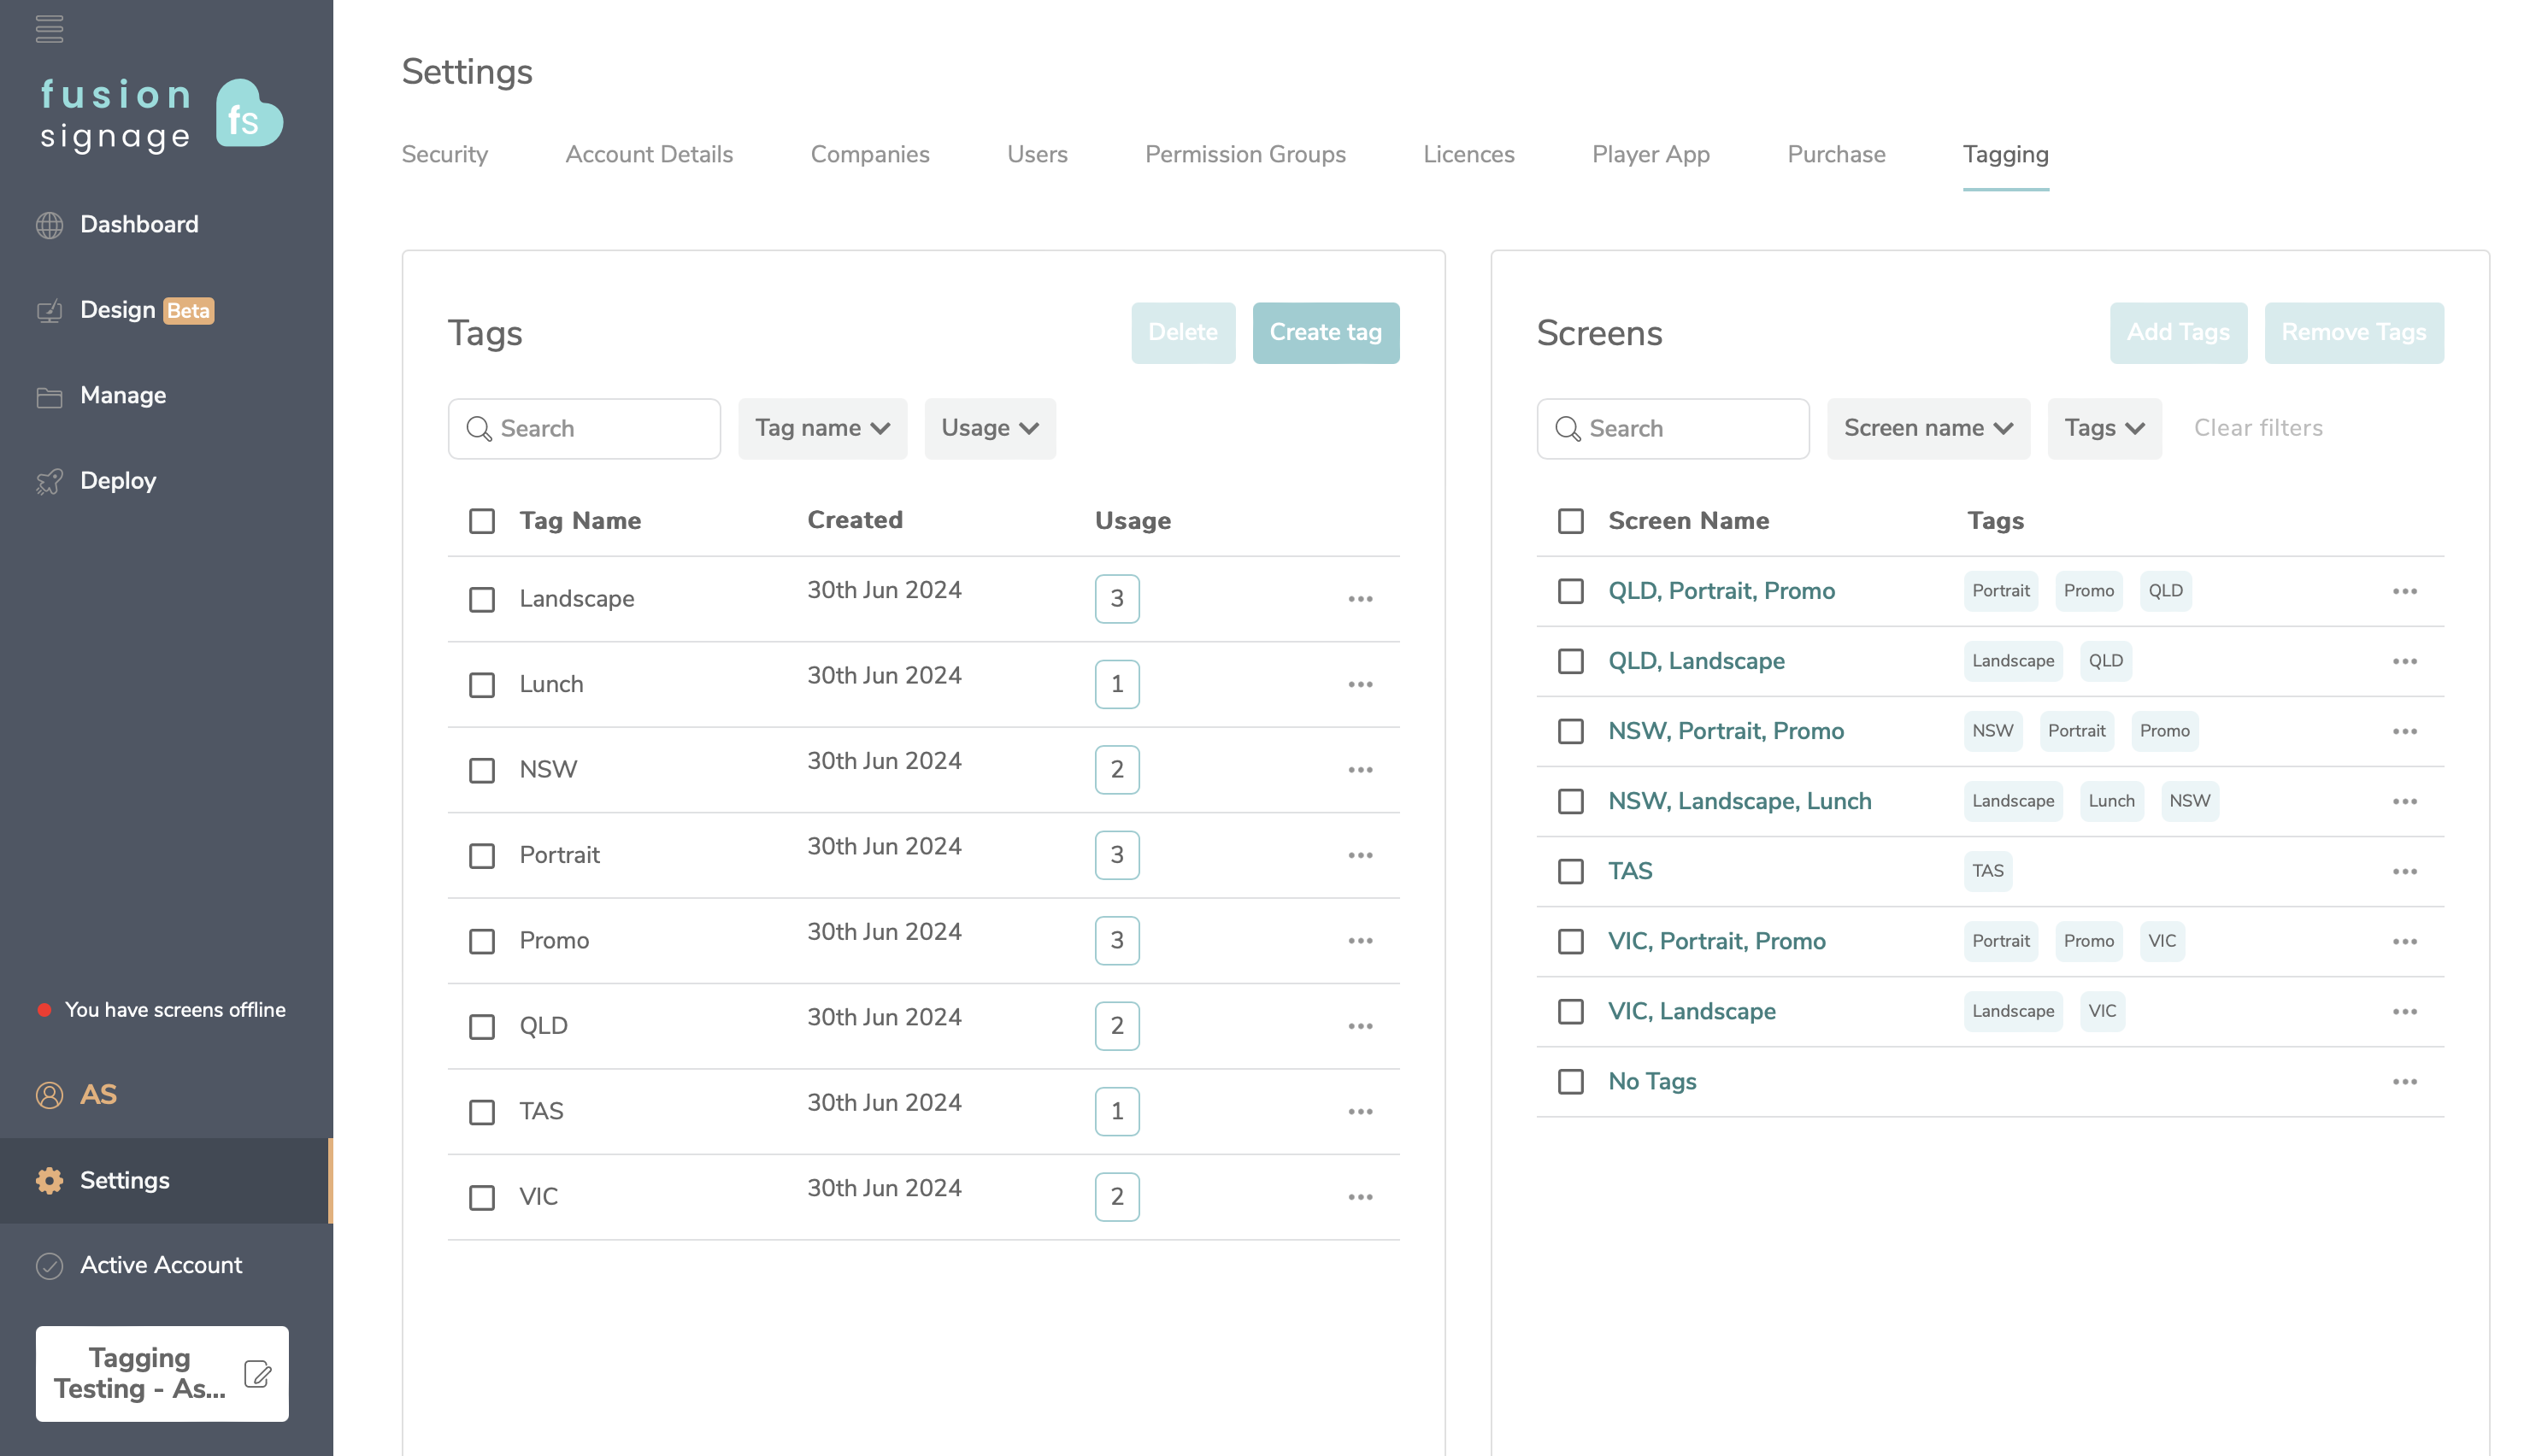
- Go to Settings in your Fusion Signage portal. Click 'Tagging' in the top row of options.
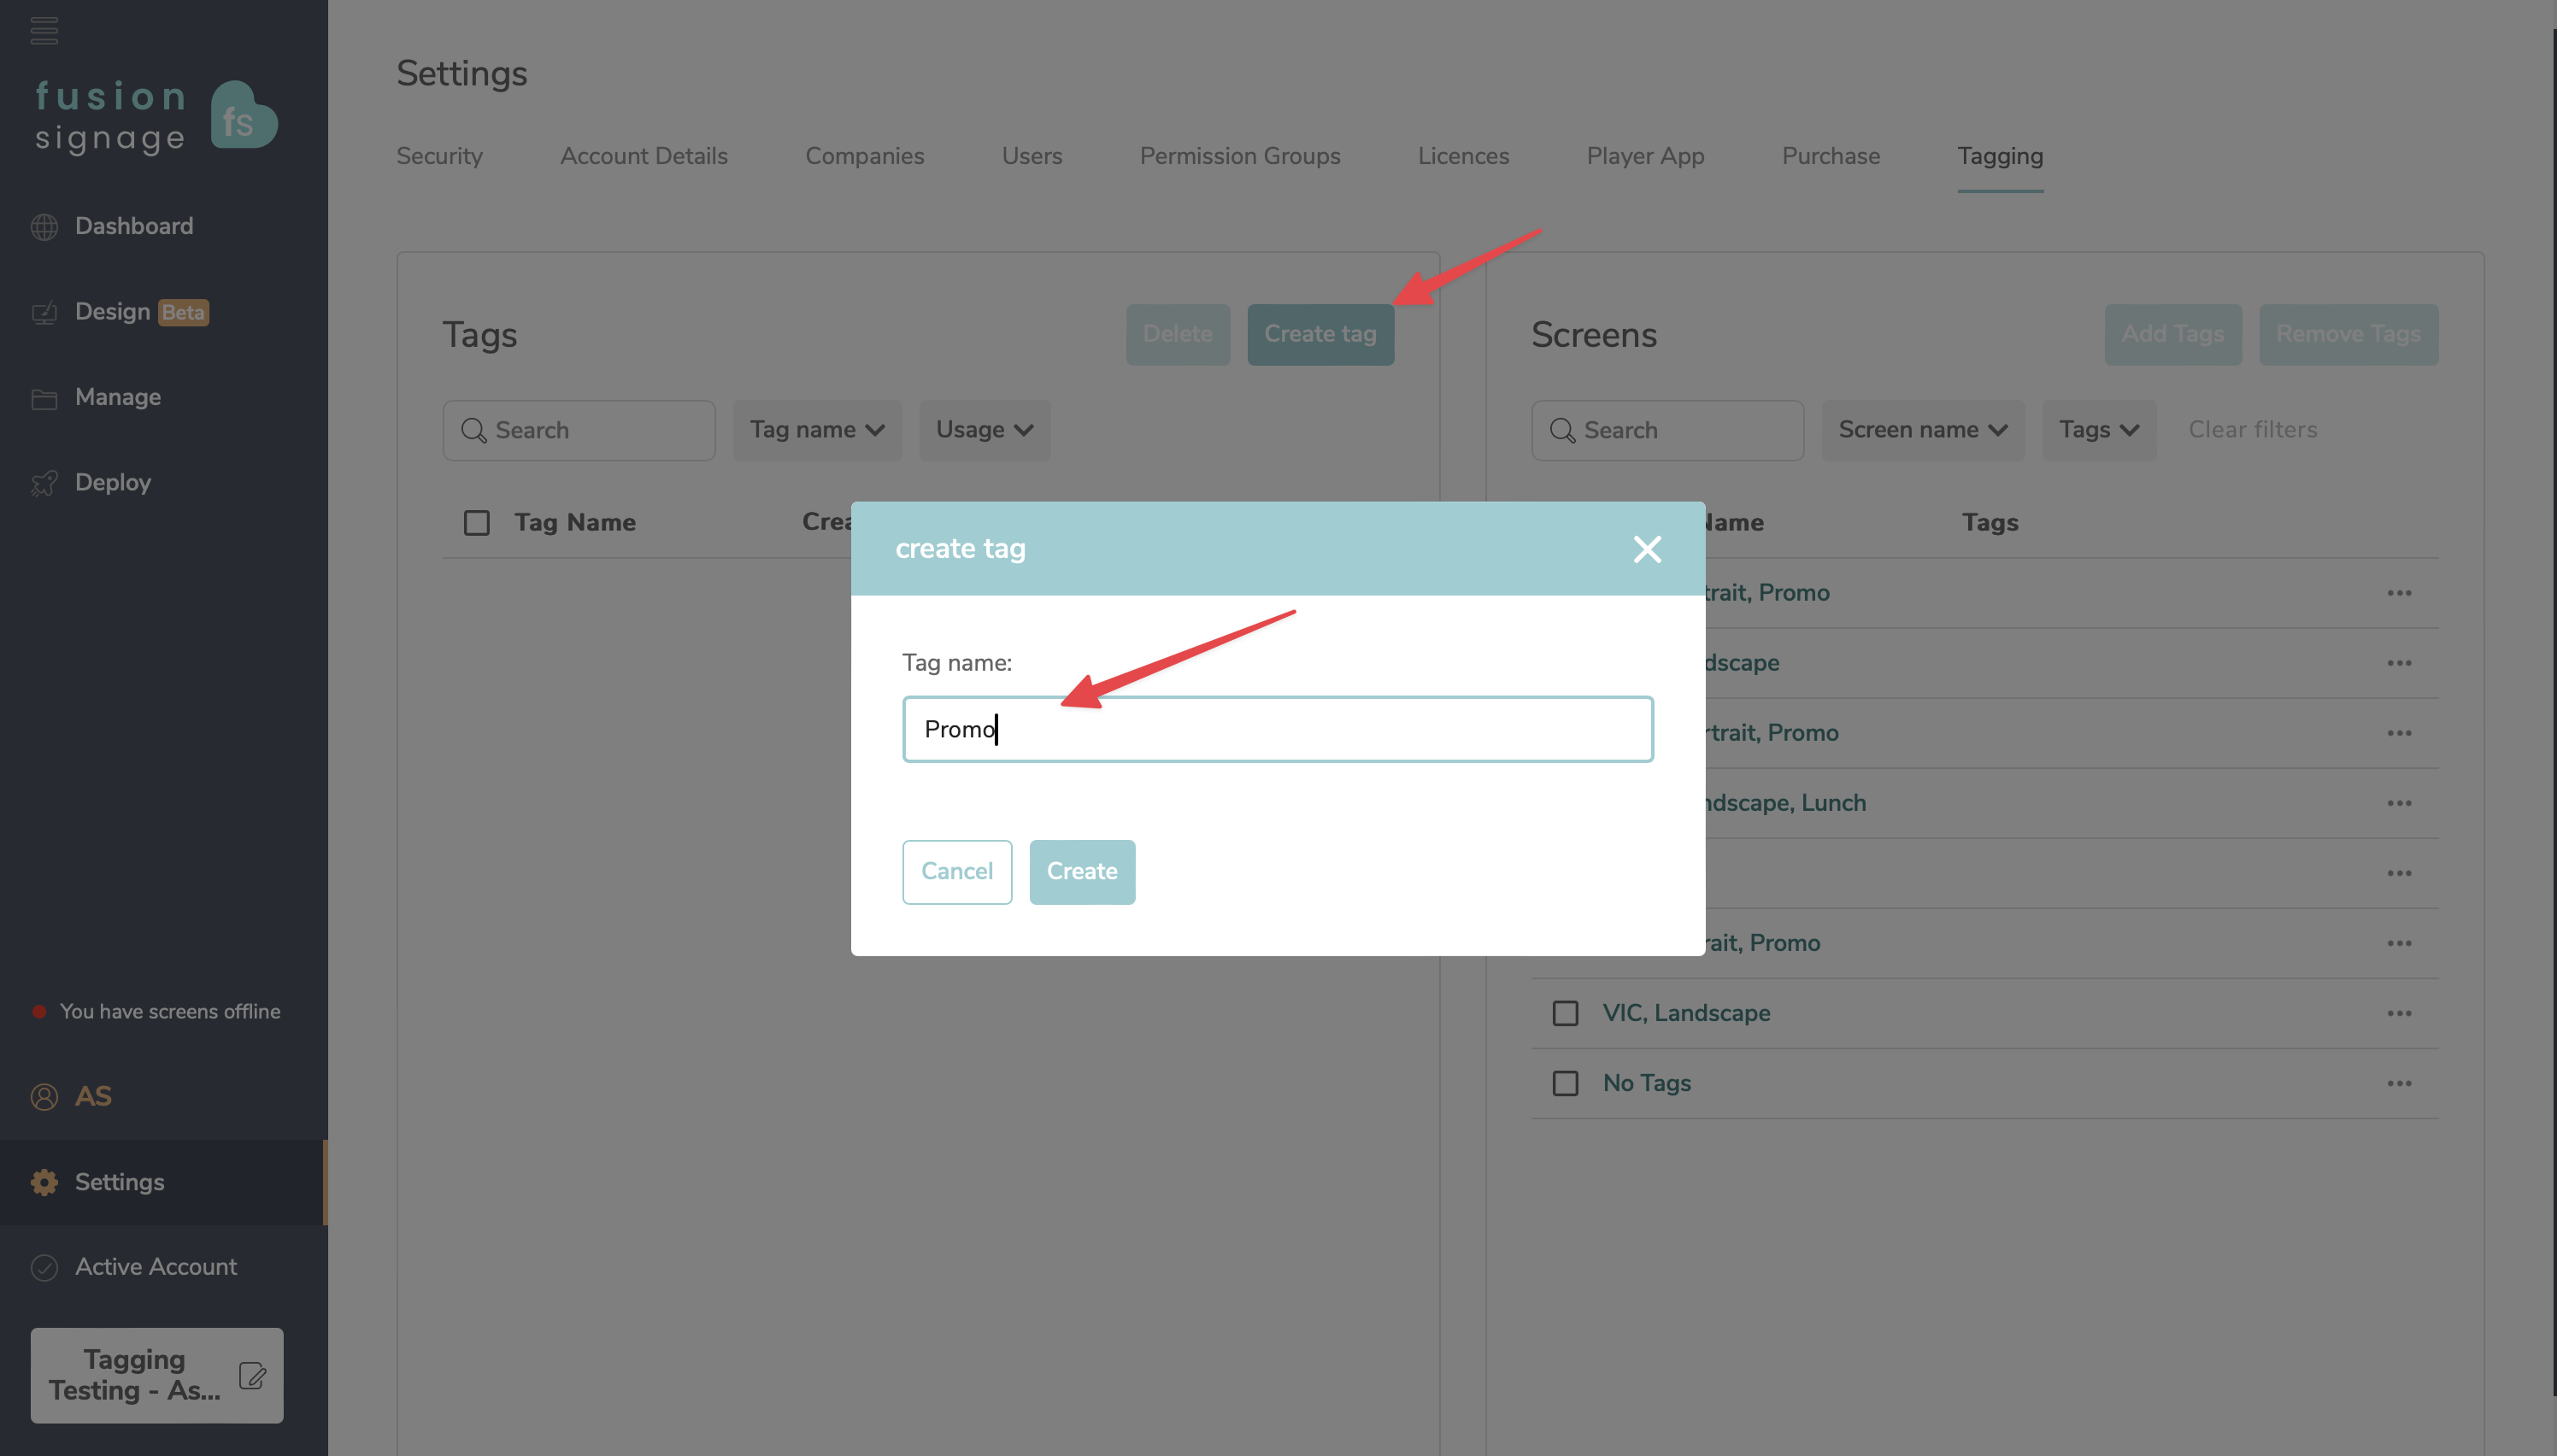
- Click 'Create tag' and give your tag a relevant name (e.g., QLD, portrait).
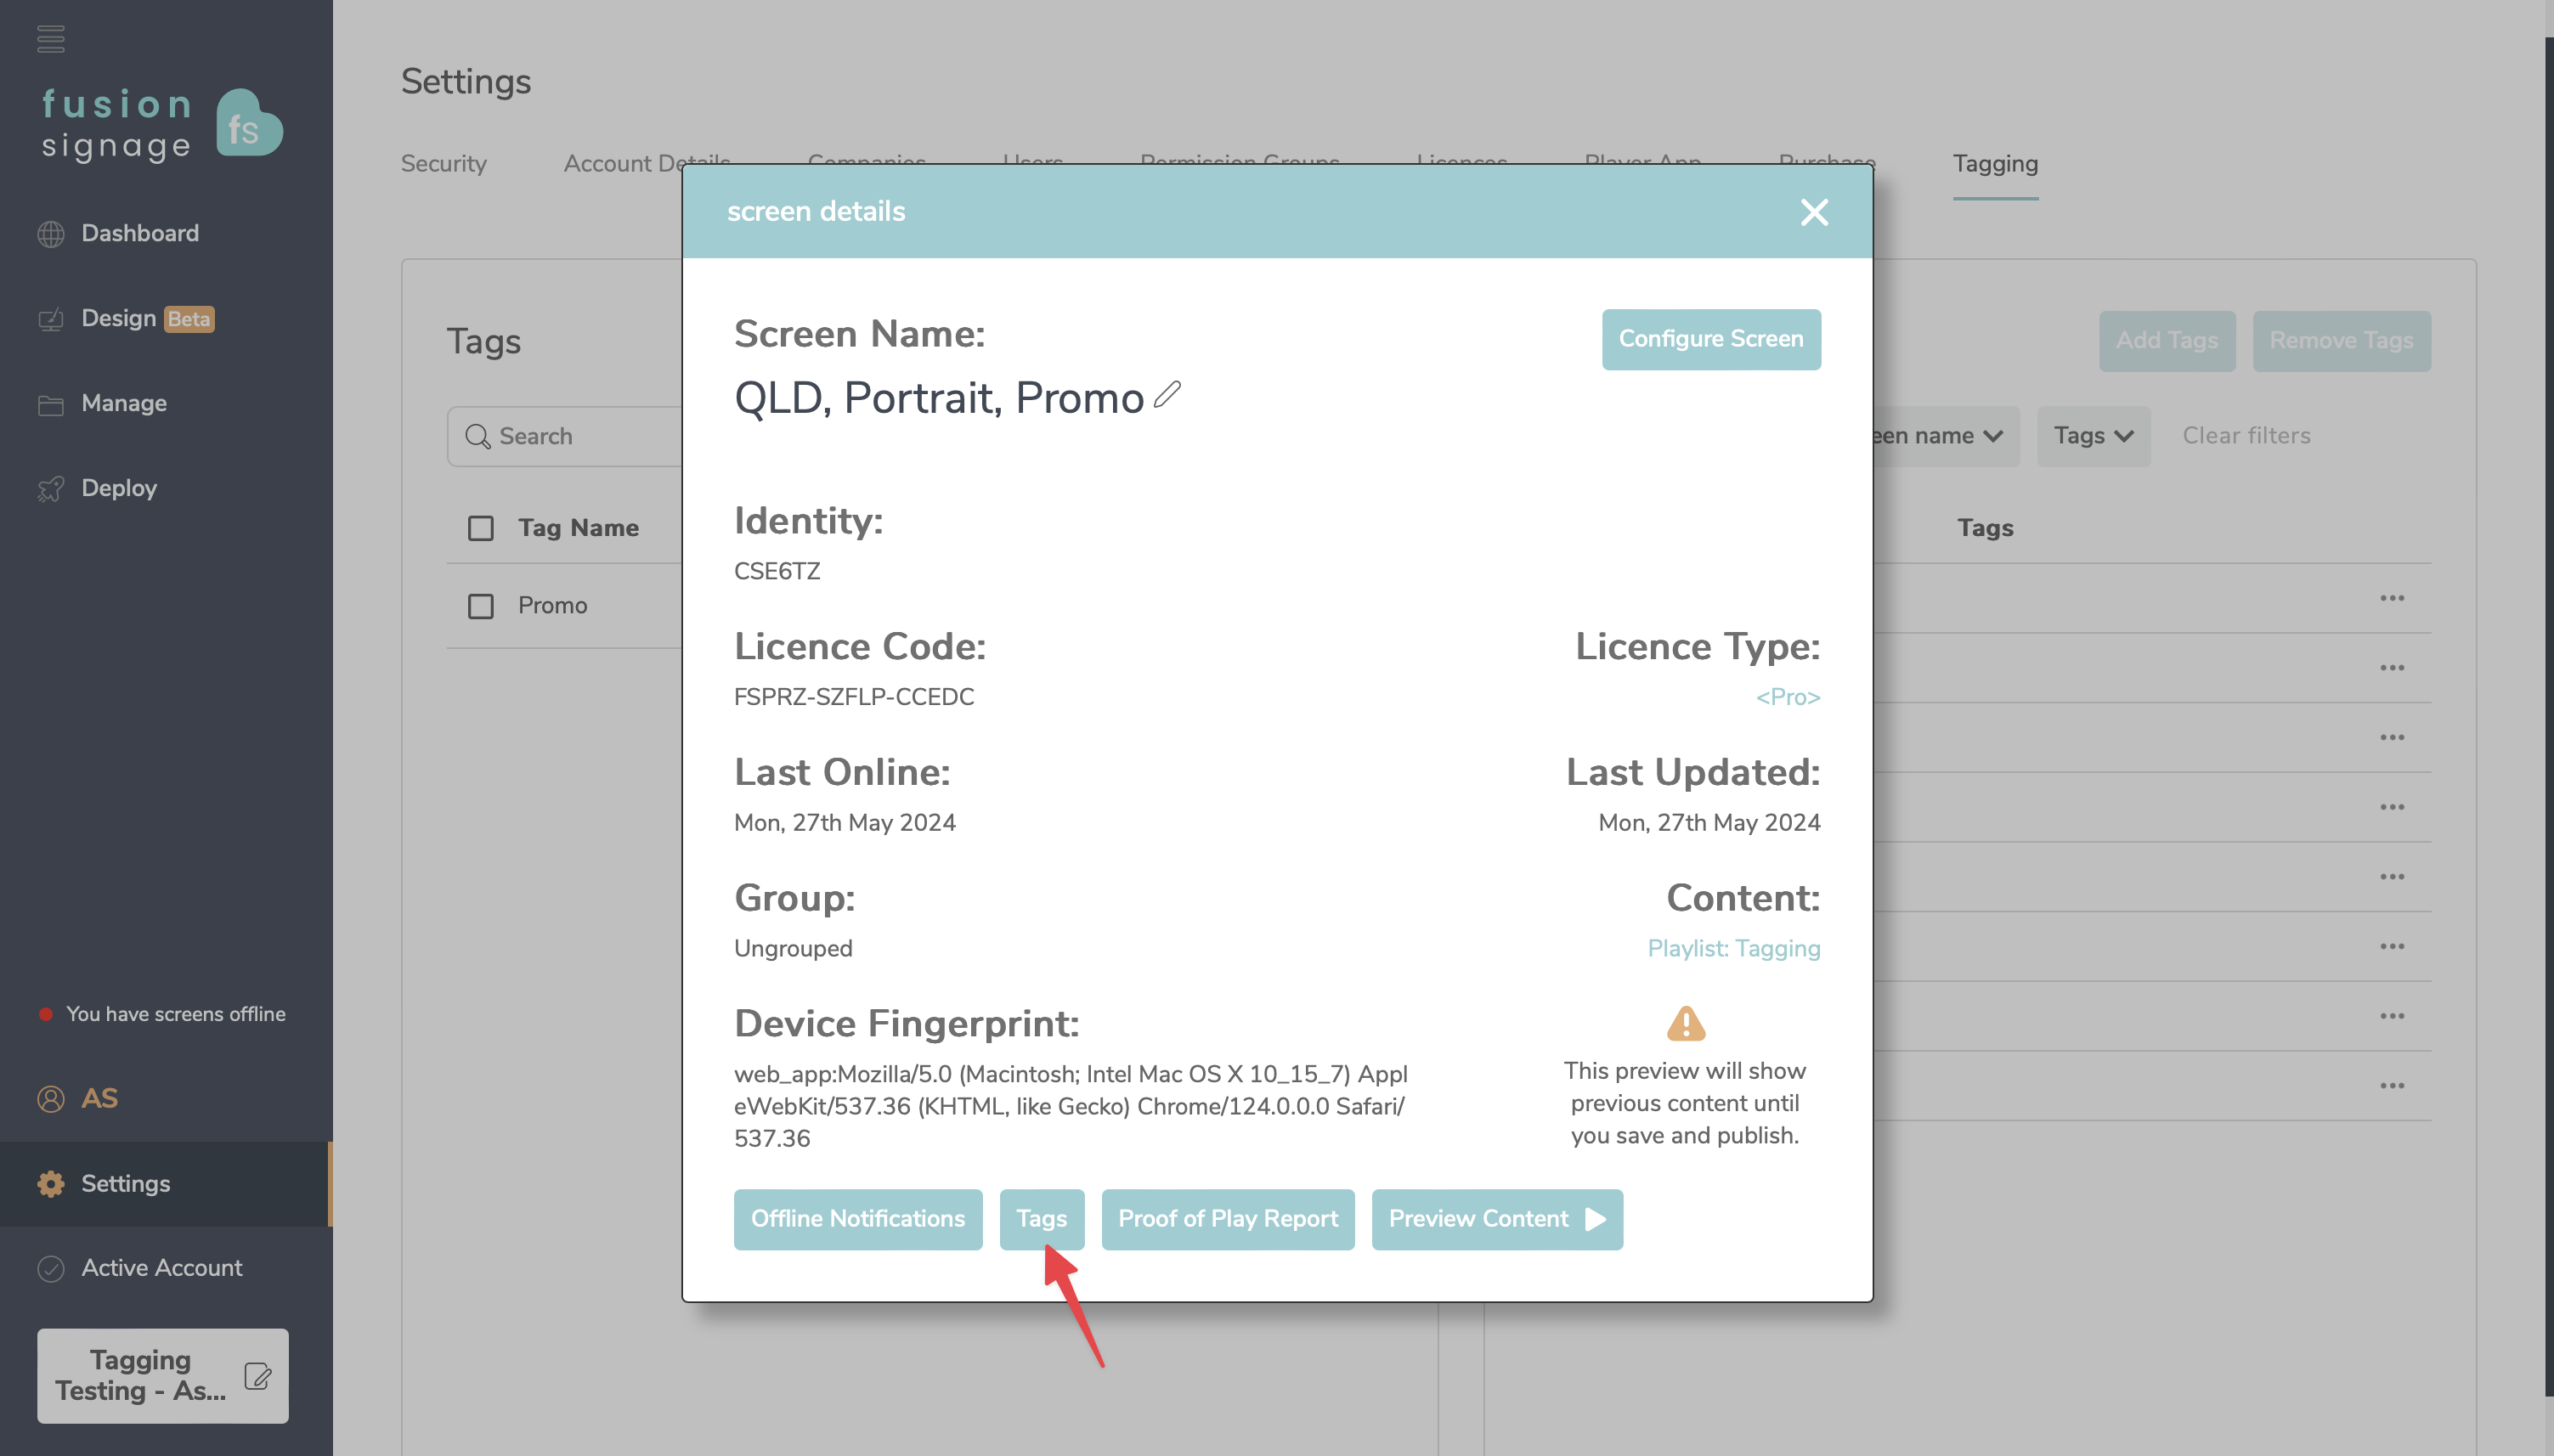
- Assign the relevant tags for each screen on the right side of the page. Do this by clicking the three dots next to your screen's name, then click 'Add tags,' or you can click the screen name and select 'Tags' at the bottom of the pop-up window, then search for your desired tag name.
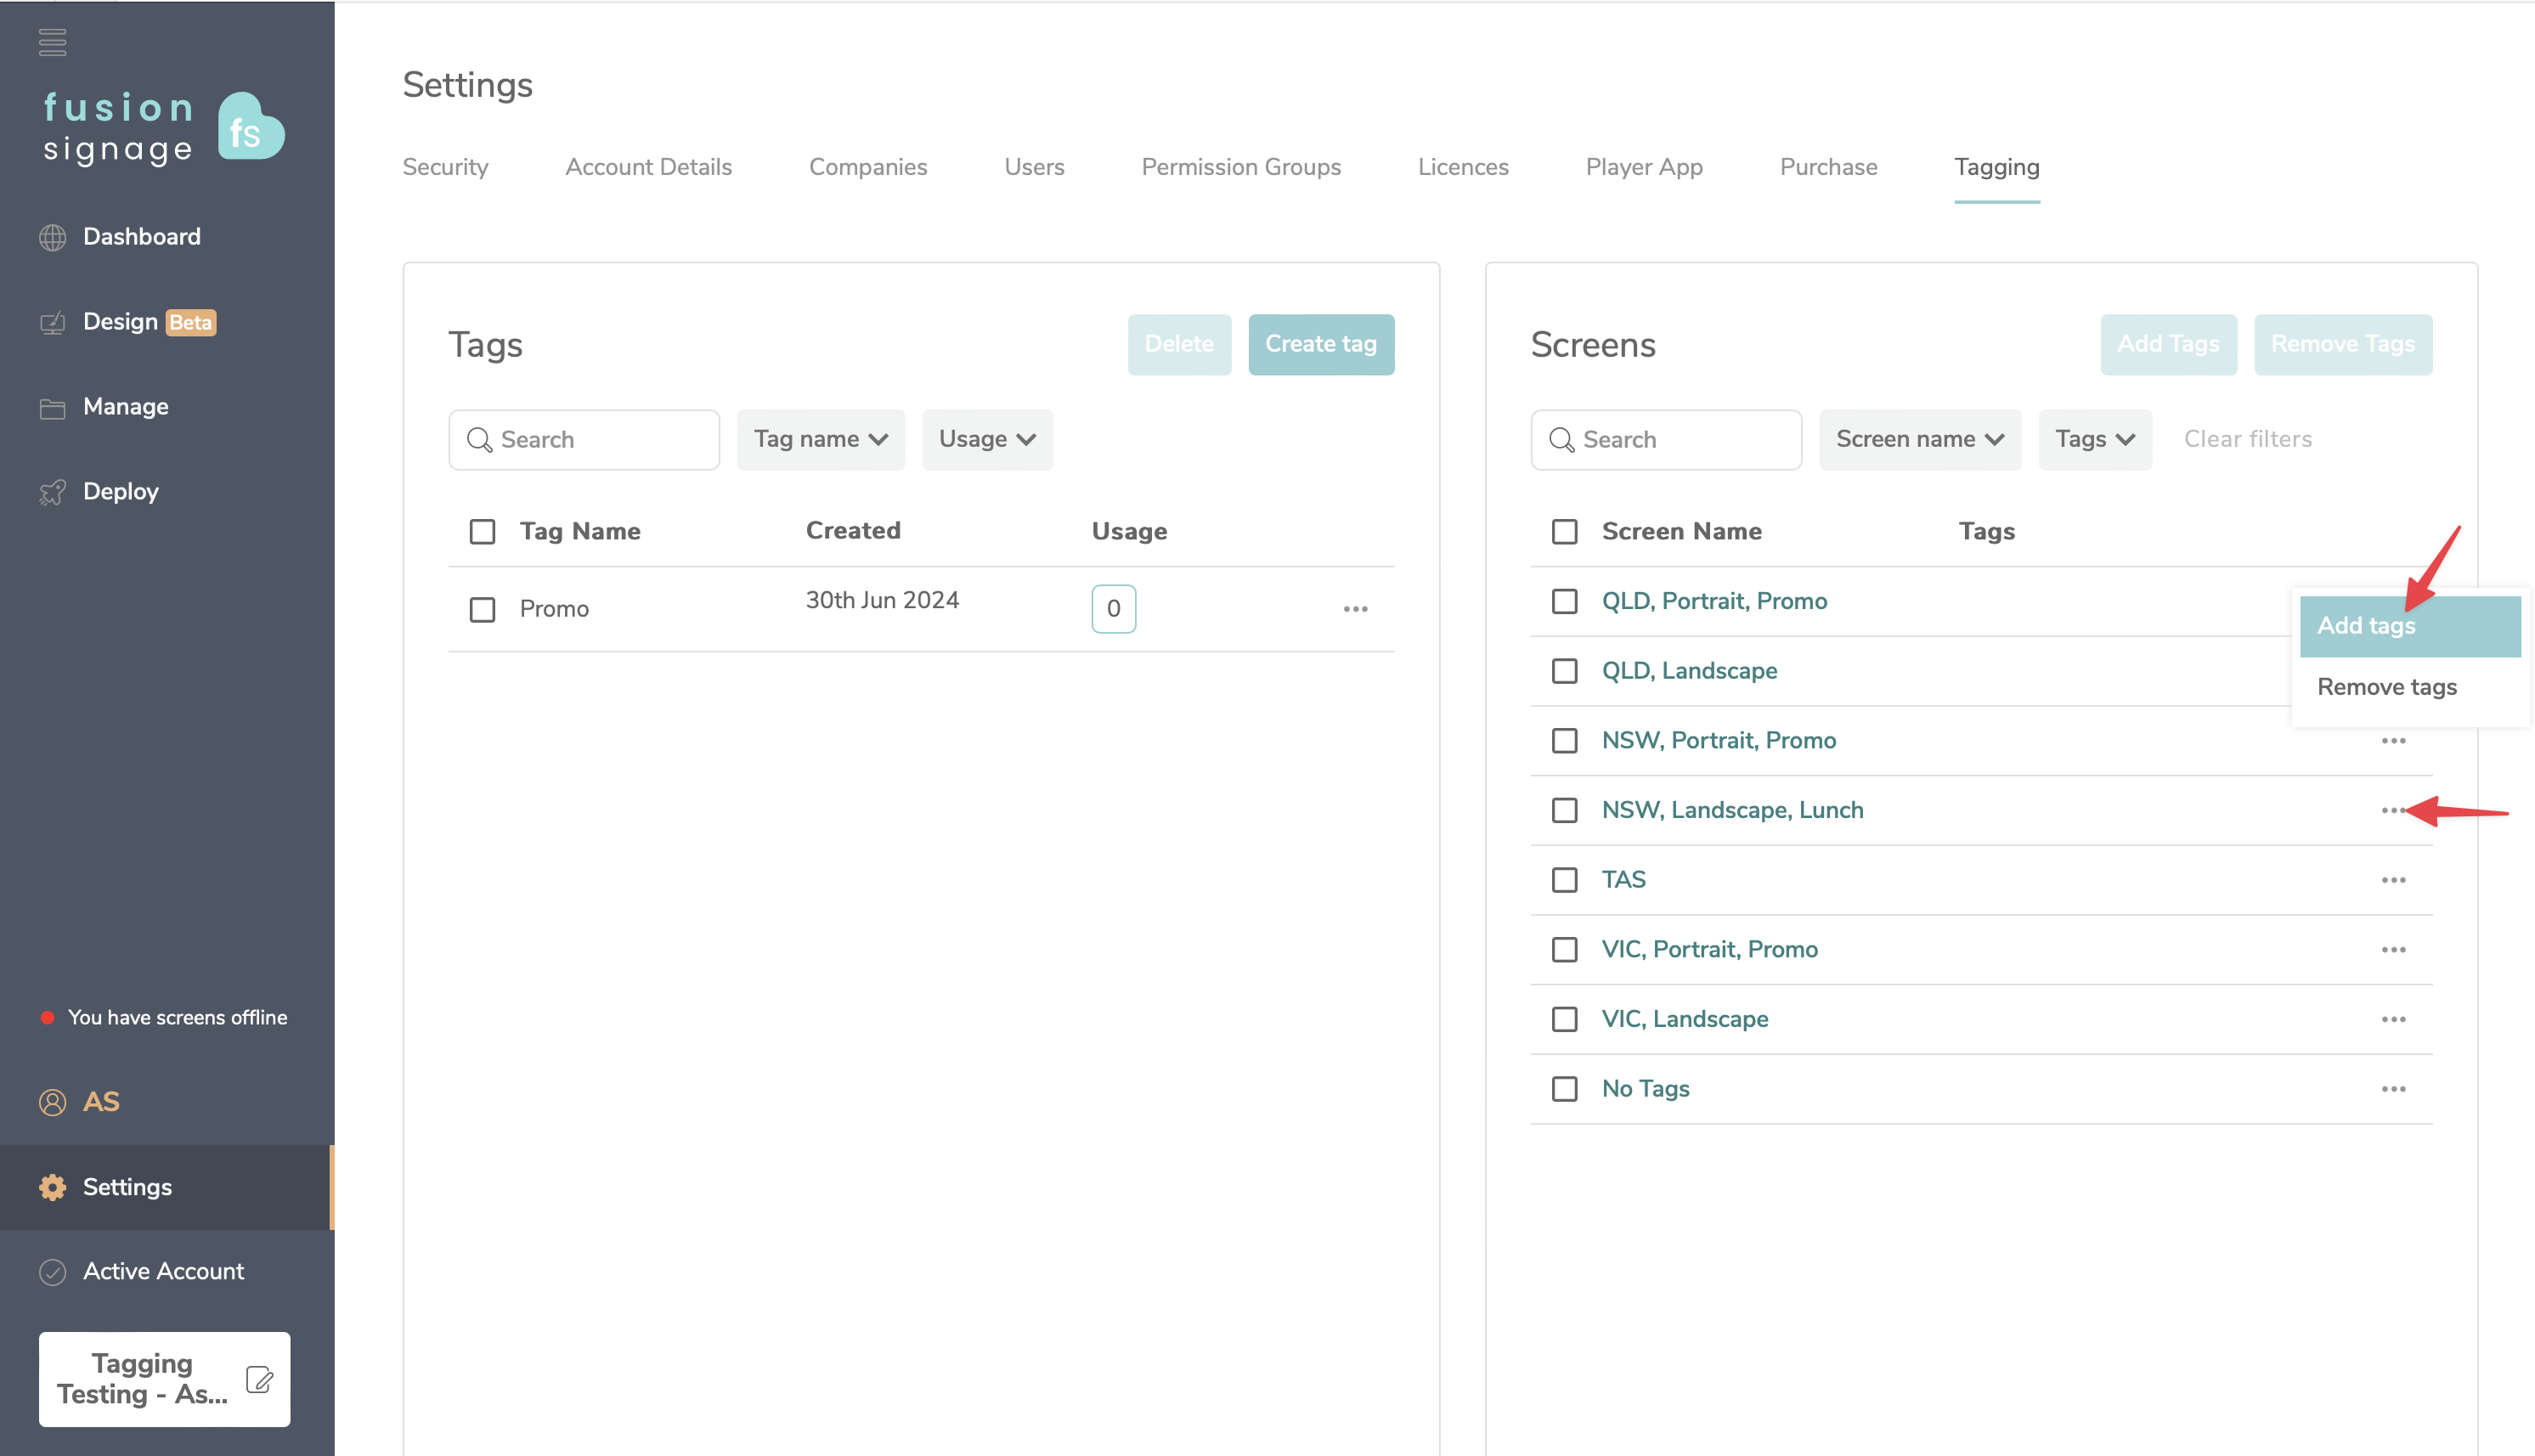
- Once you have finished you should see the tags assigned to the right of all of your screens. You can also see a usage counter next to each tag. This will show you which screens have been assigned this tag.
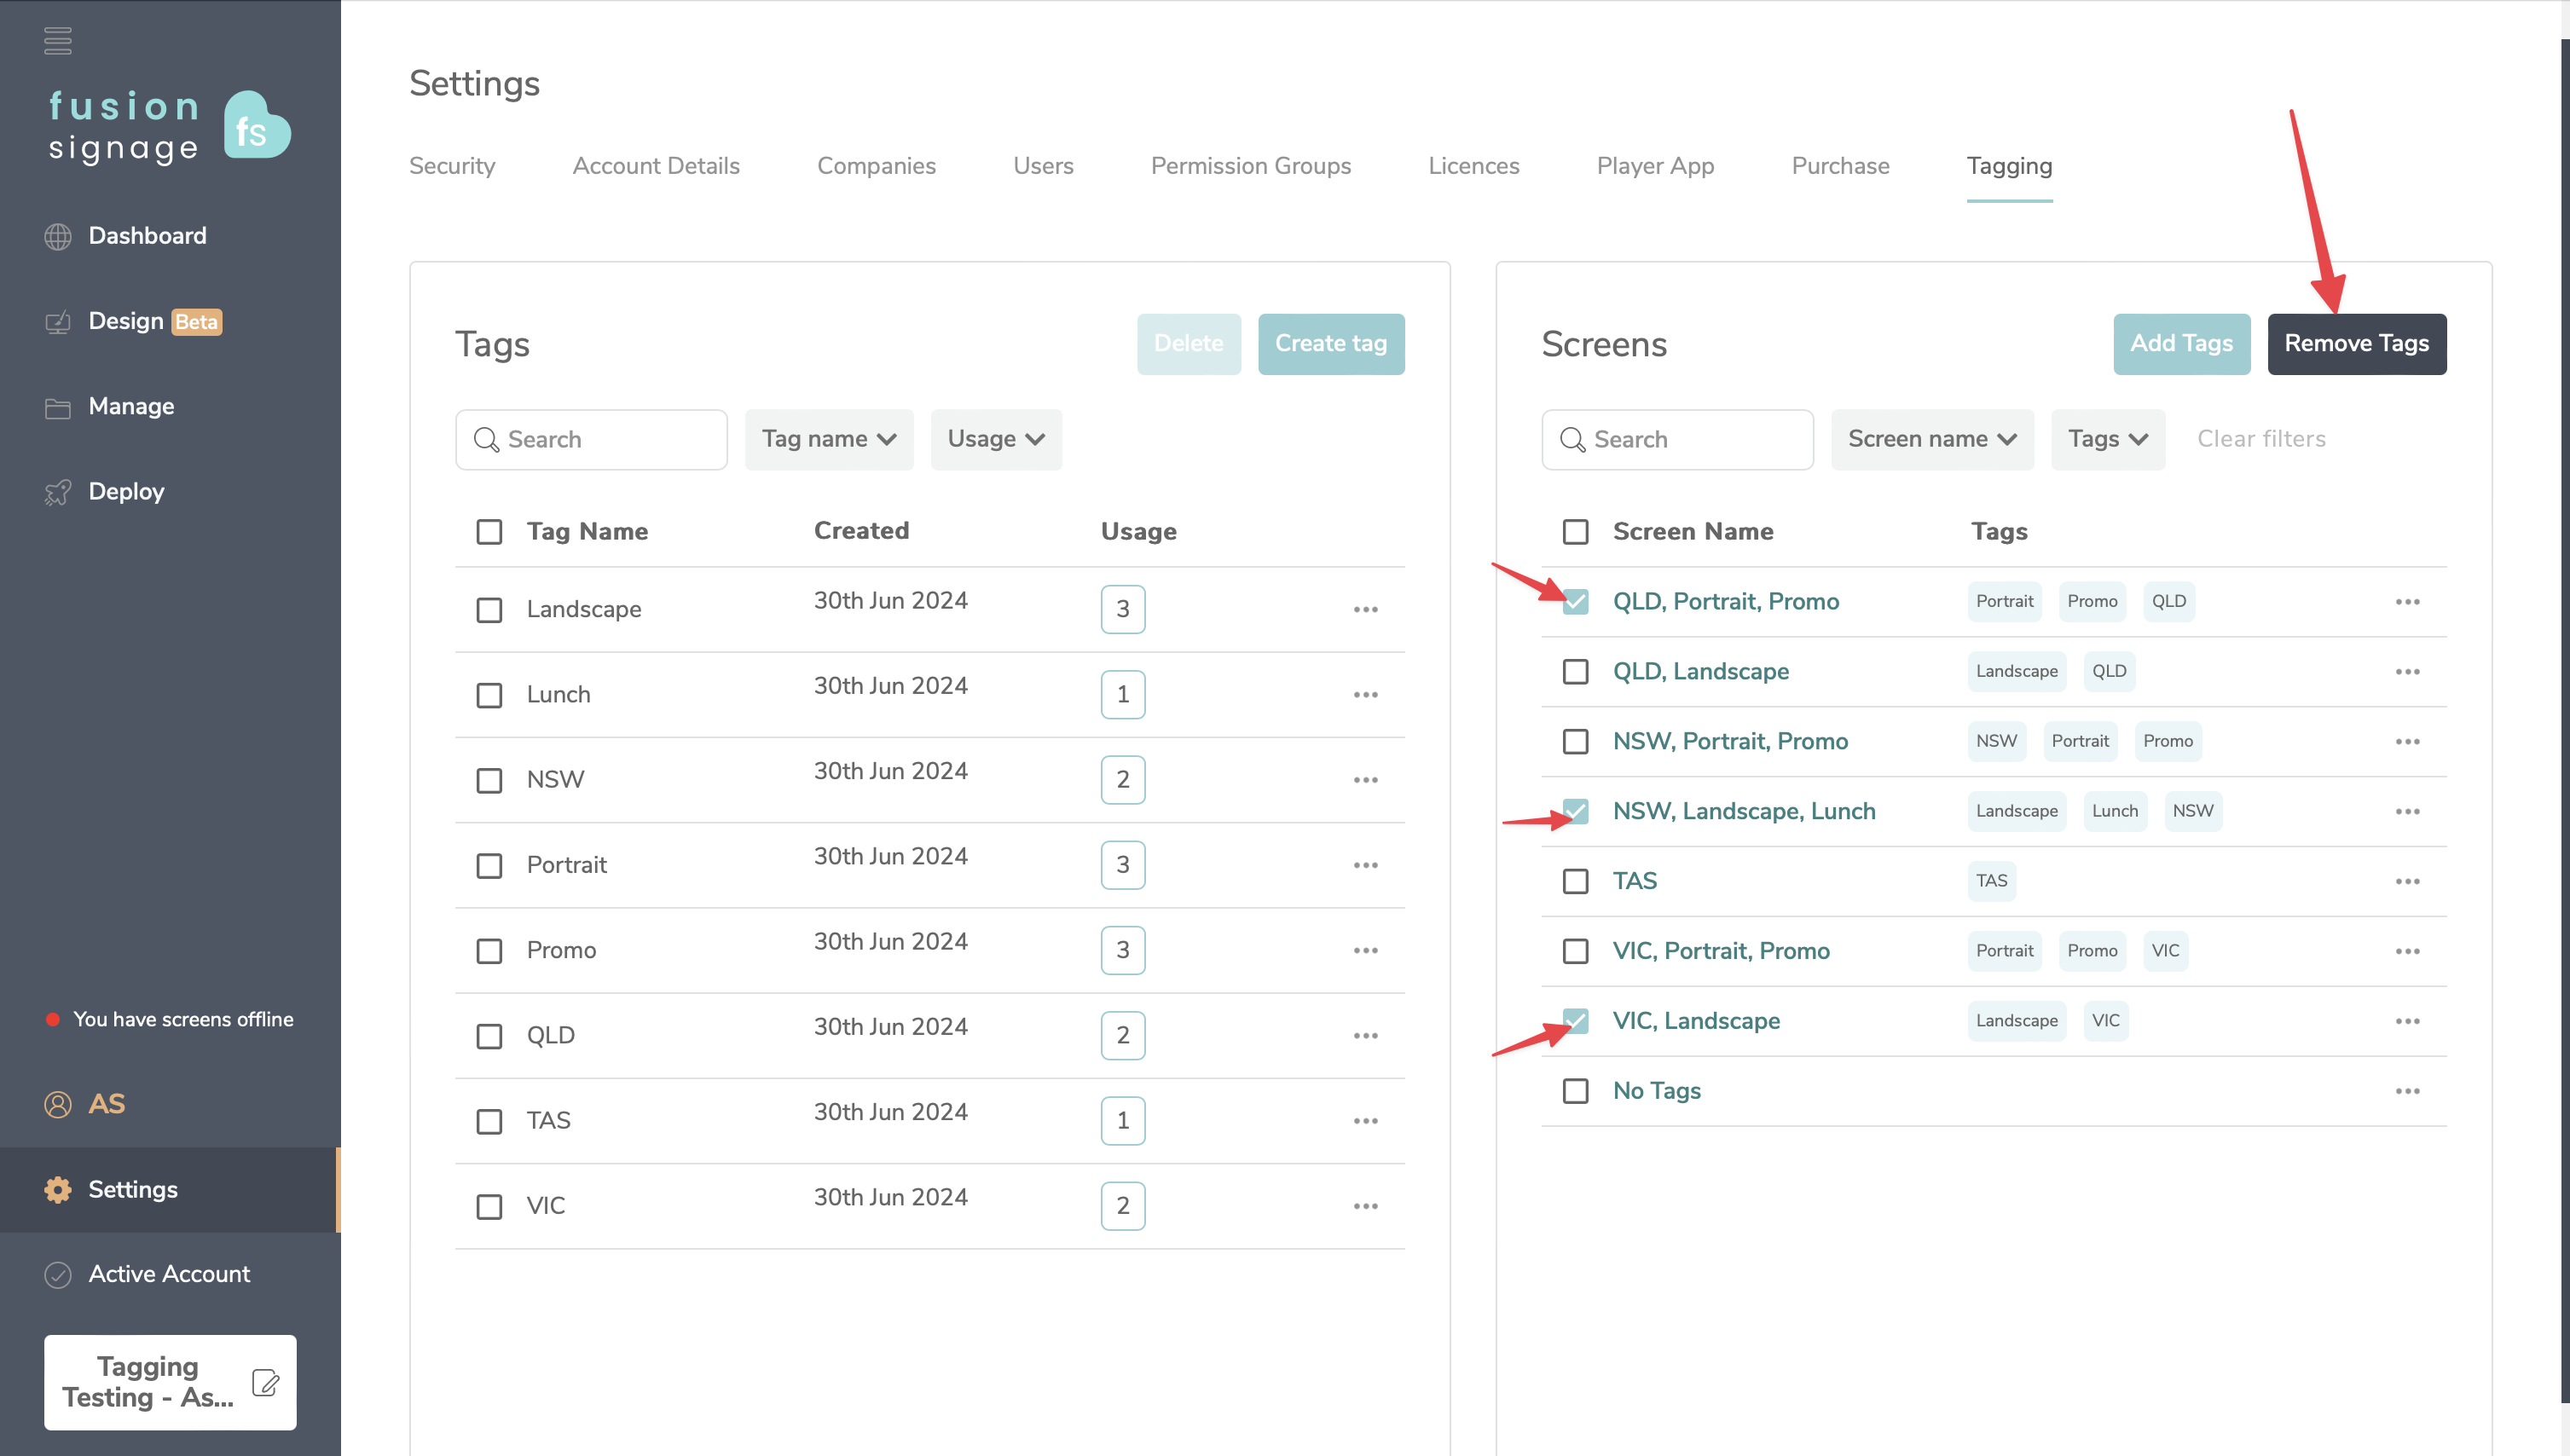
- To remove tags select the screen/s you want to remove the tags from and click the Remove Tags button. Then select which tags you want to remove from the screen/s
You cannot completely delete a tag from your account until they have been removed from all screens. This is a safety measure to ensure you don’t accidentally remove tags from 100’s of screens. You can only delete tags when the usage is 0.
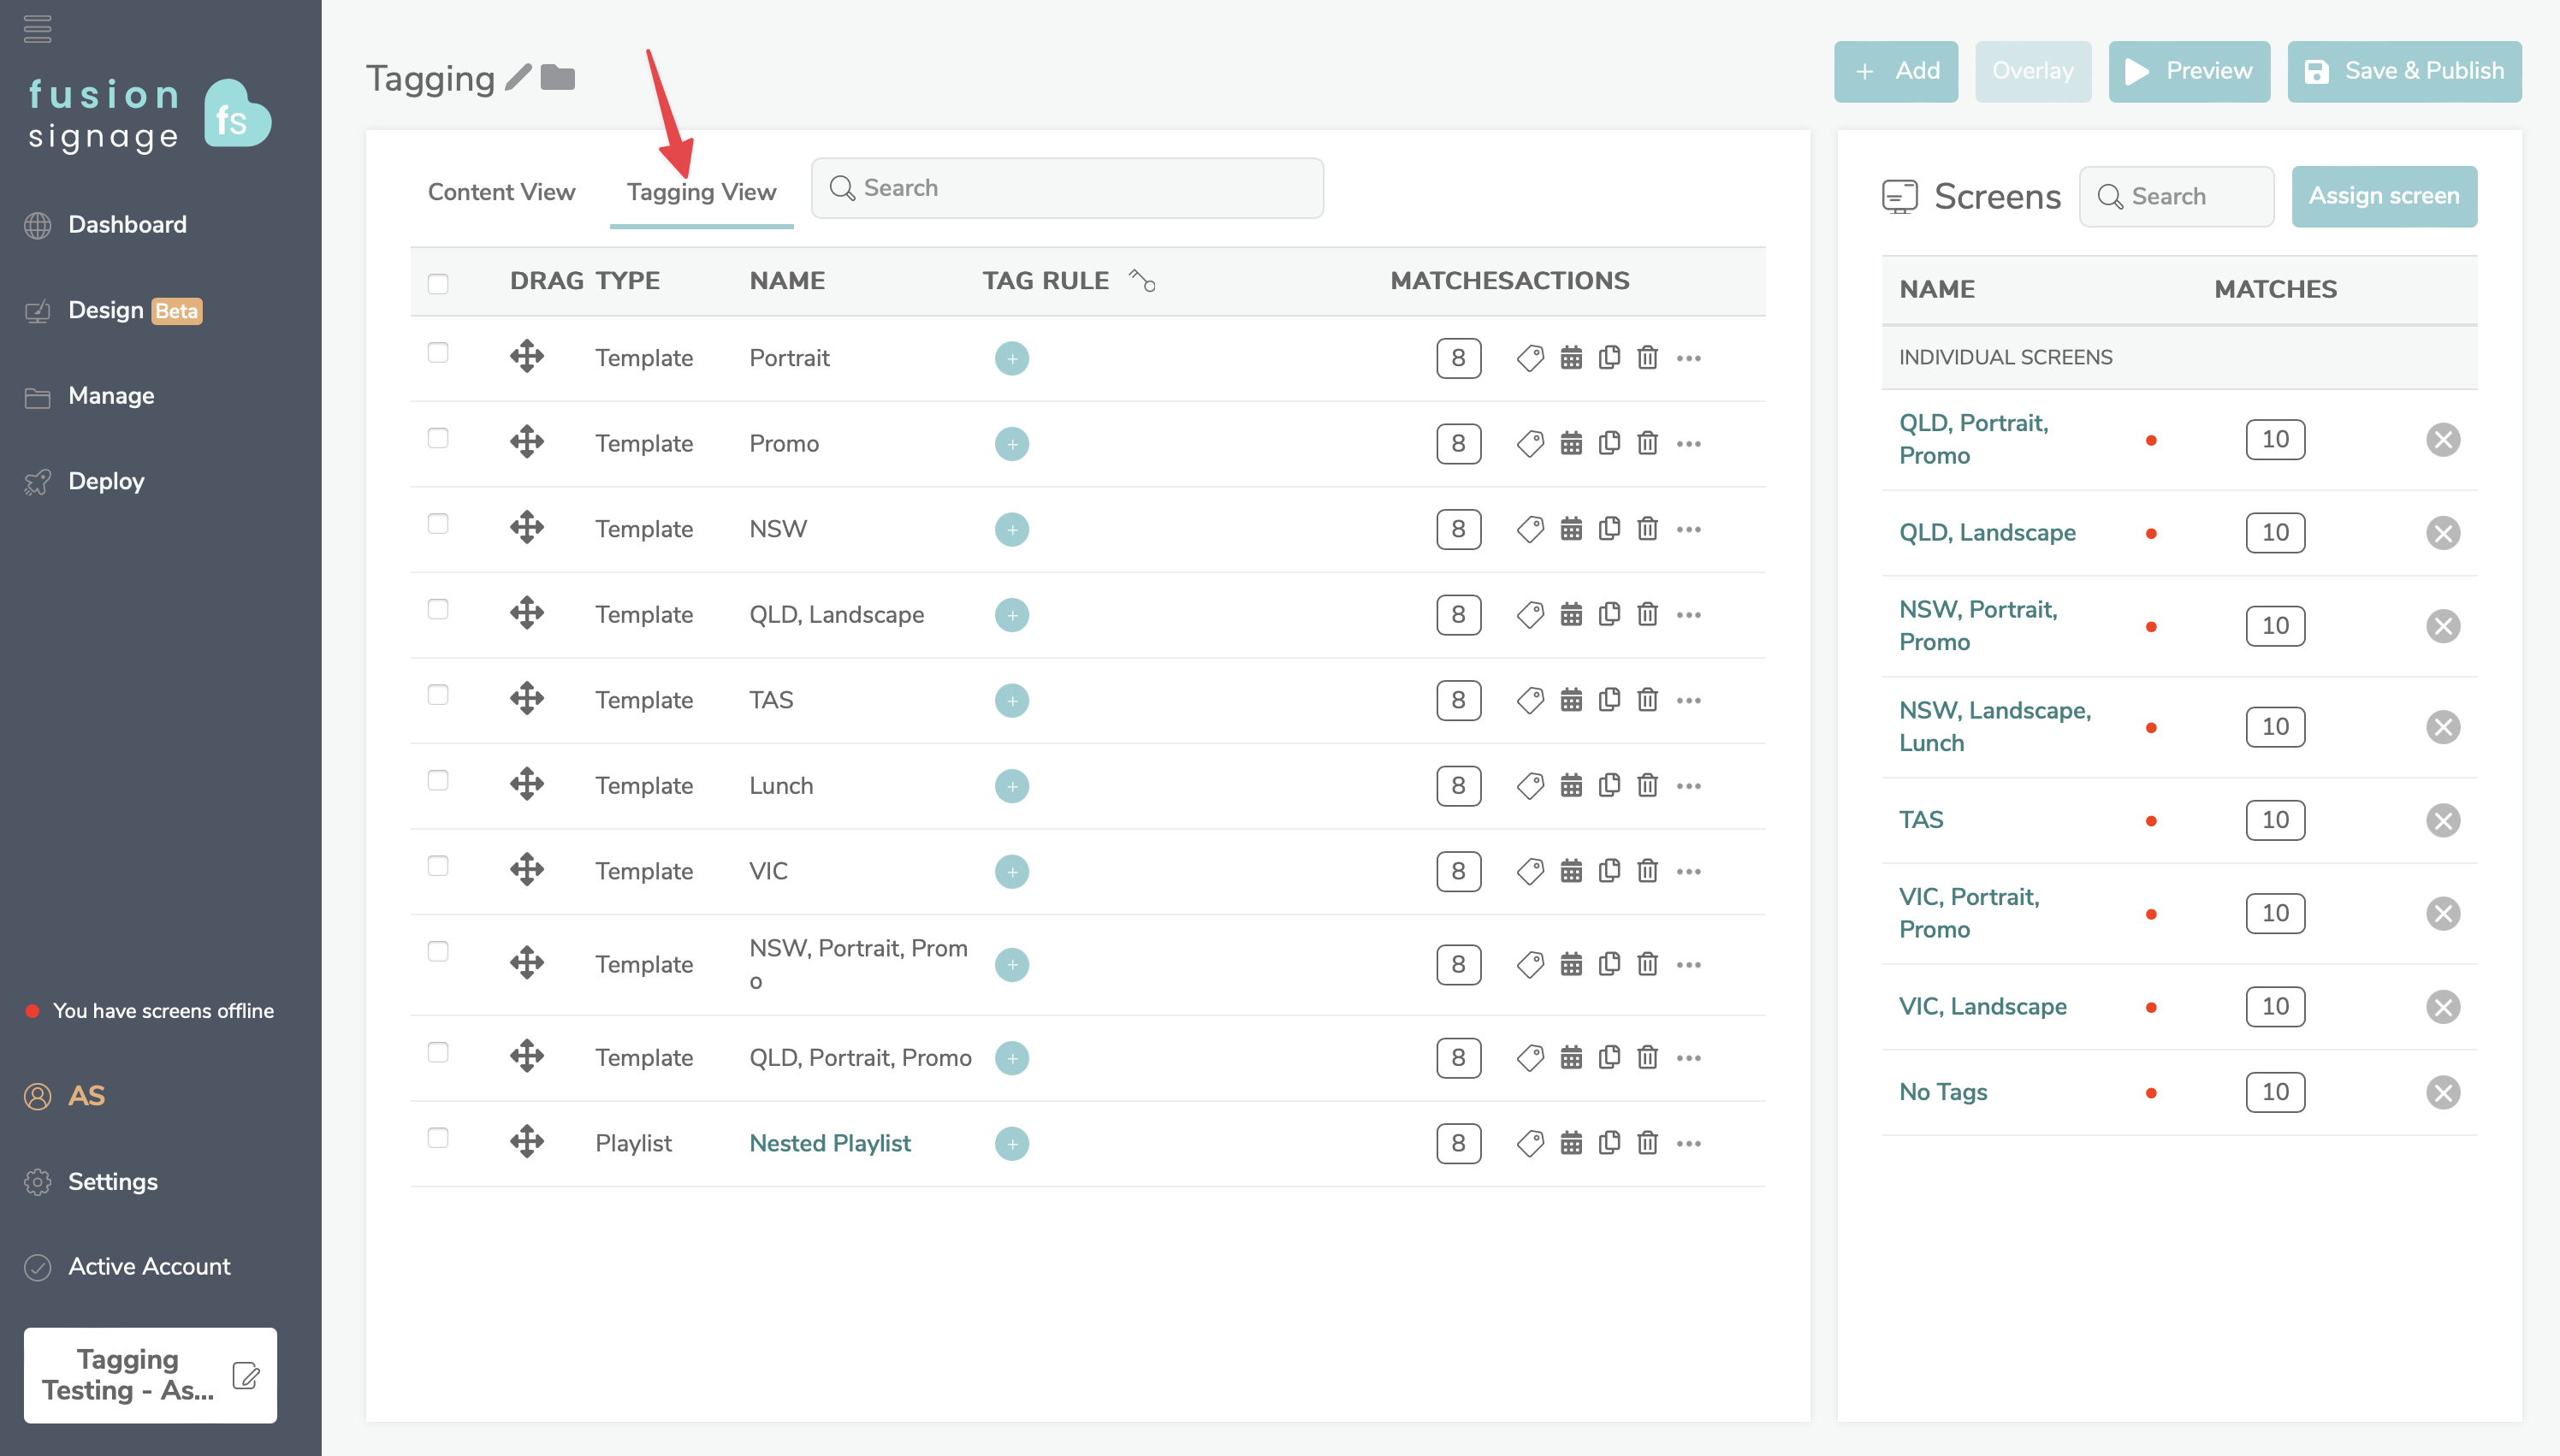
- Create a playlist, or go to an existing playlist. Then click Tagging View
- Click the teal + button in the tag rule column for the piece of content you wish to assign a rule to.
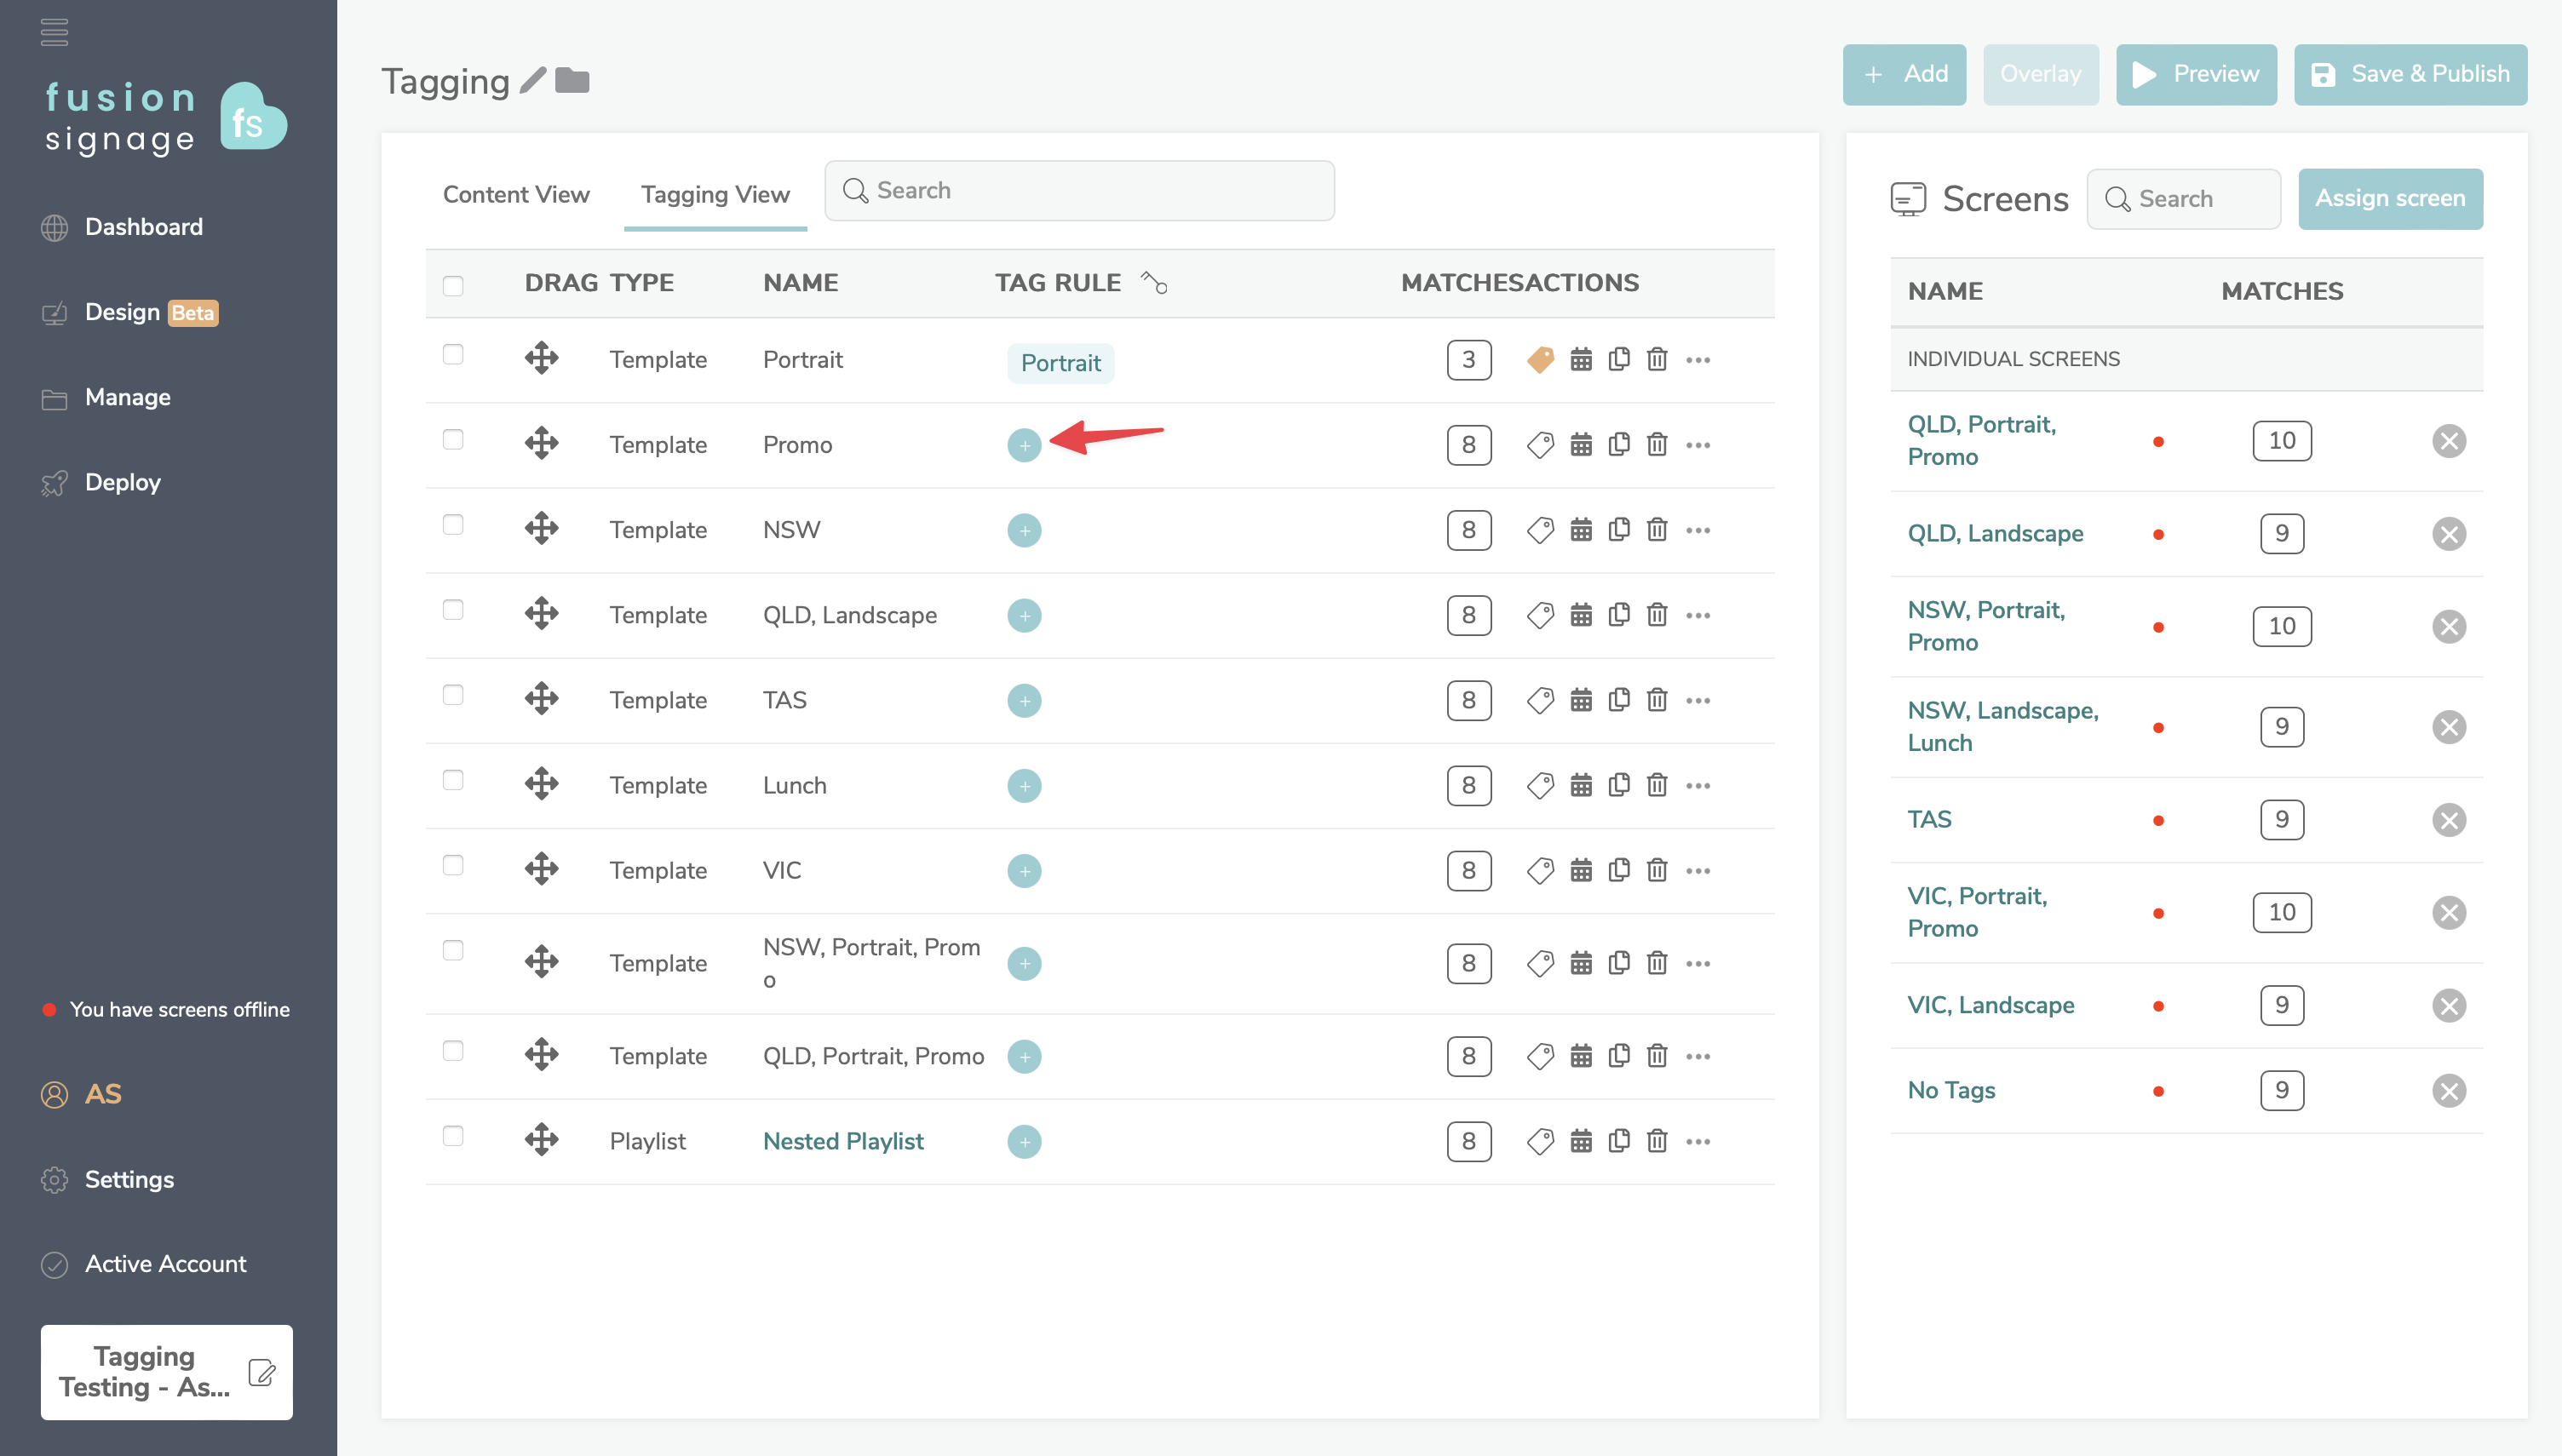
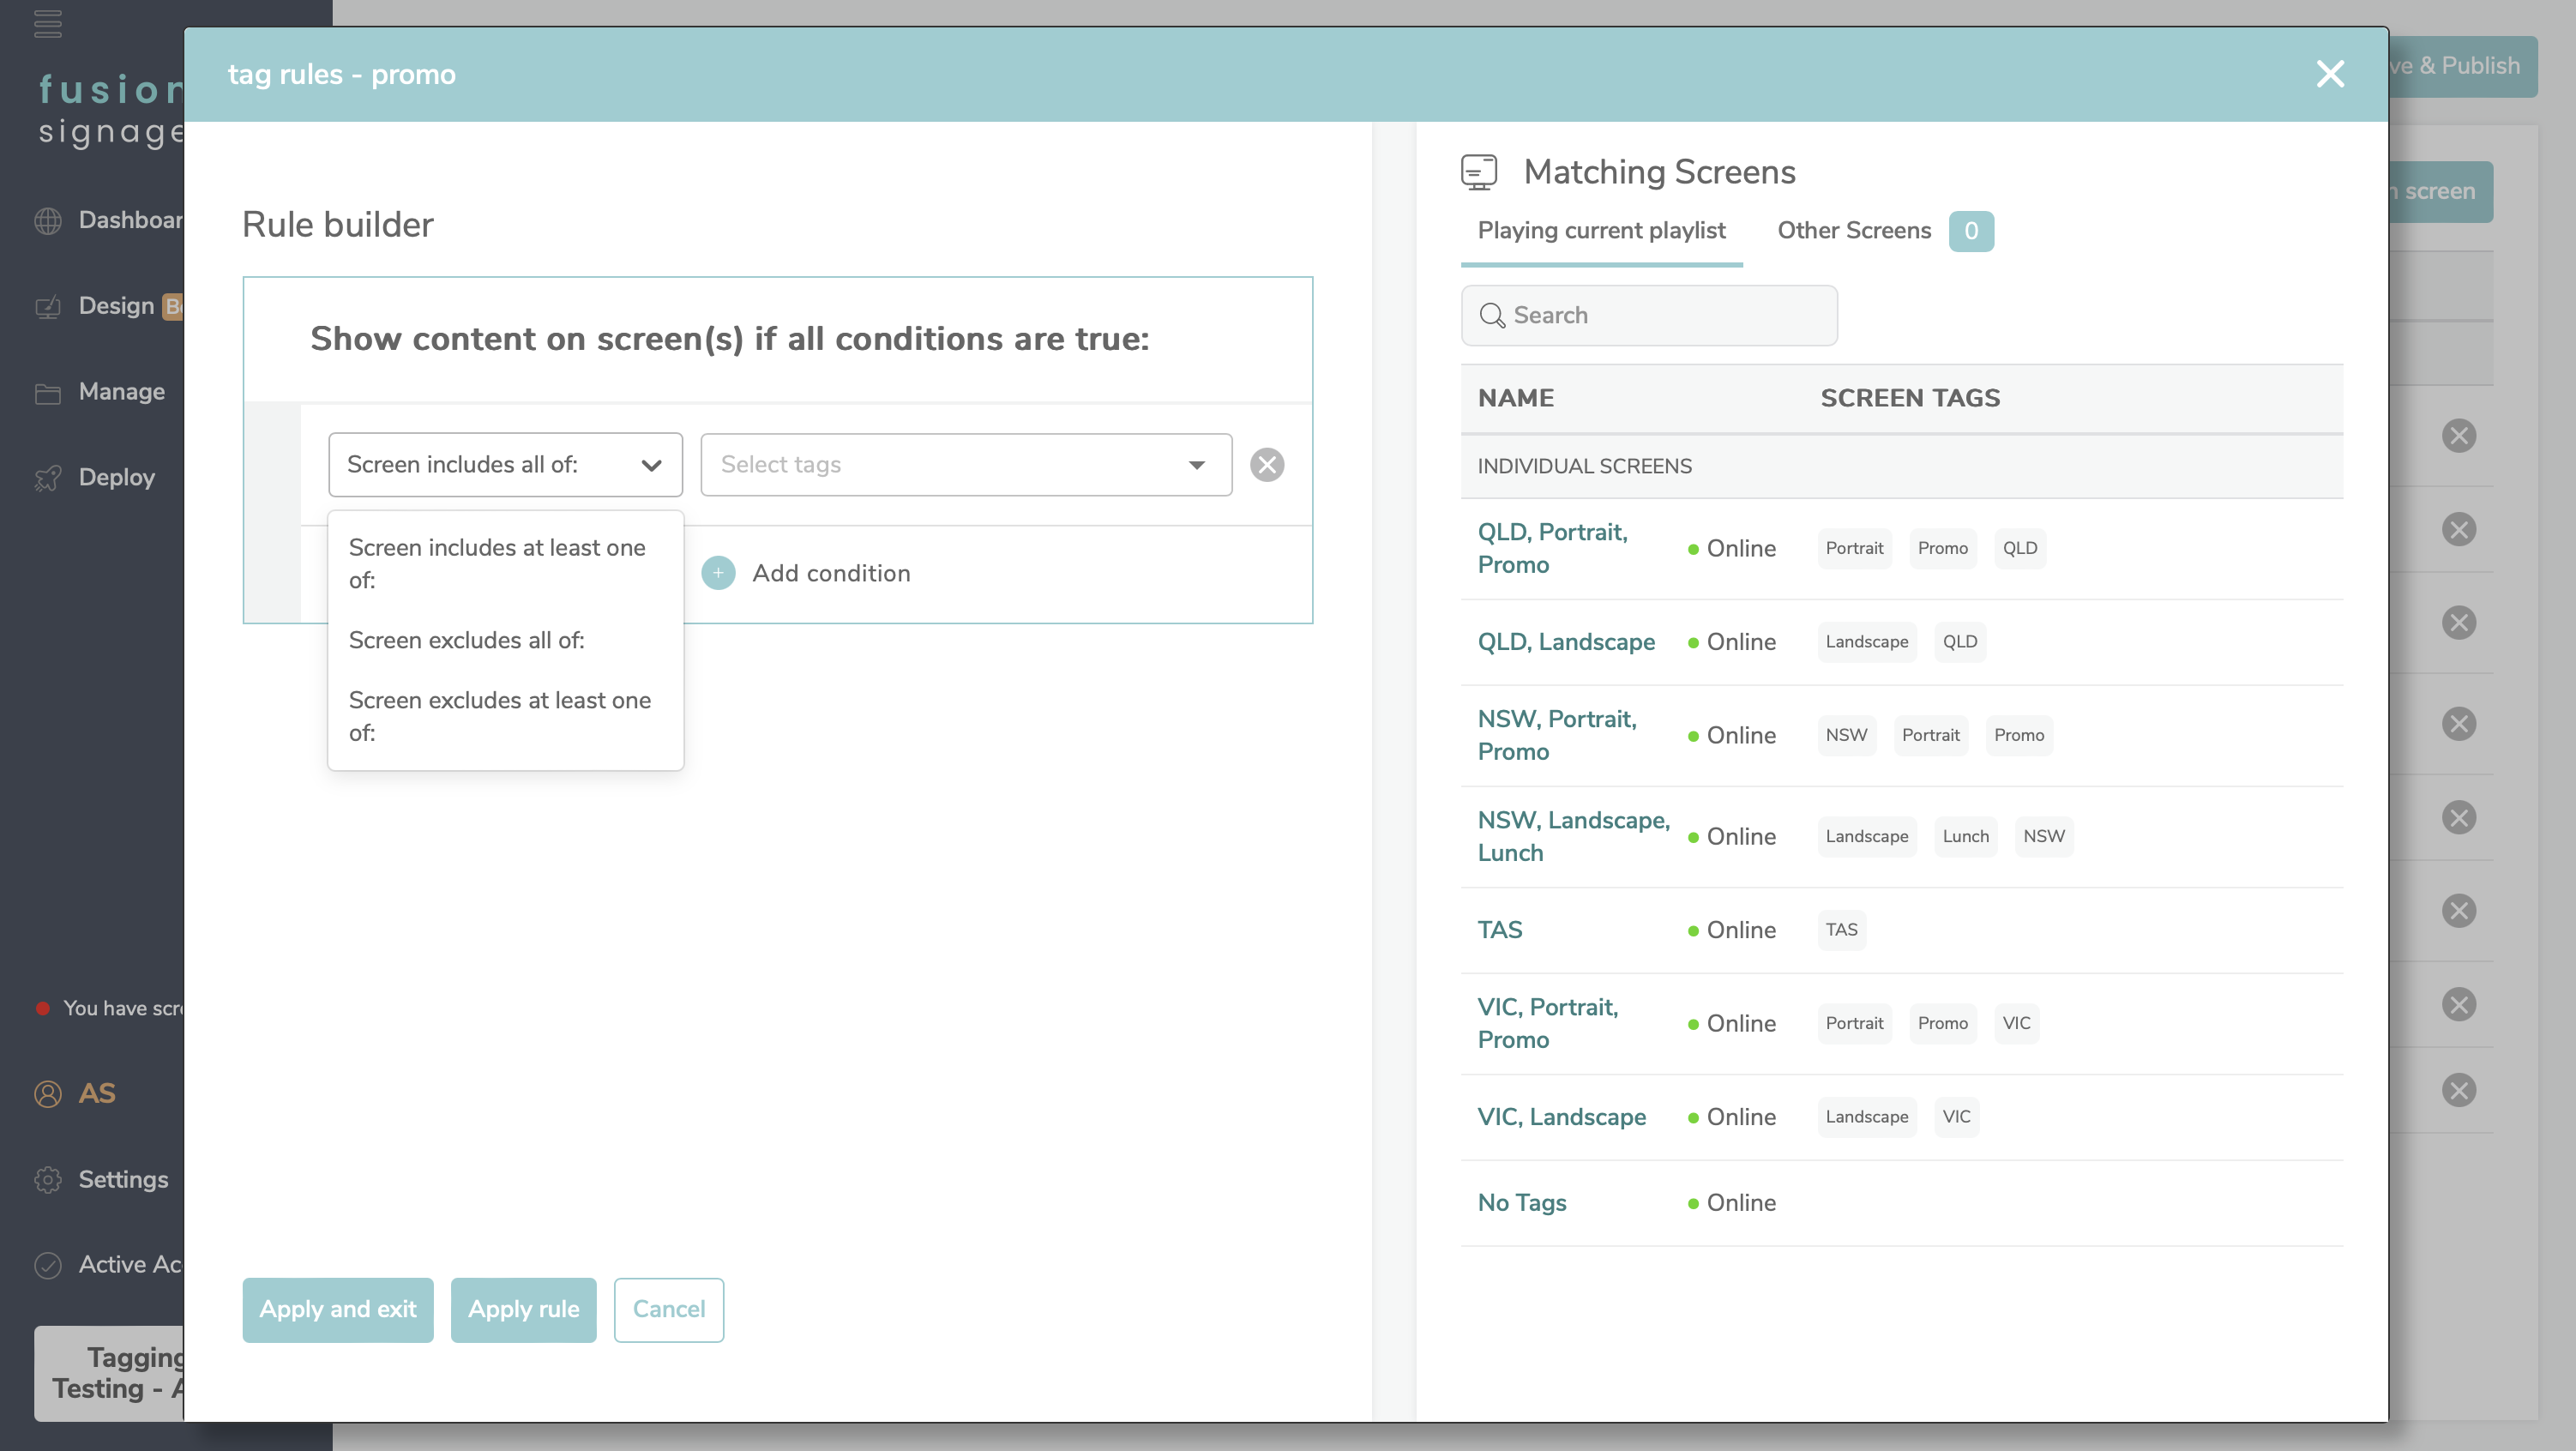
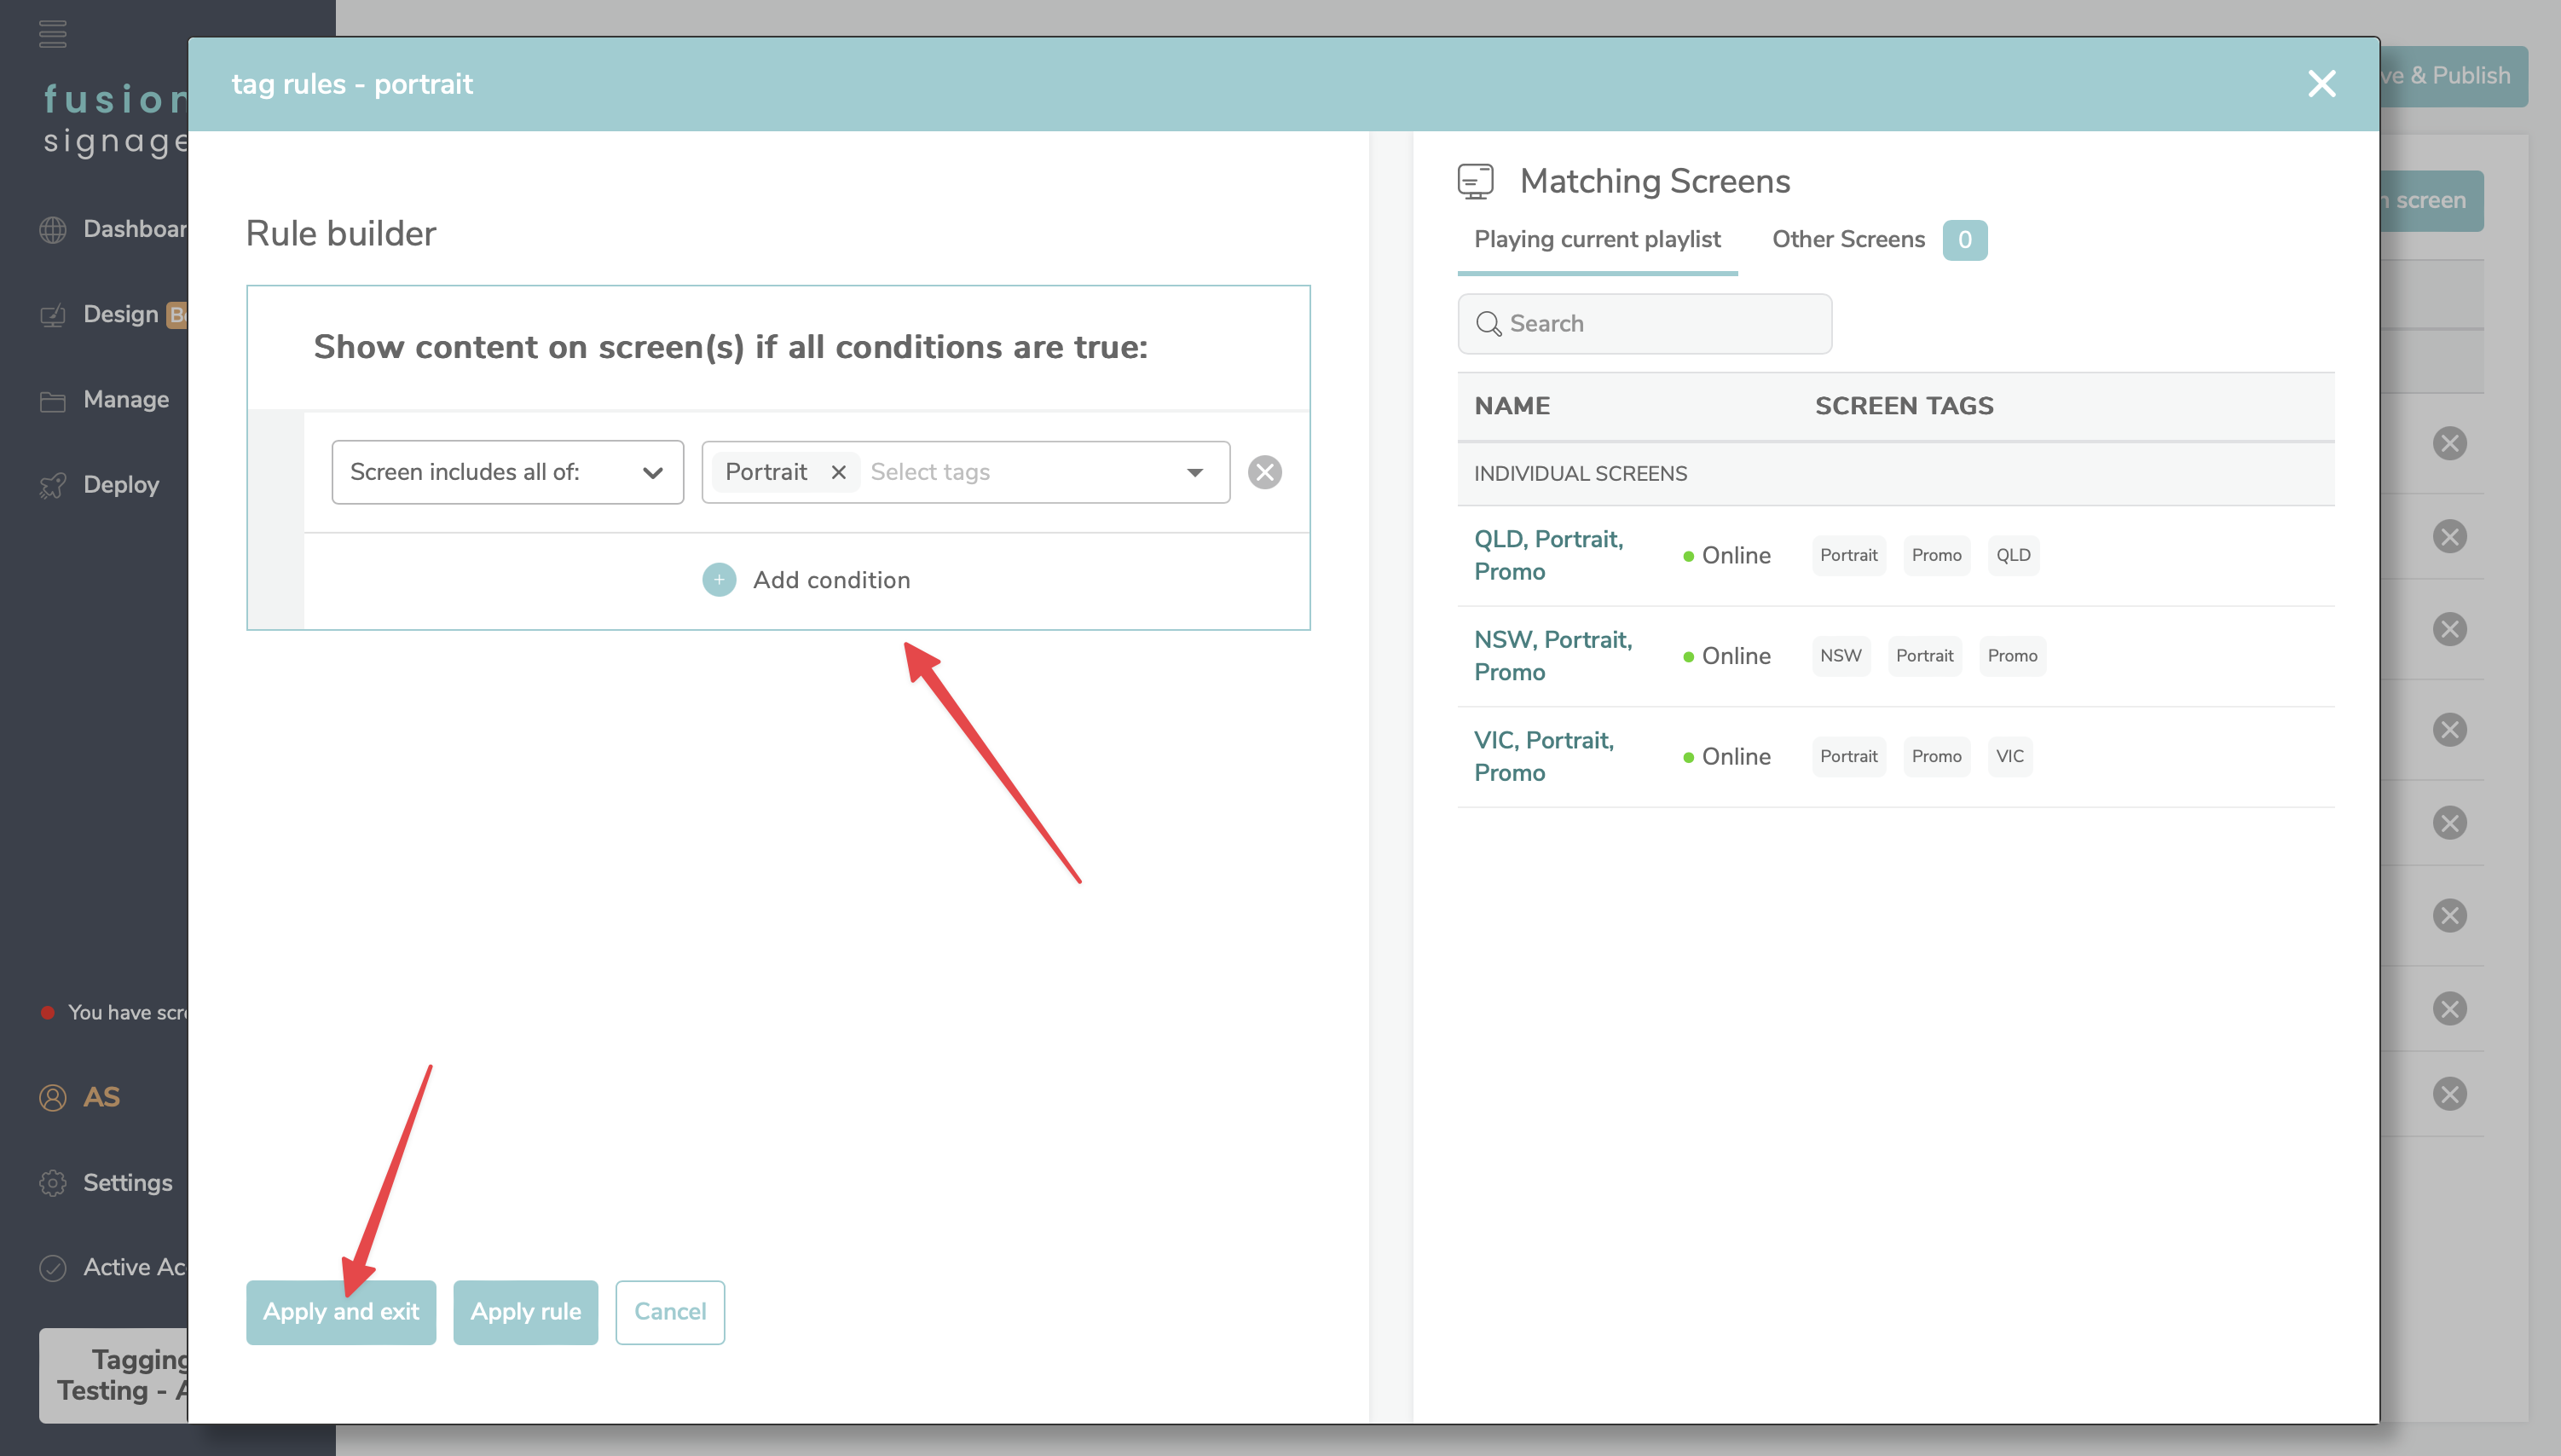
- Build the tag rule for that piece of content. Once you build out the rule, you will see the screens on the right filter to show the screens the content will show on. You can create as few or as many rules as needed for each piece of content. The screen rule conditions are;
- Screen includes all of
- Screen includes at least one of
- Screen excludes all of
- Screen excludes at least one of
If you want a piece of content to apply to all screens, don’t build a rule.
- Once happy, click Apply & Exit
Repeat steps 7, 8 and 9 as necessary for other content within the playlist.
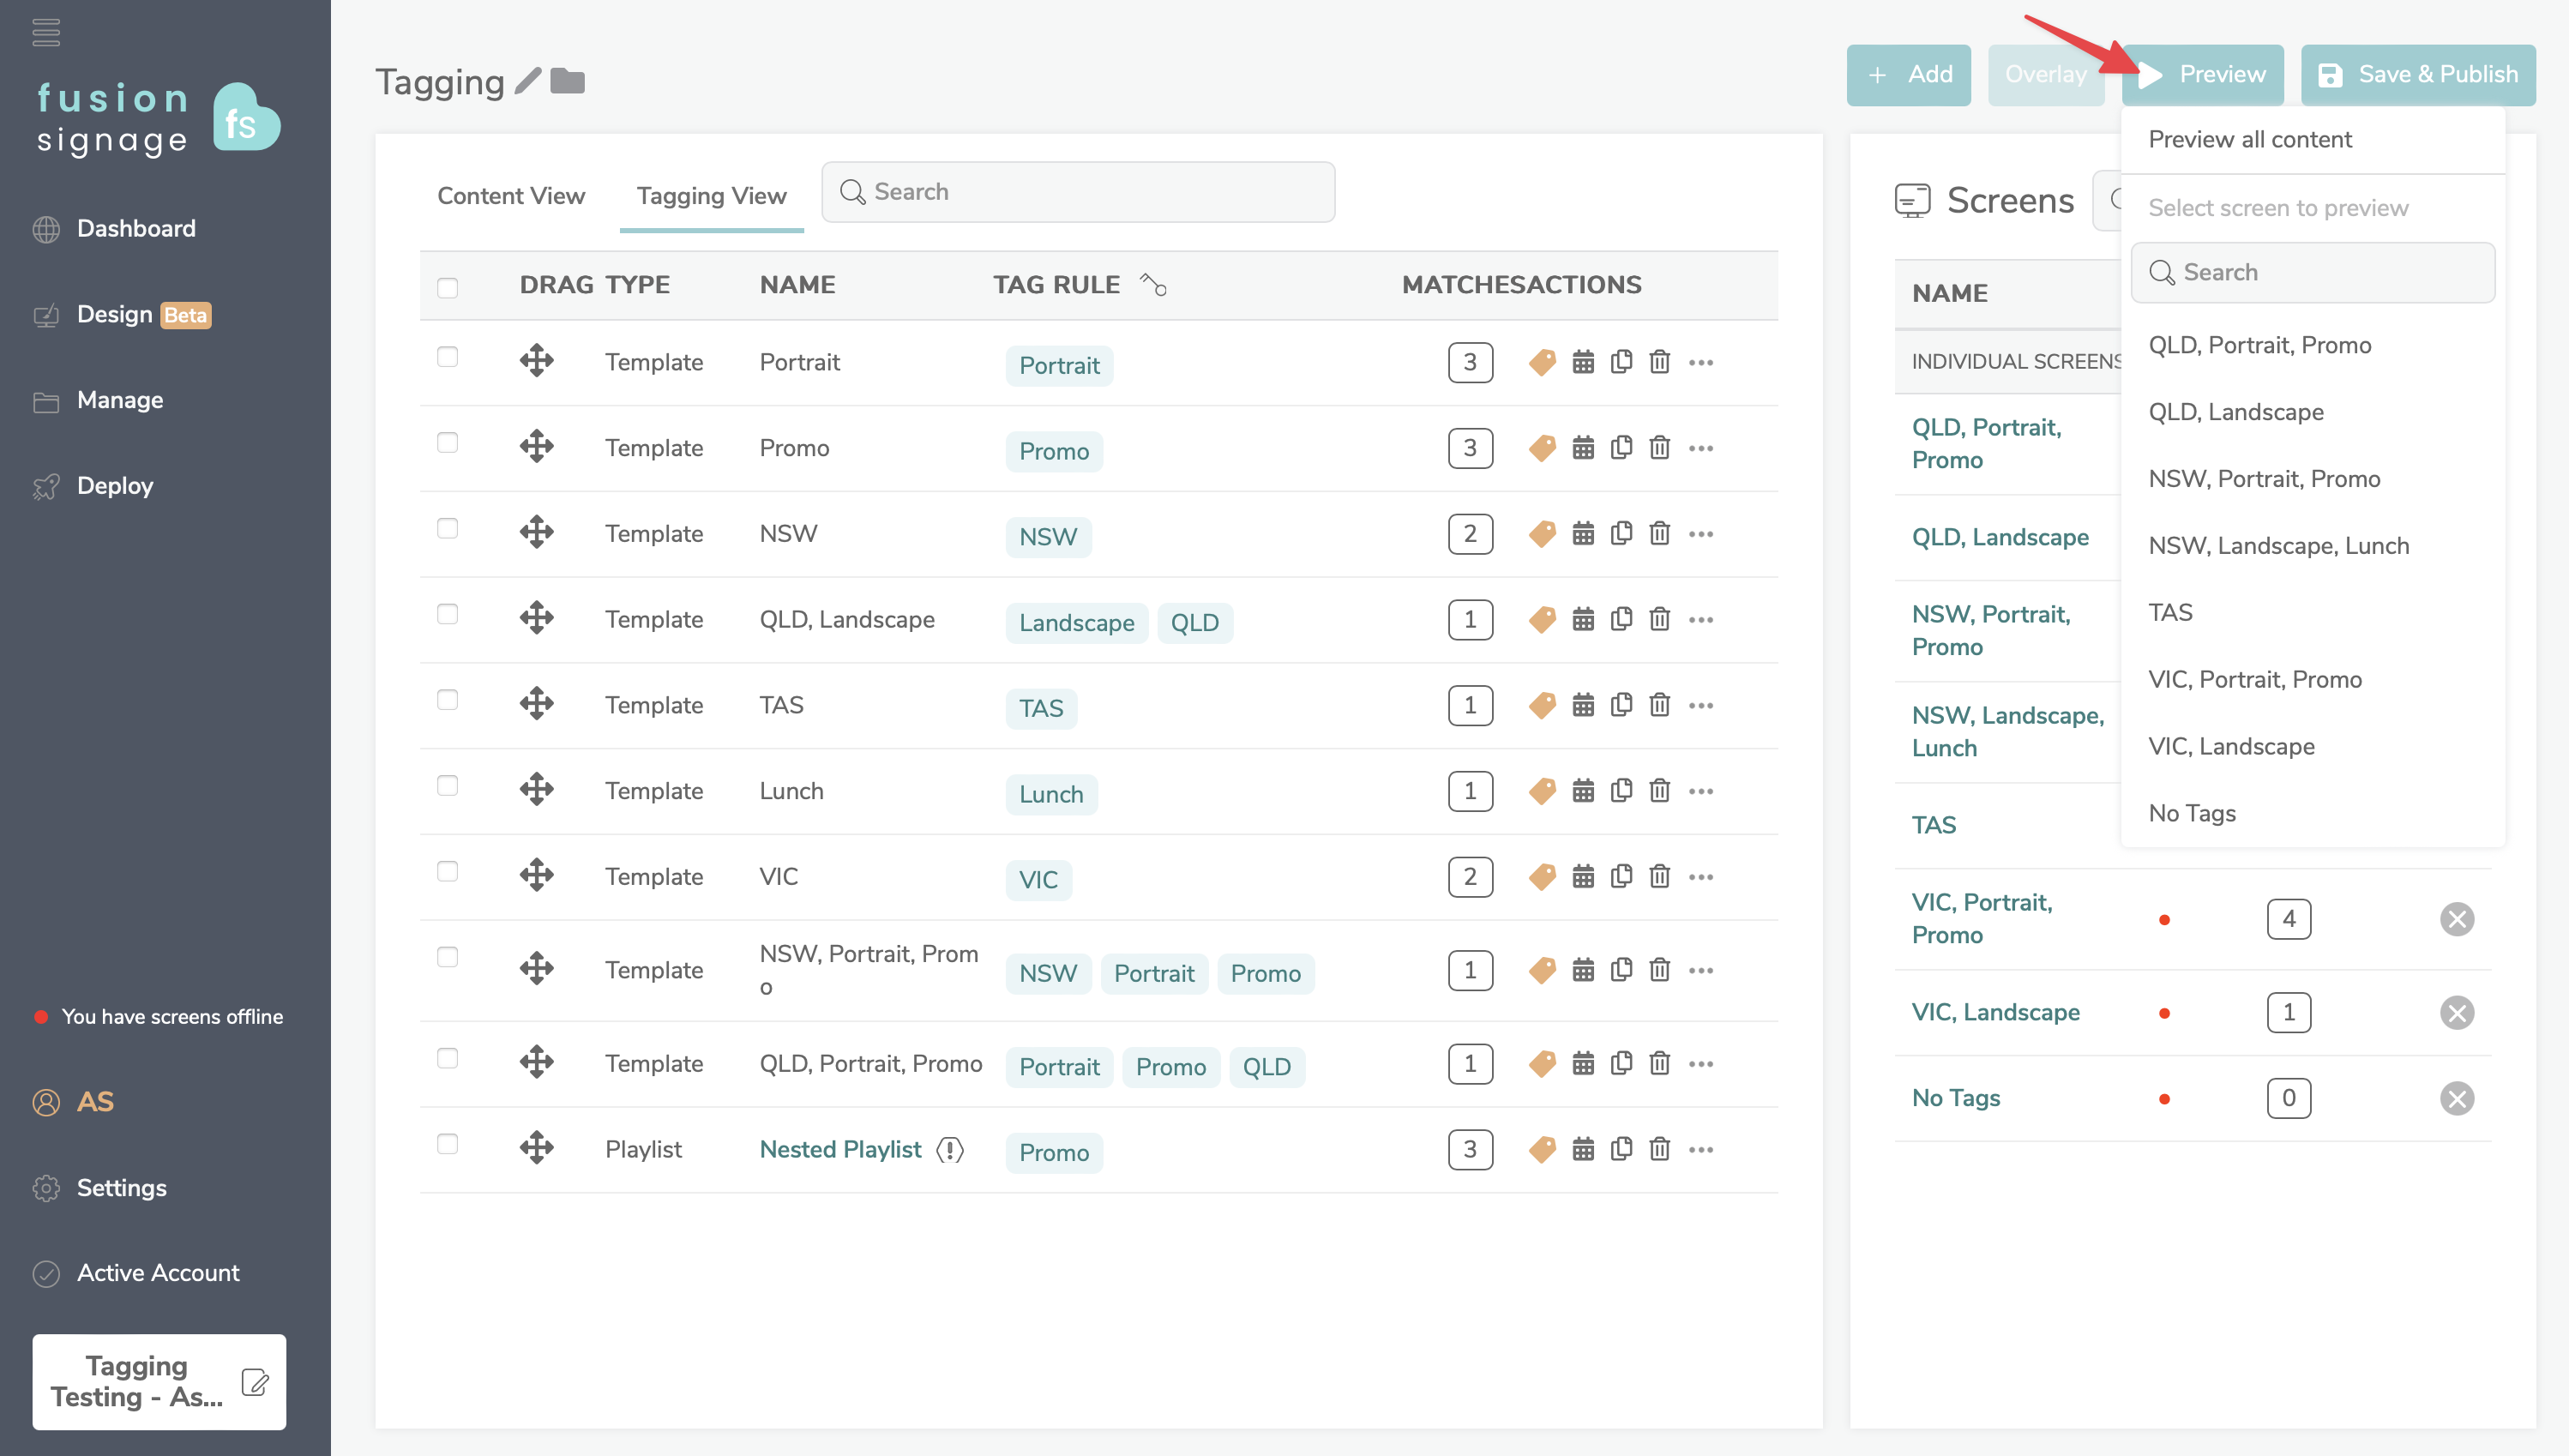
Once you're happy with the tags assigned to your content, preview and then click 'Save & Publish'. When previewing you can now choose to preview the specific screen which will show only the content assigned to play on that screen as per the tag rules, or preview all content which will show you a preview of the whole playlist.
Nested Playlists
You can also create tags for nested playlists. Add a tag rule to a nested playlist the same as you would a normal piece of content. It is important to note that any tag rules set within this nested playlist will be ignored. This is for complexity sake. When a playlist is nested inside another playlist it will only apply the rules set to the nested playlist as a whole, not the individual content inside that playlist.
Watch the Demo
Feedback and Support
As always we value your feedback. If you have any questions or need assistance, don't hesitate to email us at support@fusionsignage.com. We hope you enjoy the new tagging feature!