Sony Bravia Pro Range
Setting up Fusion Signage on your Sony Screen
This guide will take you through the steps of installing the Fusion Signage application through an APK for the Sony Bravia Pro Range commercial screens. These instructions will start assuming you have completed the initial 'out of the box' setup. Simply follow the prompts on screen, ensuring you connect your device to an internet connection when prompted.
Steps for installation
Installing the App on your device
- Sony Remote
- USB Memory stick with only the latest version of the Fusion Signage APK and nothing else (you can download the latest APK via https://fus.app/a.apk)
- An active internet connection
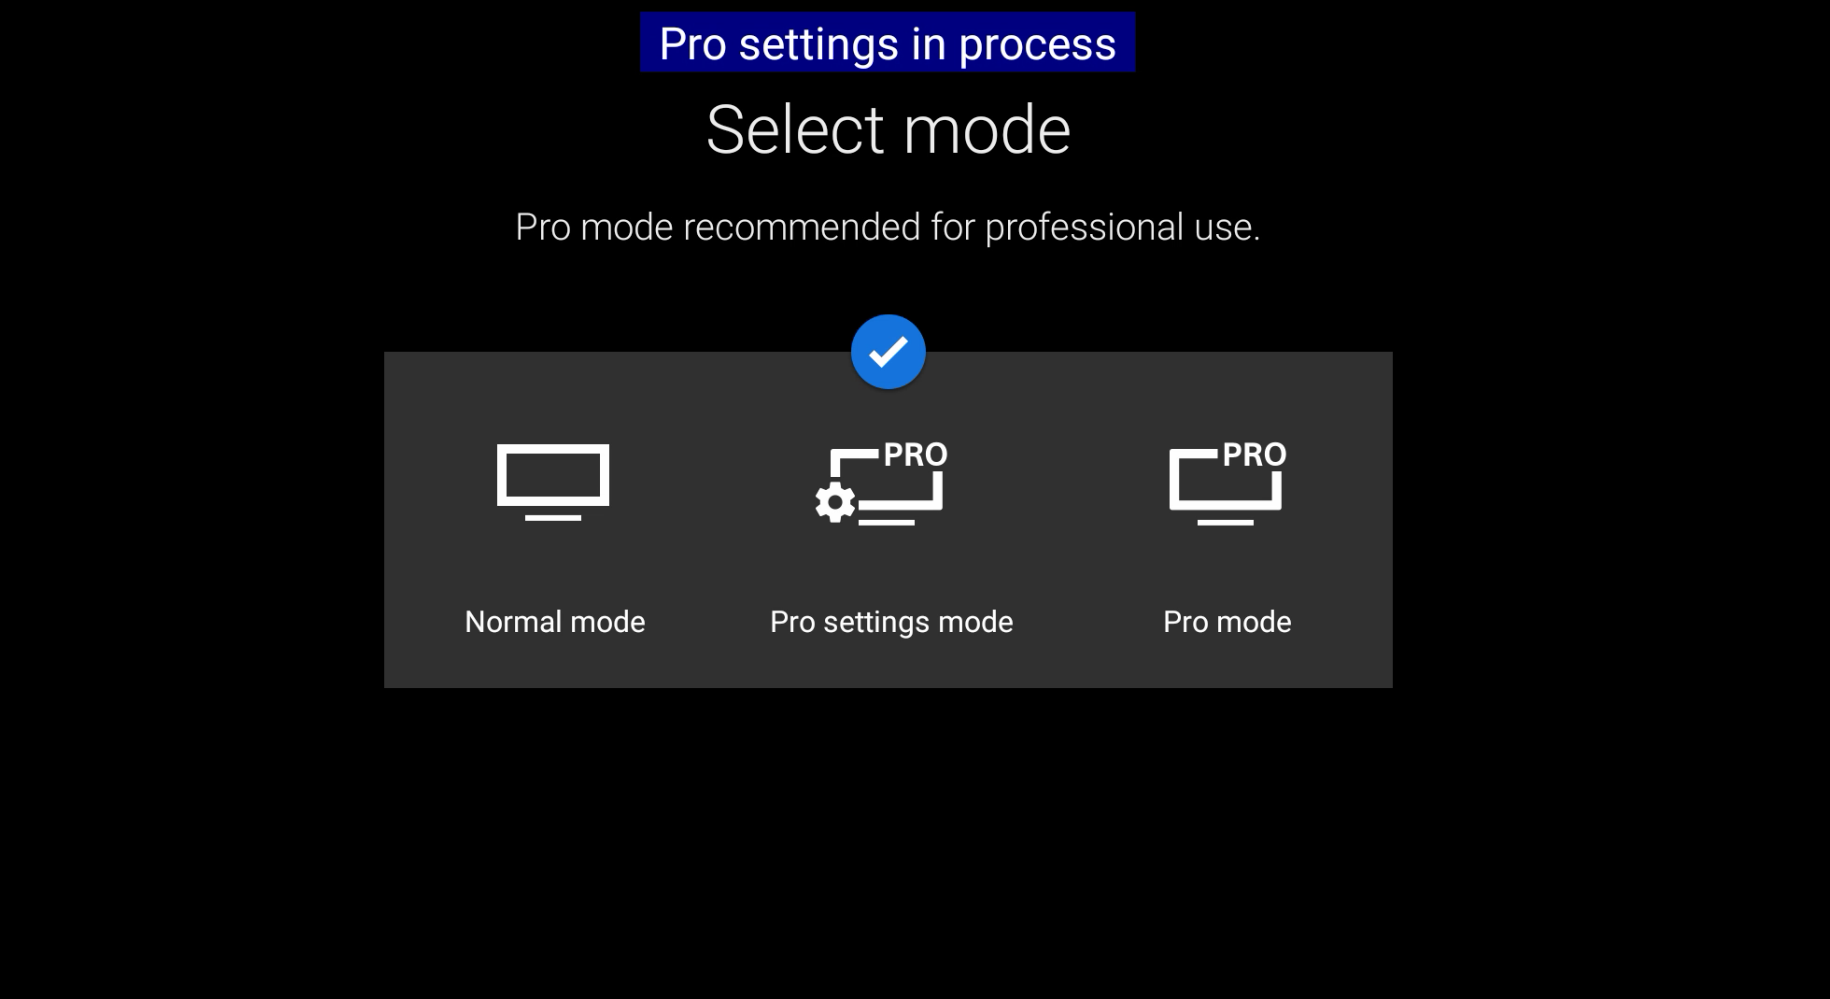
- The device will need to have pro settings turned on for the installation. To turn on pro settings press the following keys on the remote
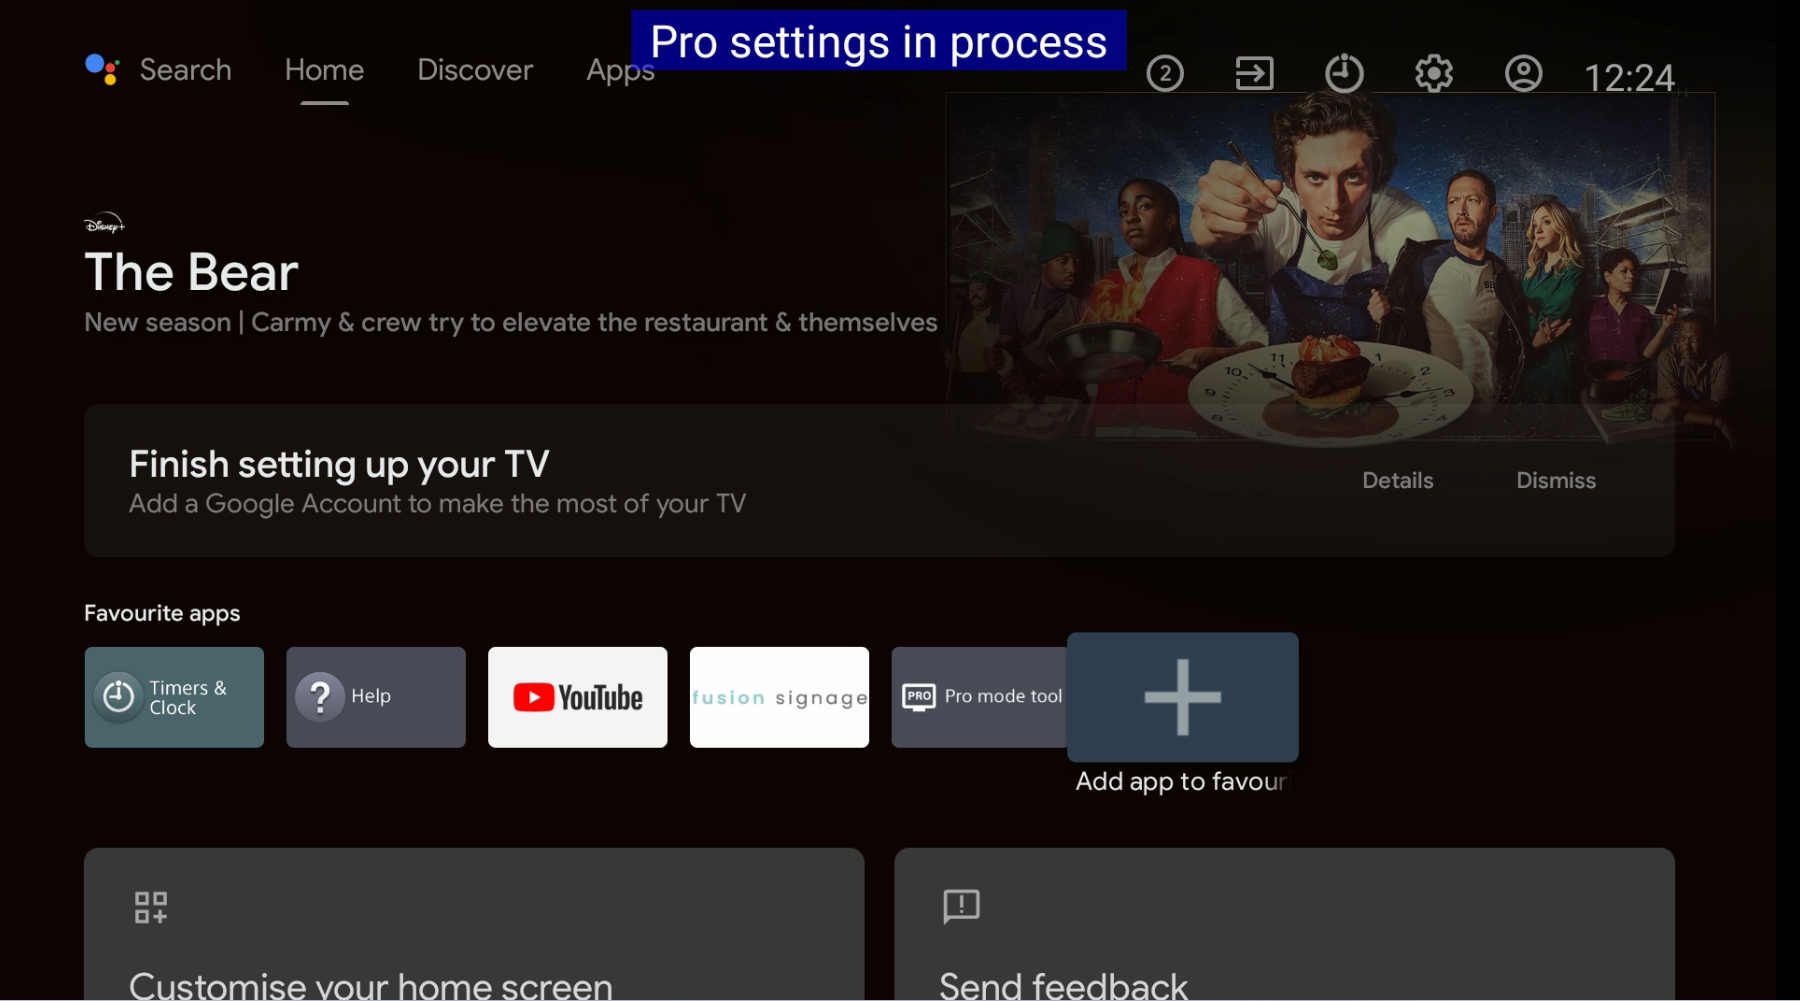
- Info -> Mute -> Volume Up -> Home
- You will know you have been successful when a blue label appears at the top of your screen saying "Pro settings in process"
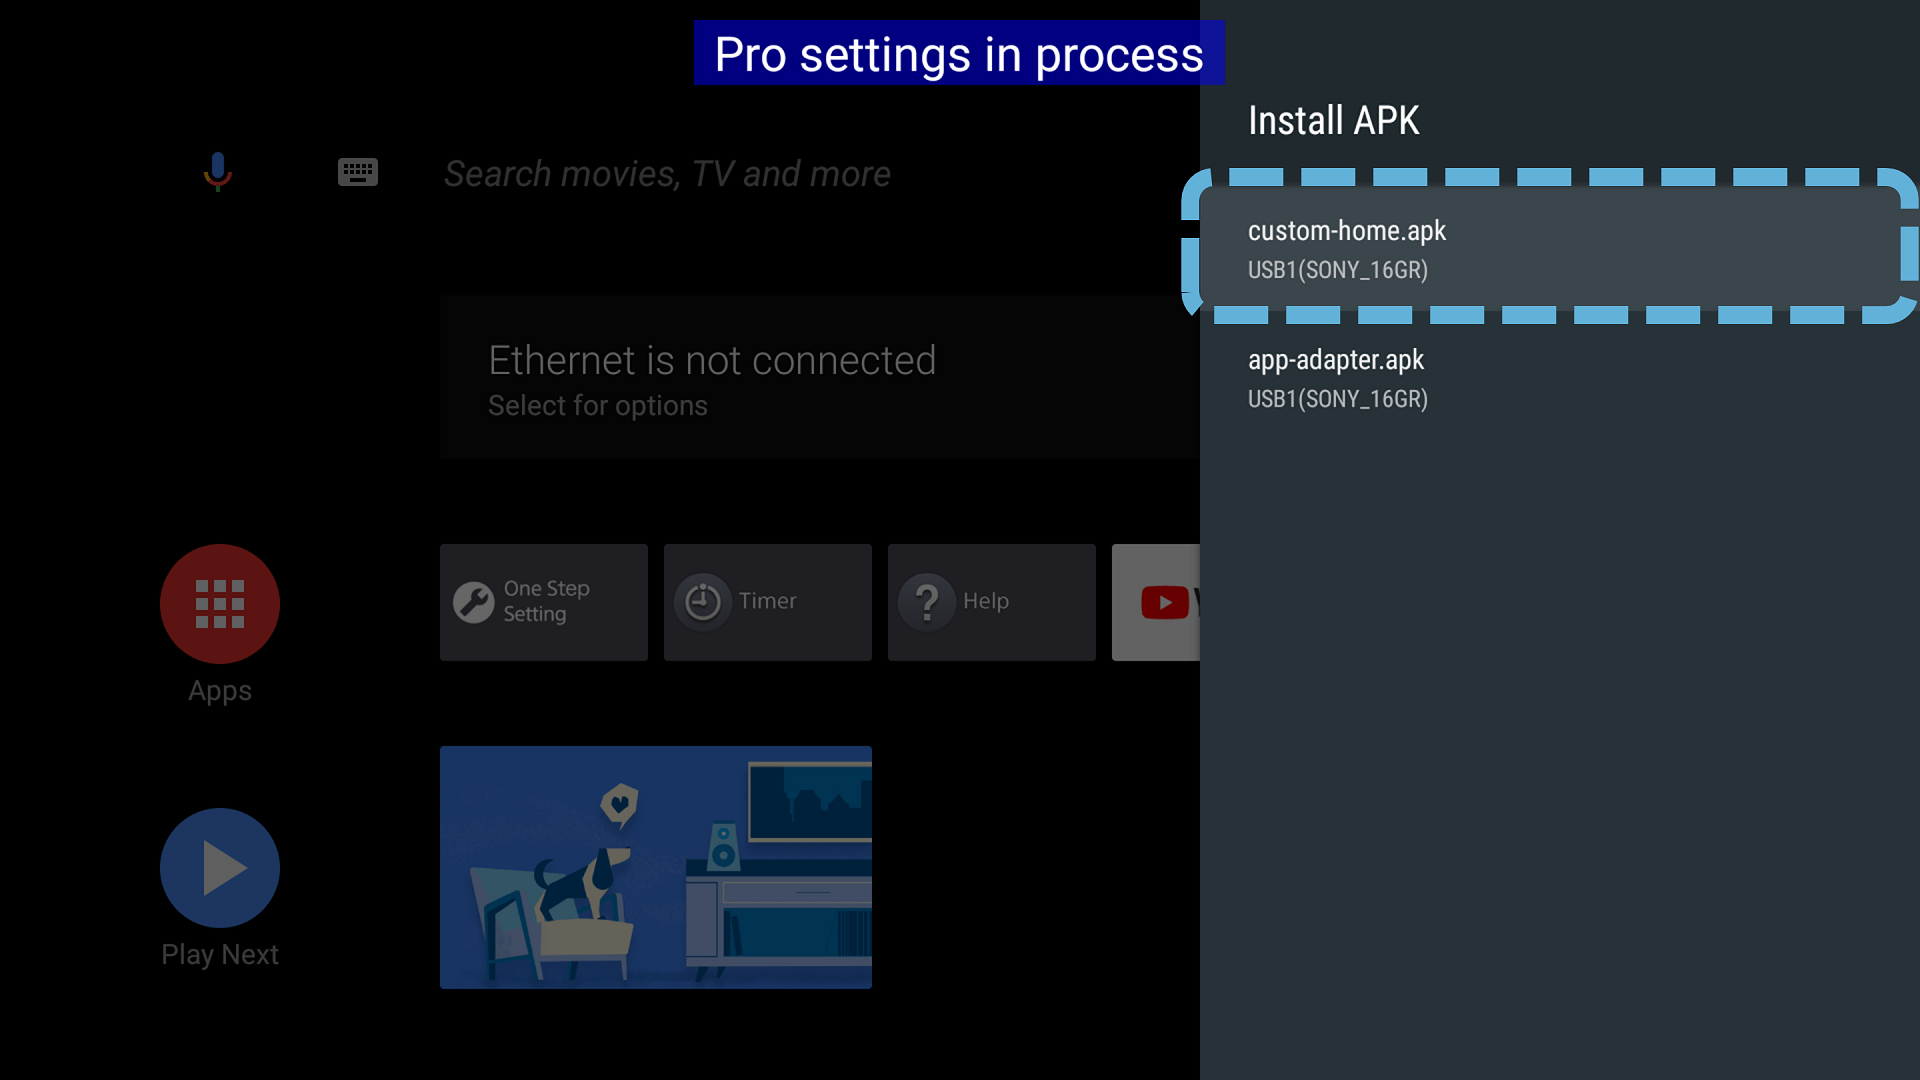
- Plug the USB with the APK into the screen via the available USB port
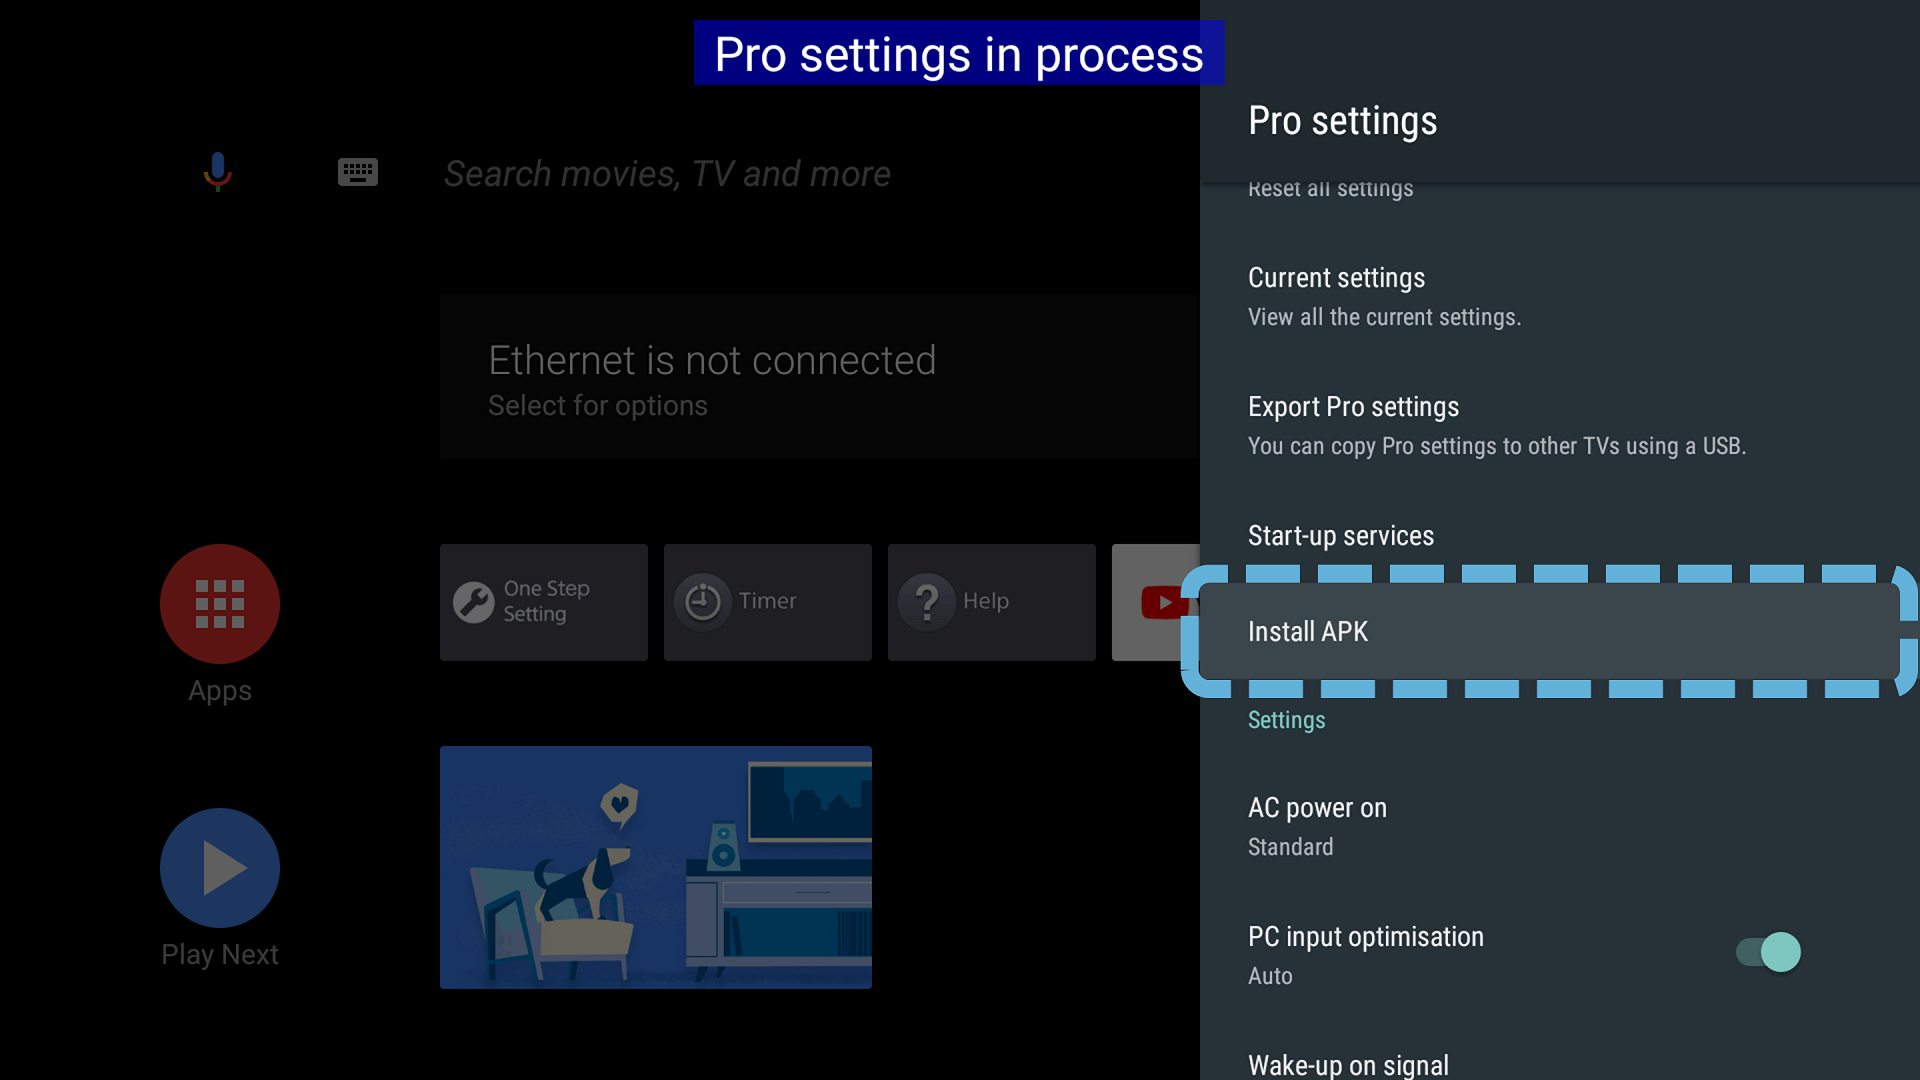
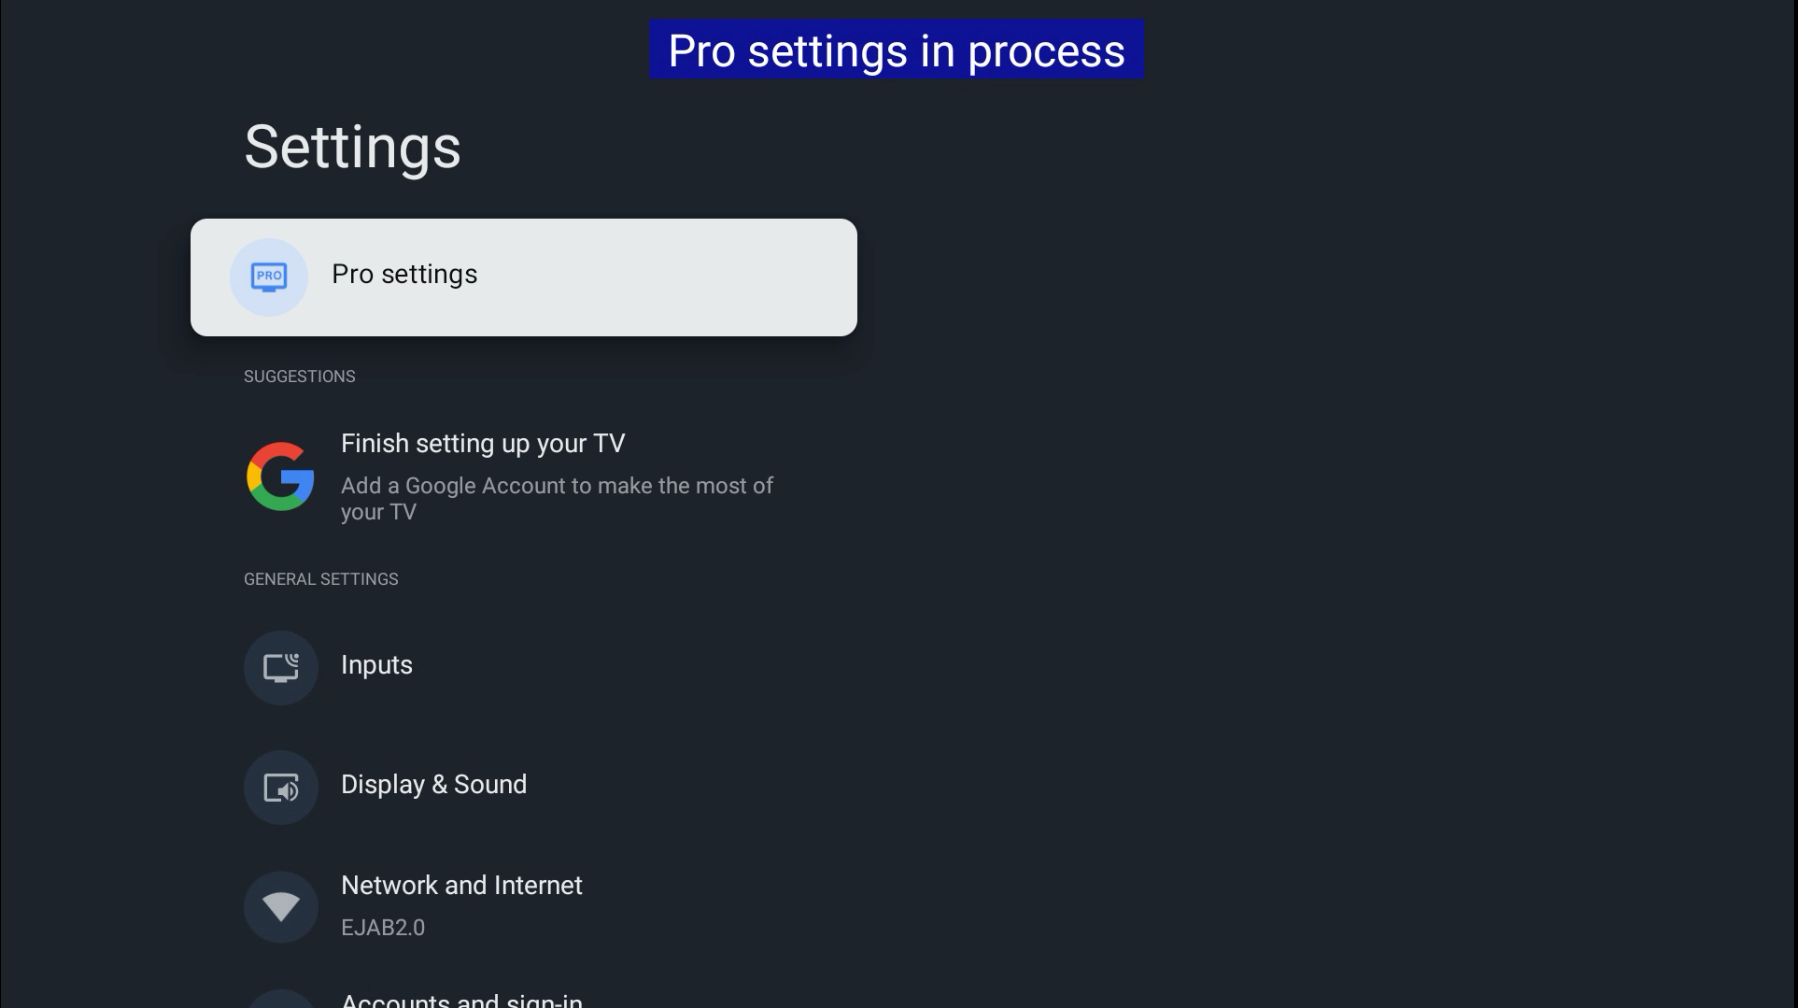
- Once pro settings are enabled, navigate to the settings menu (the gear icon at the top right of the screen) and go into the pro settings tab.
- Scroll down and select the Install APK button
- Select the APK from your USB (*note there should only be one APK folder as long as the USB was empty)
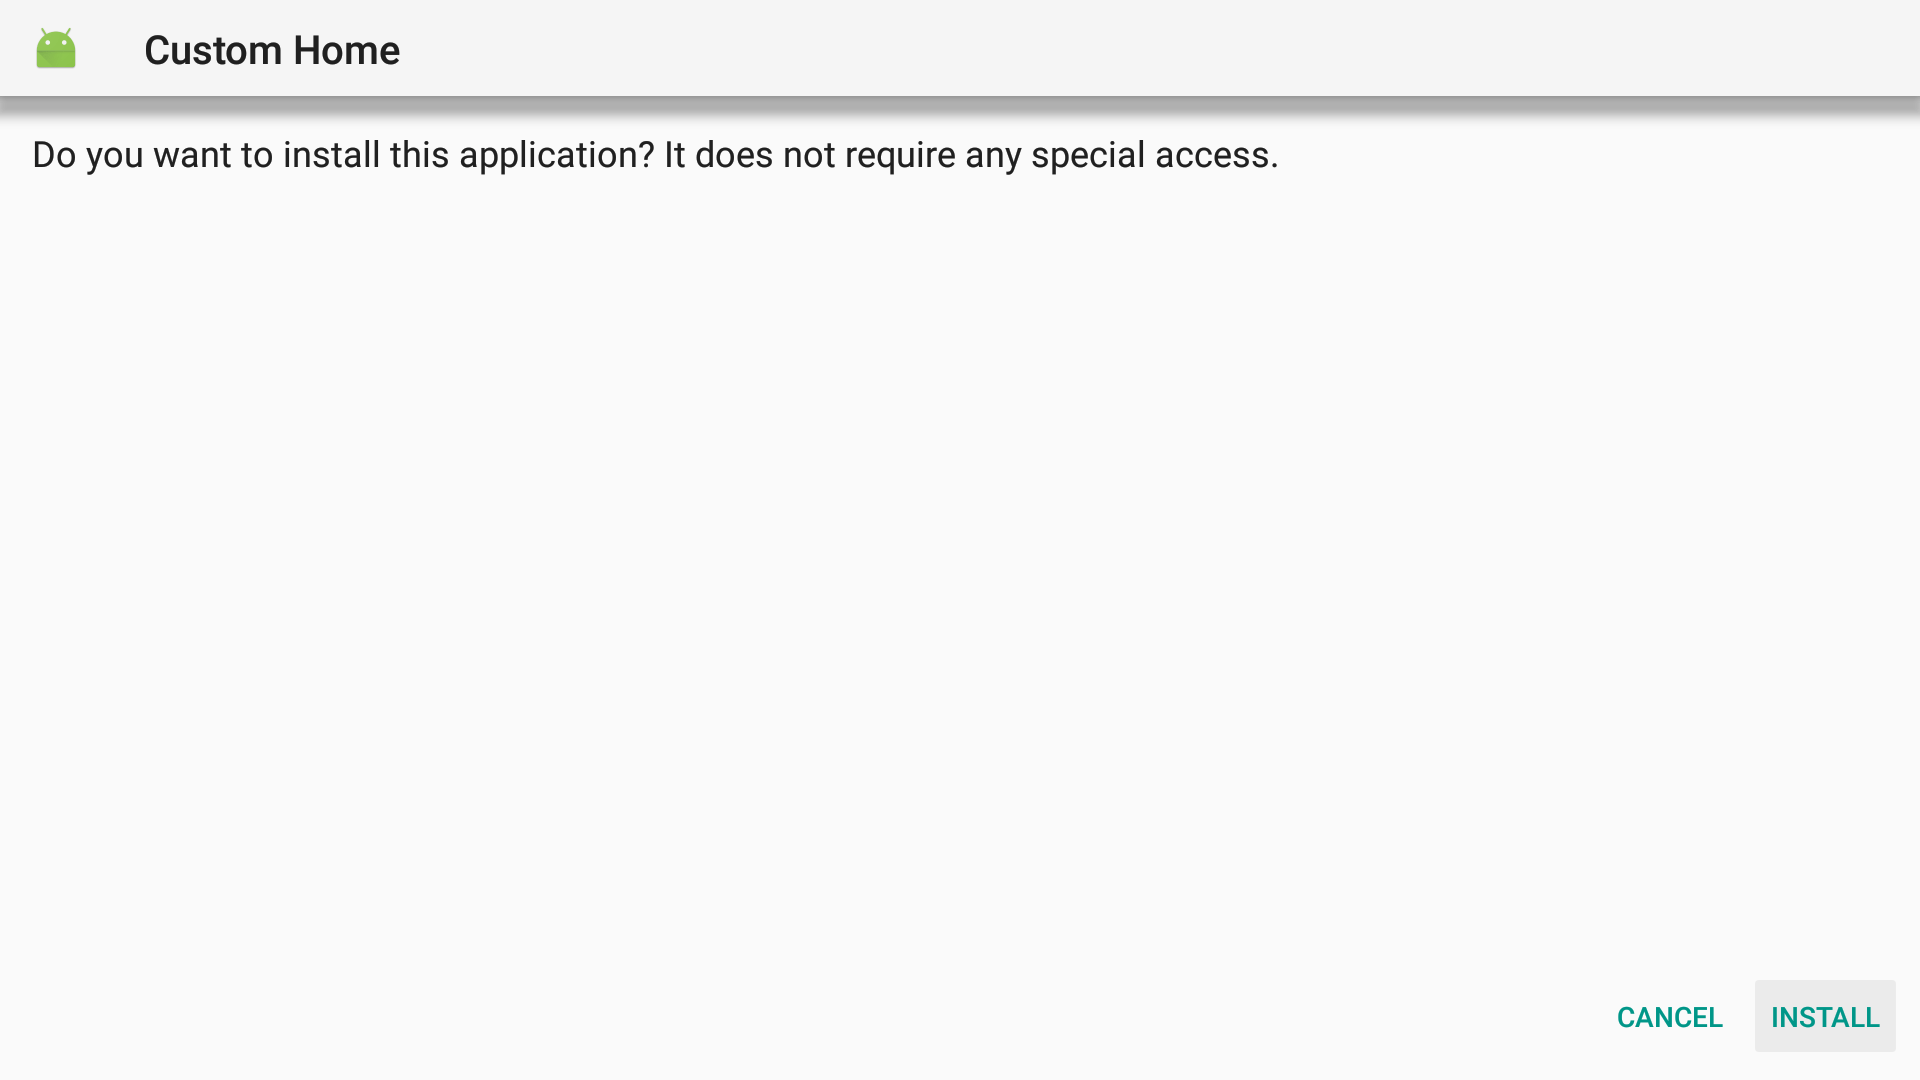
- Press install
- Once installation is complete the Fusion Signage application will be installed on your screen and the screens identity code will appear on the screen.
There are a few more settings you can enable for customisation and for a more seamless experience using the app. See these settings below.
Power on/off Schedule
Energy saving settings are on by default and the screen will turn off after 4 hours. You will need to turn this off to avoid the screen powering off after 4 hours.
- Navigate to settings -> scroll down to system -> power and energy -> energy saver and toggle turn off display after to never
You can set the times for the display to turn on and off automatically, including a schedule to run periodically (daily or weekly).
- Ensure you are in Pro Settings mode (See step 1 of steps for installation)
- Navigate to settings -> Pro settings -> Power Scheduling
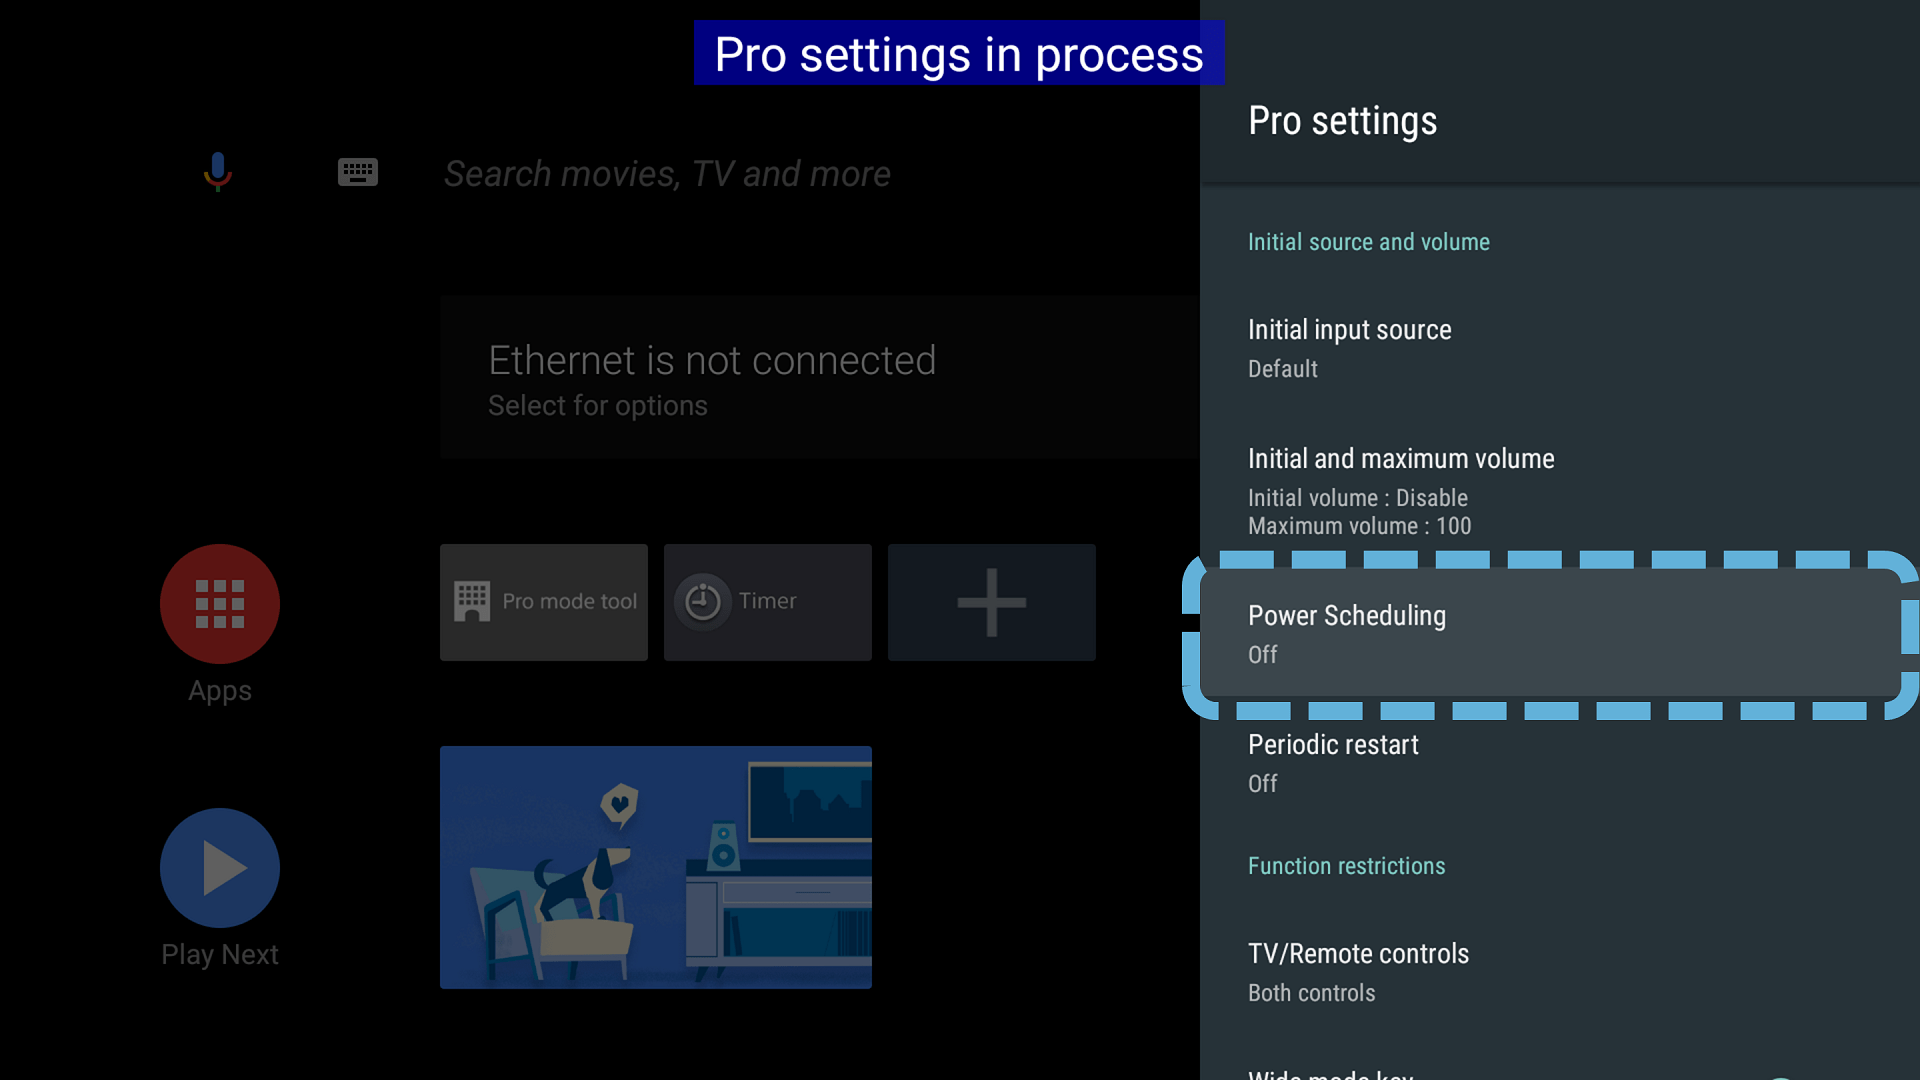
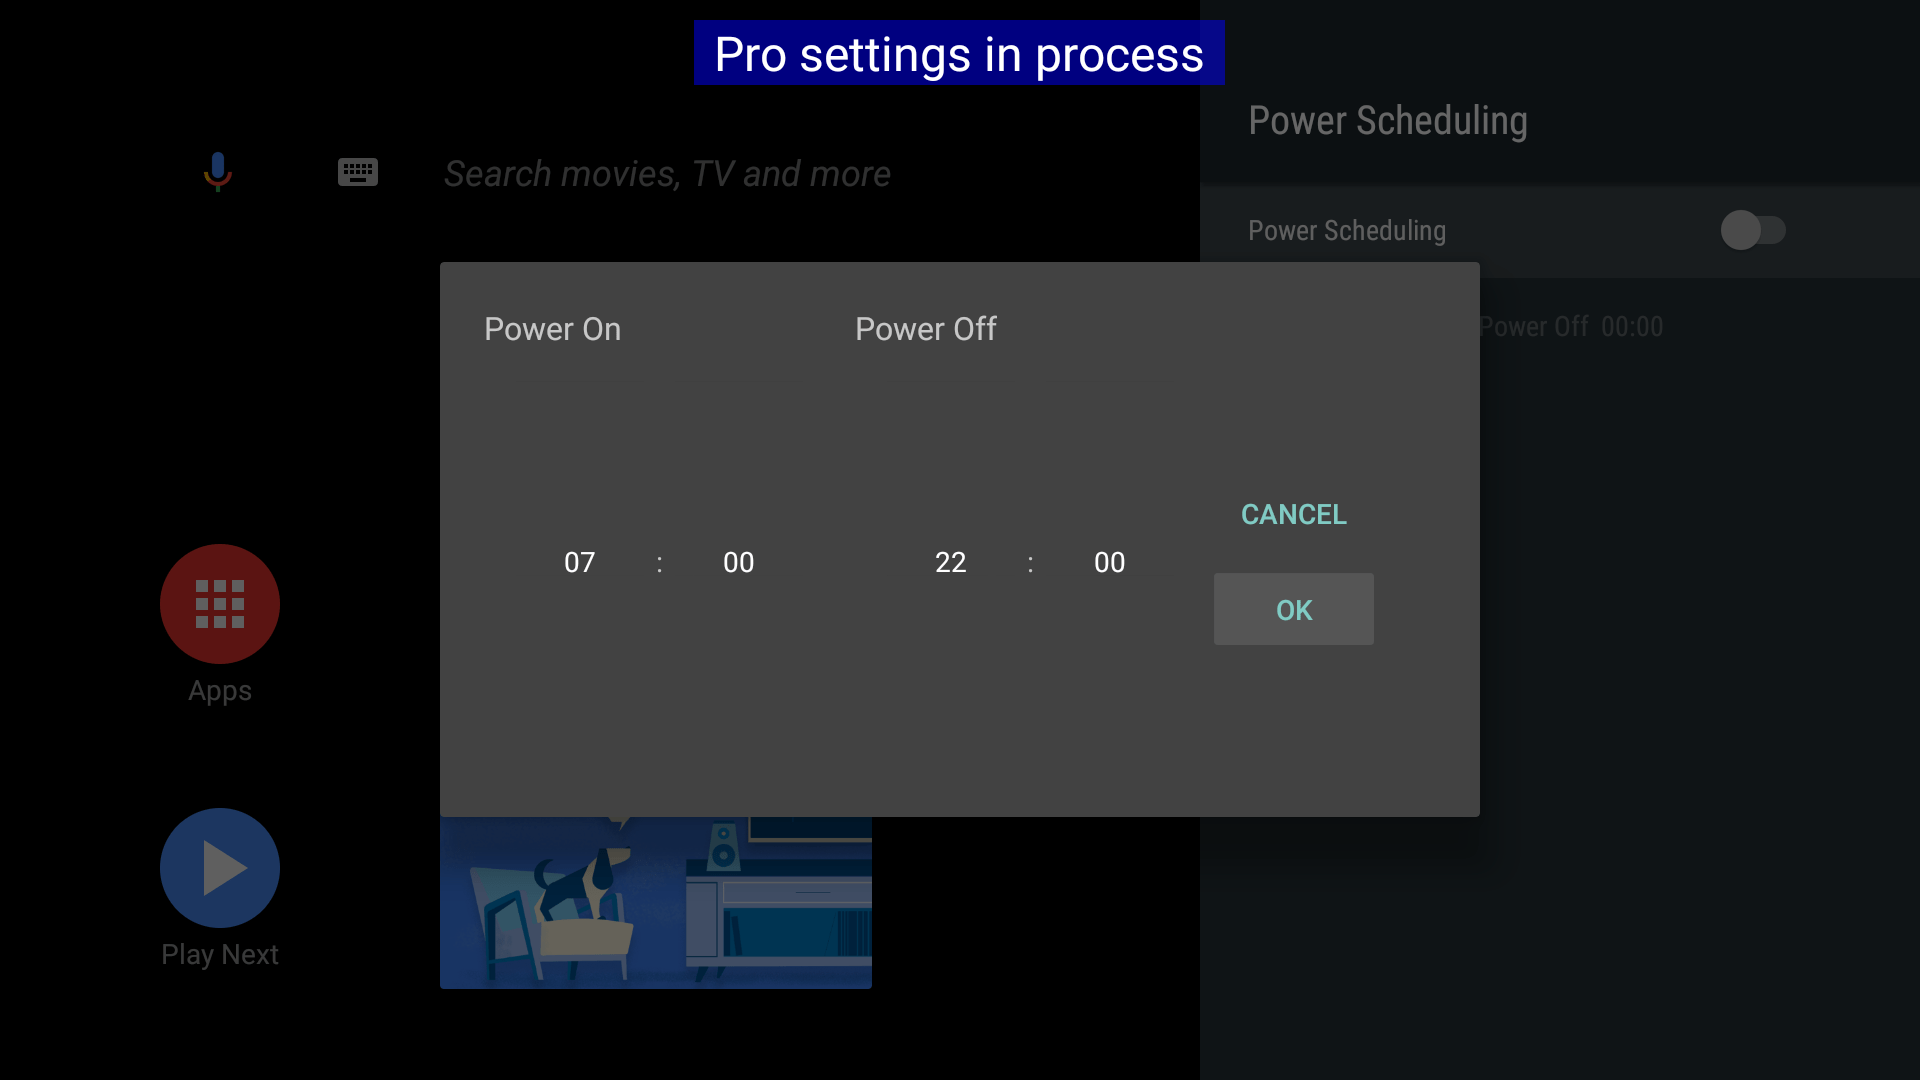
- Toggle the power scheduling to on, select the power on power off button and set to your desired on/off times. Press OK to confirm.
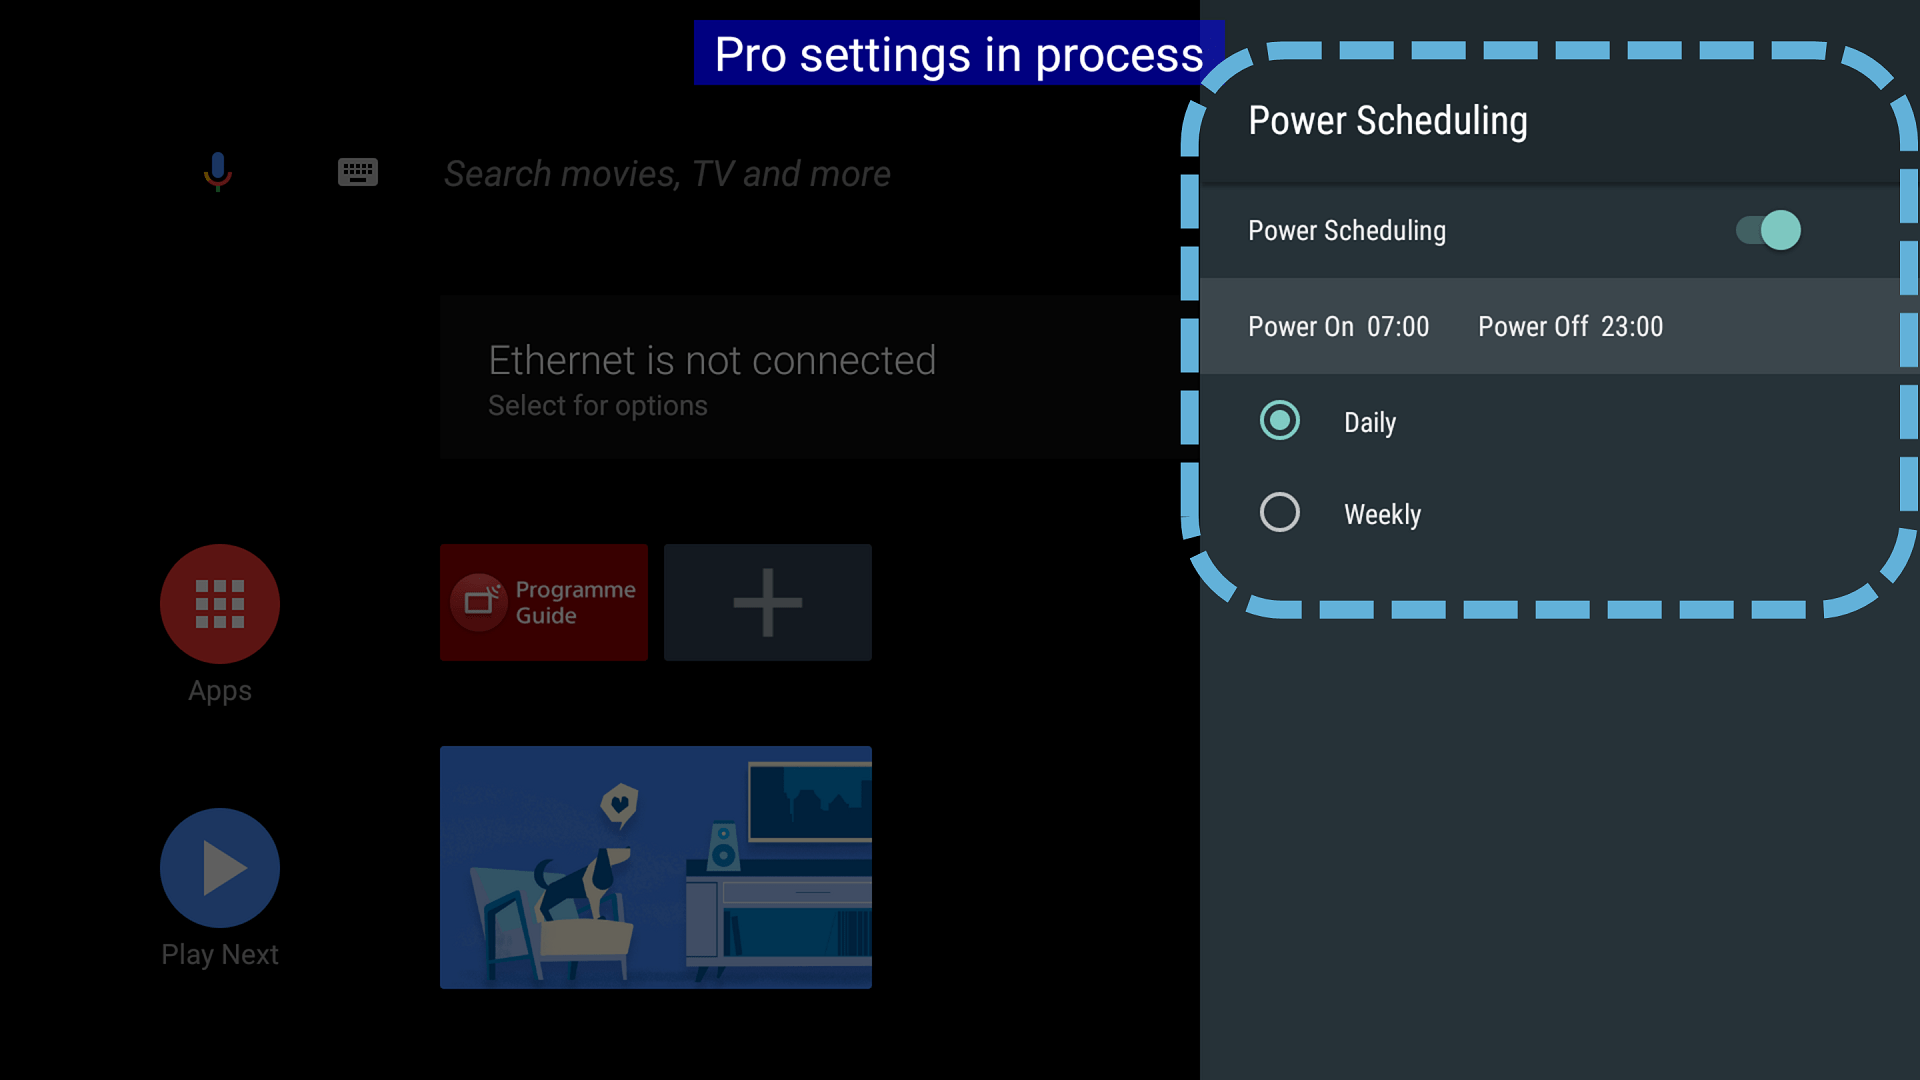
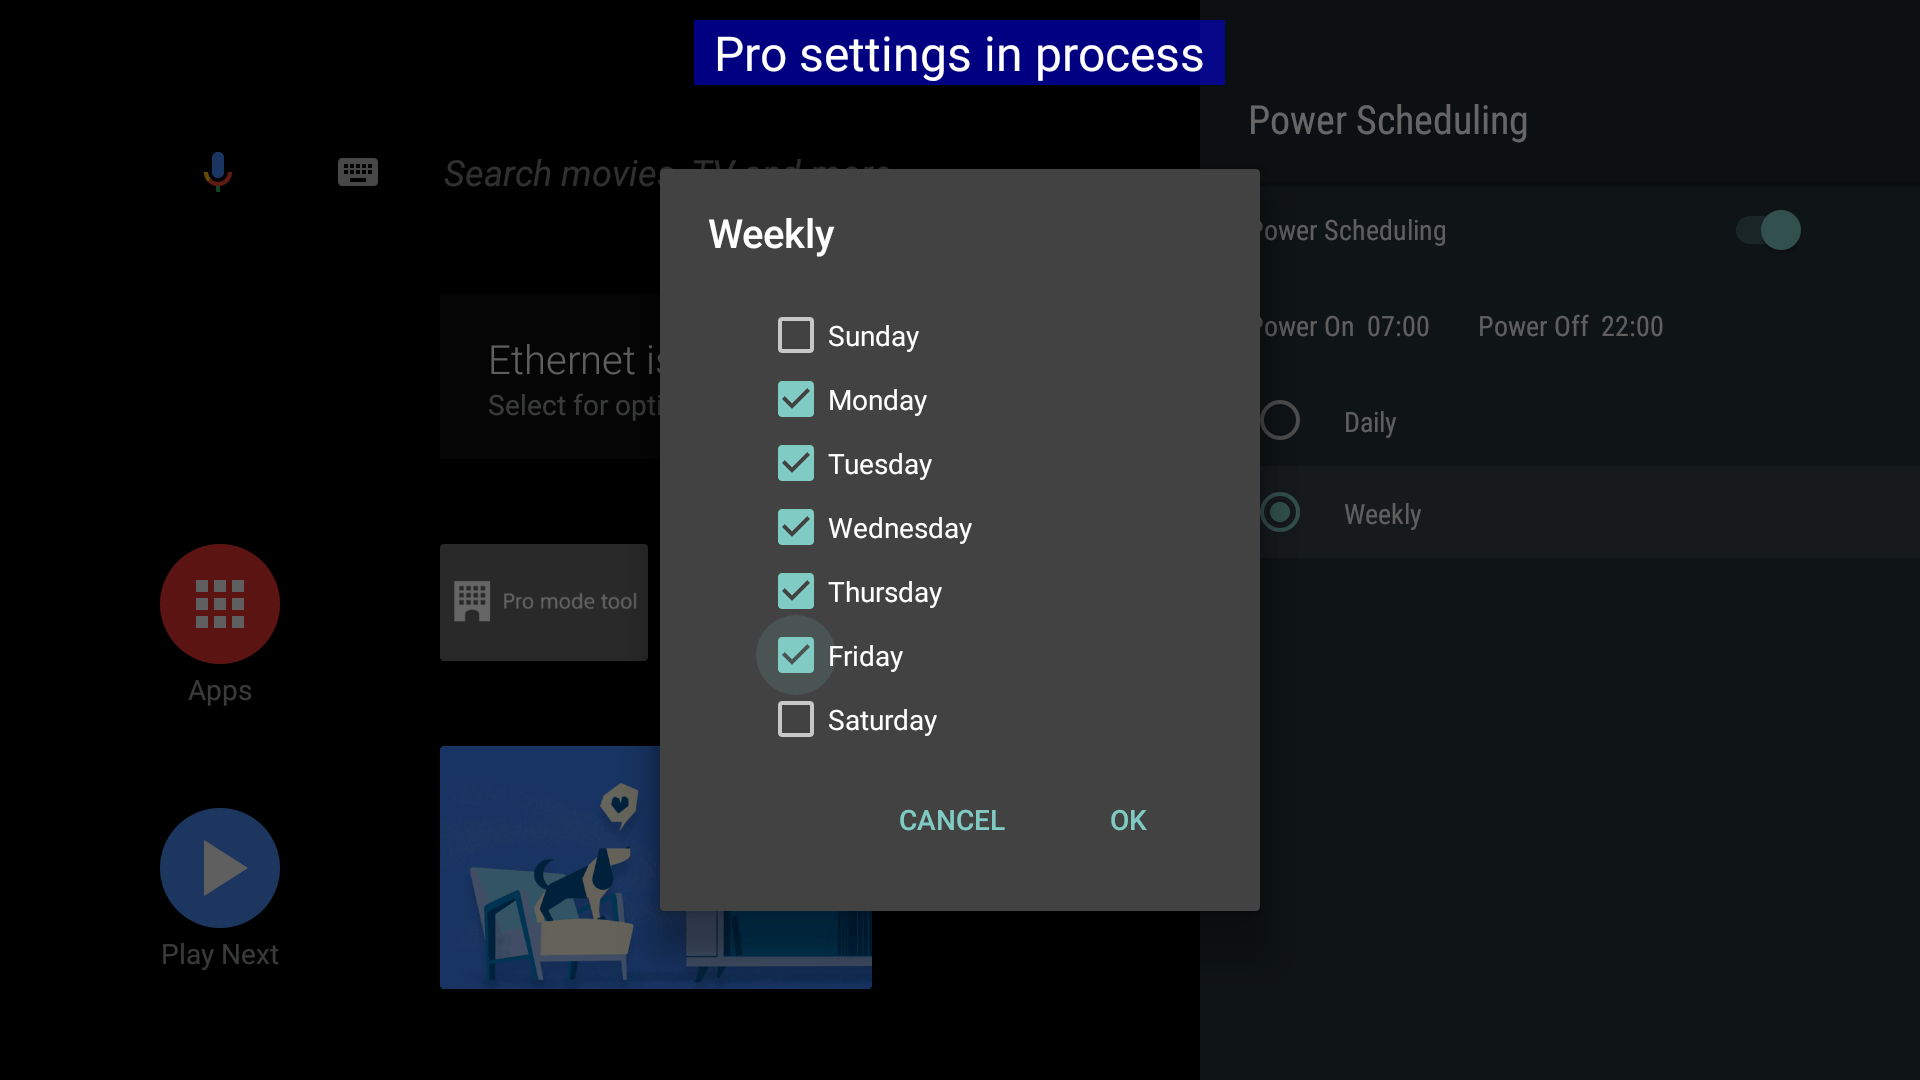
- Select a run schedule, it can be set to either Daily or Weekly.
Set Fusion Signage App to auto boot when screen turns on
- Ensure Pro Settings are enabled
Go to settings in the top right of the home page
Select pro settings
- Scroll down and select initial input source under the initial source and volume heading
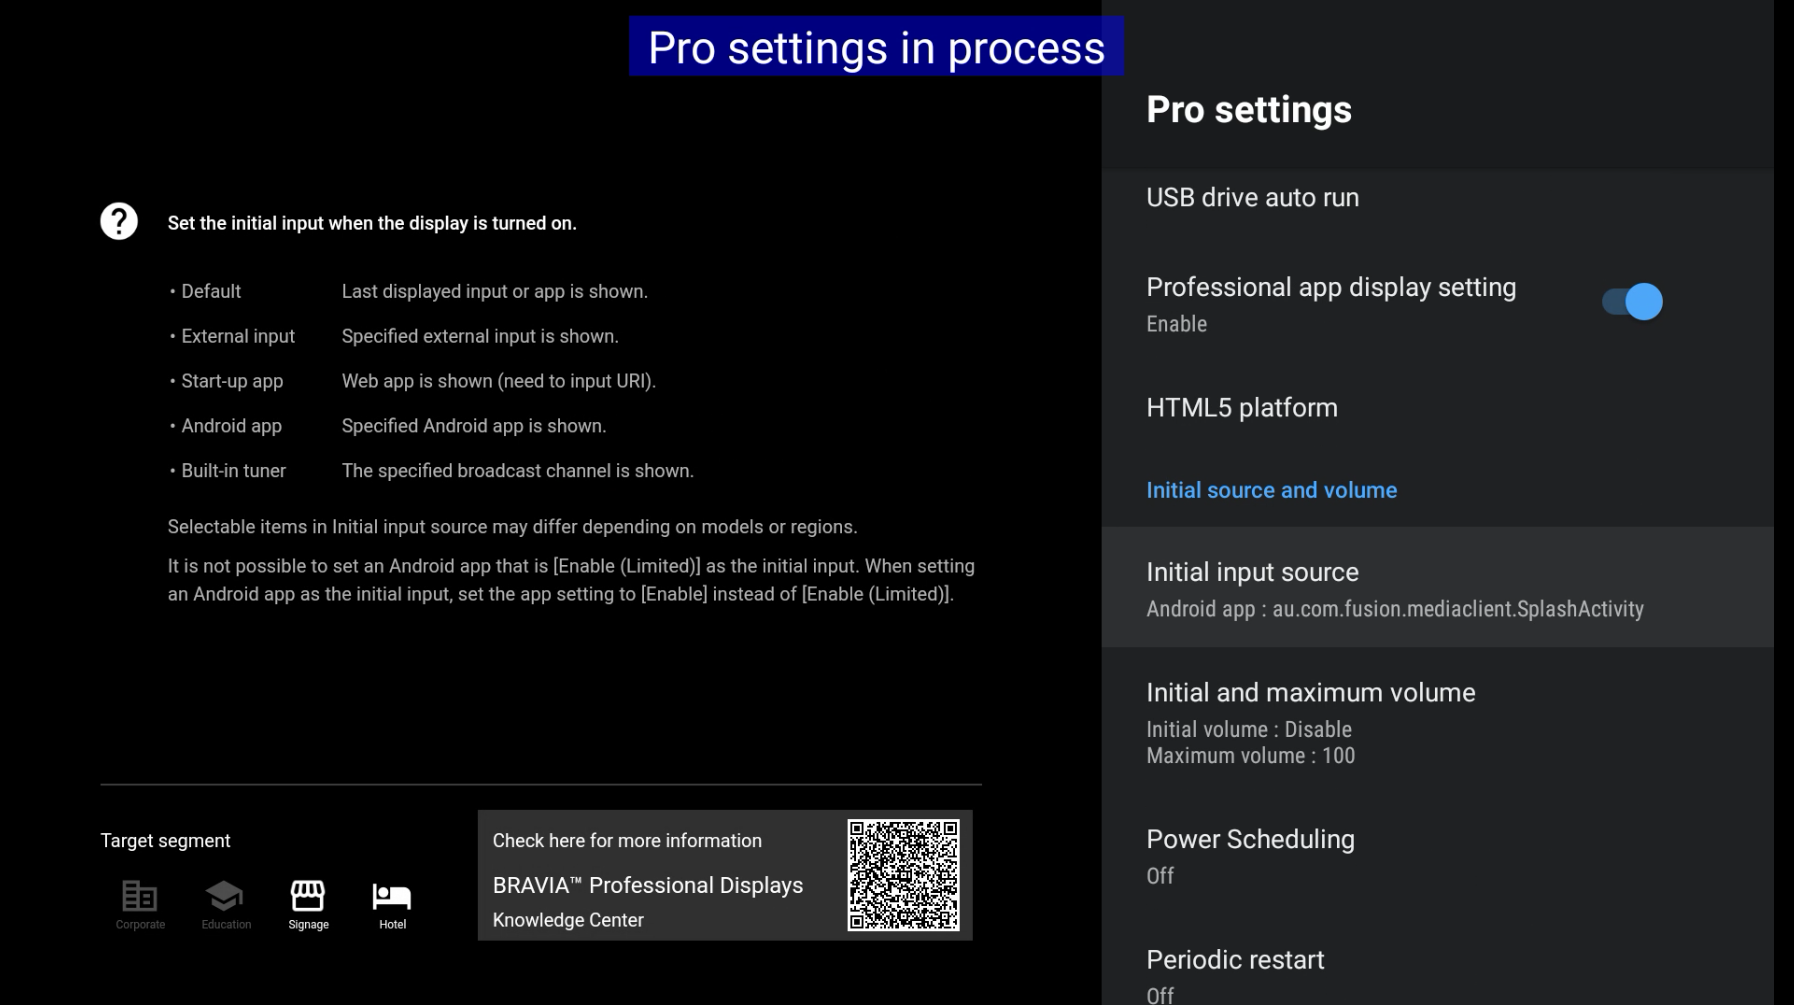
- Select Android App
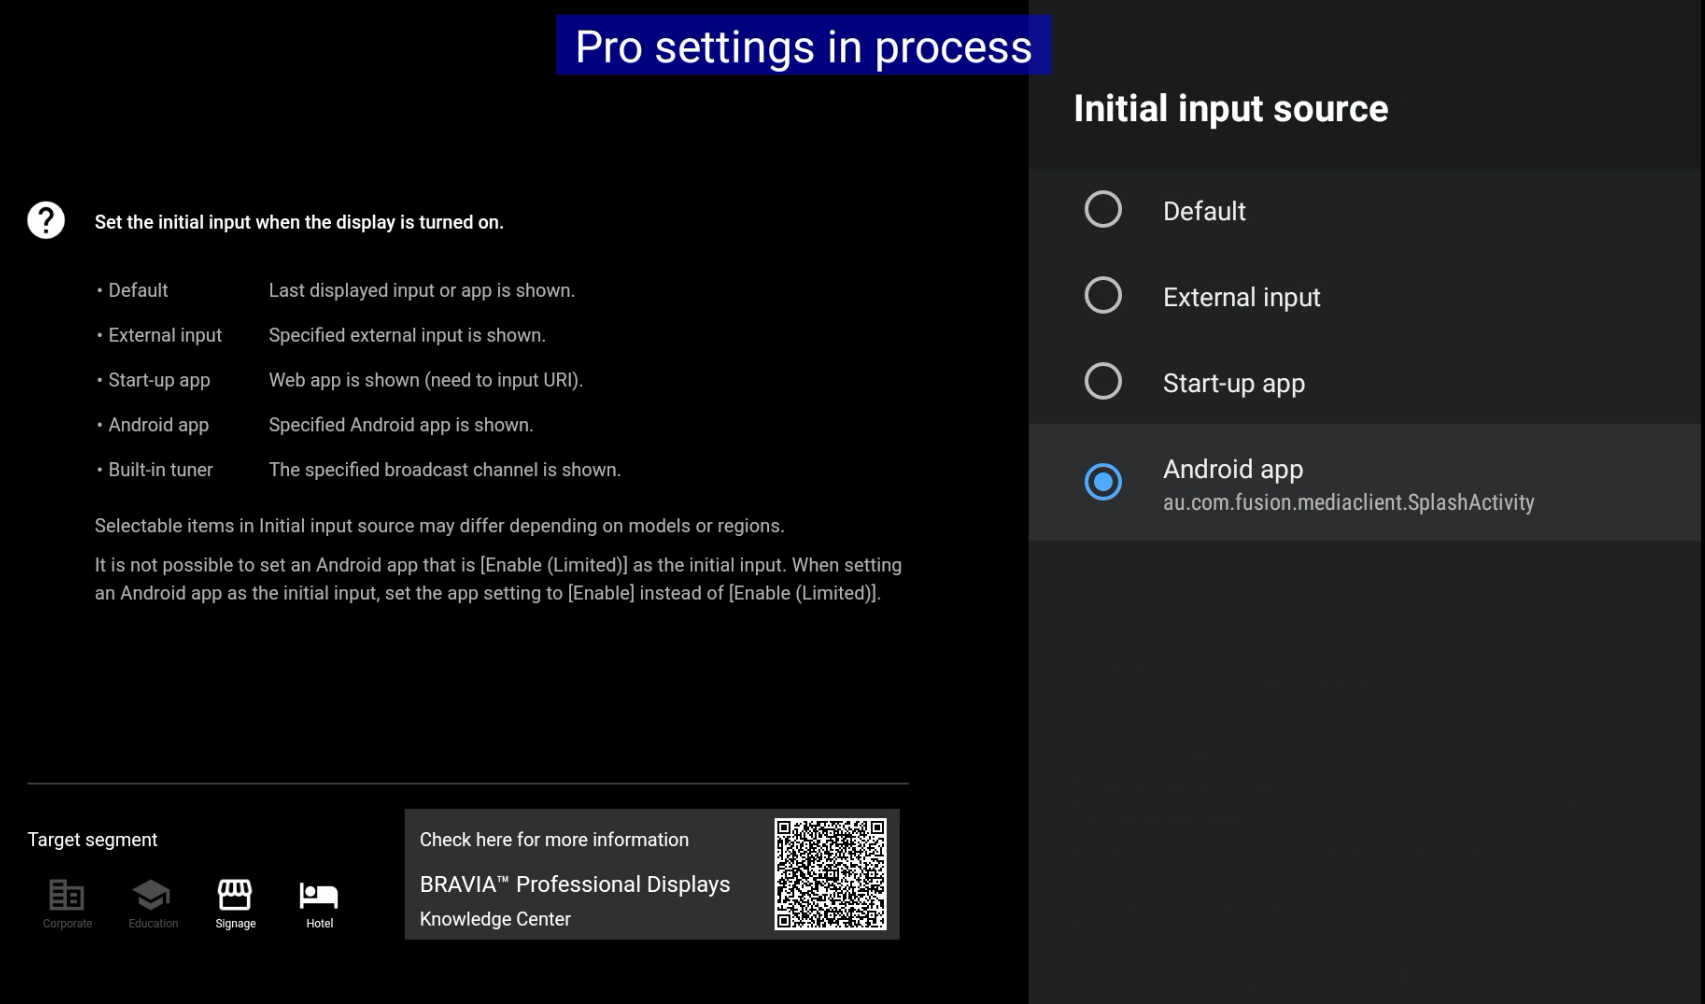
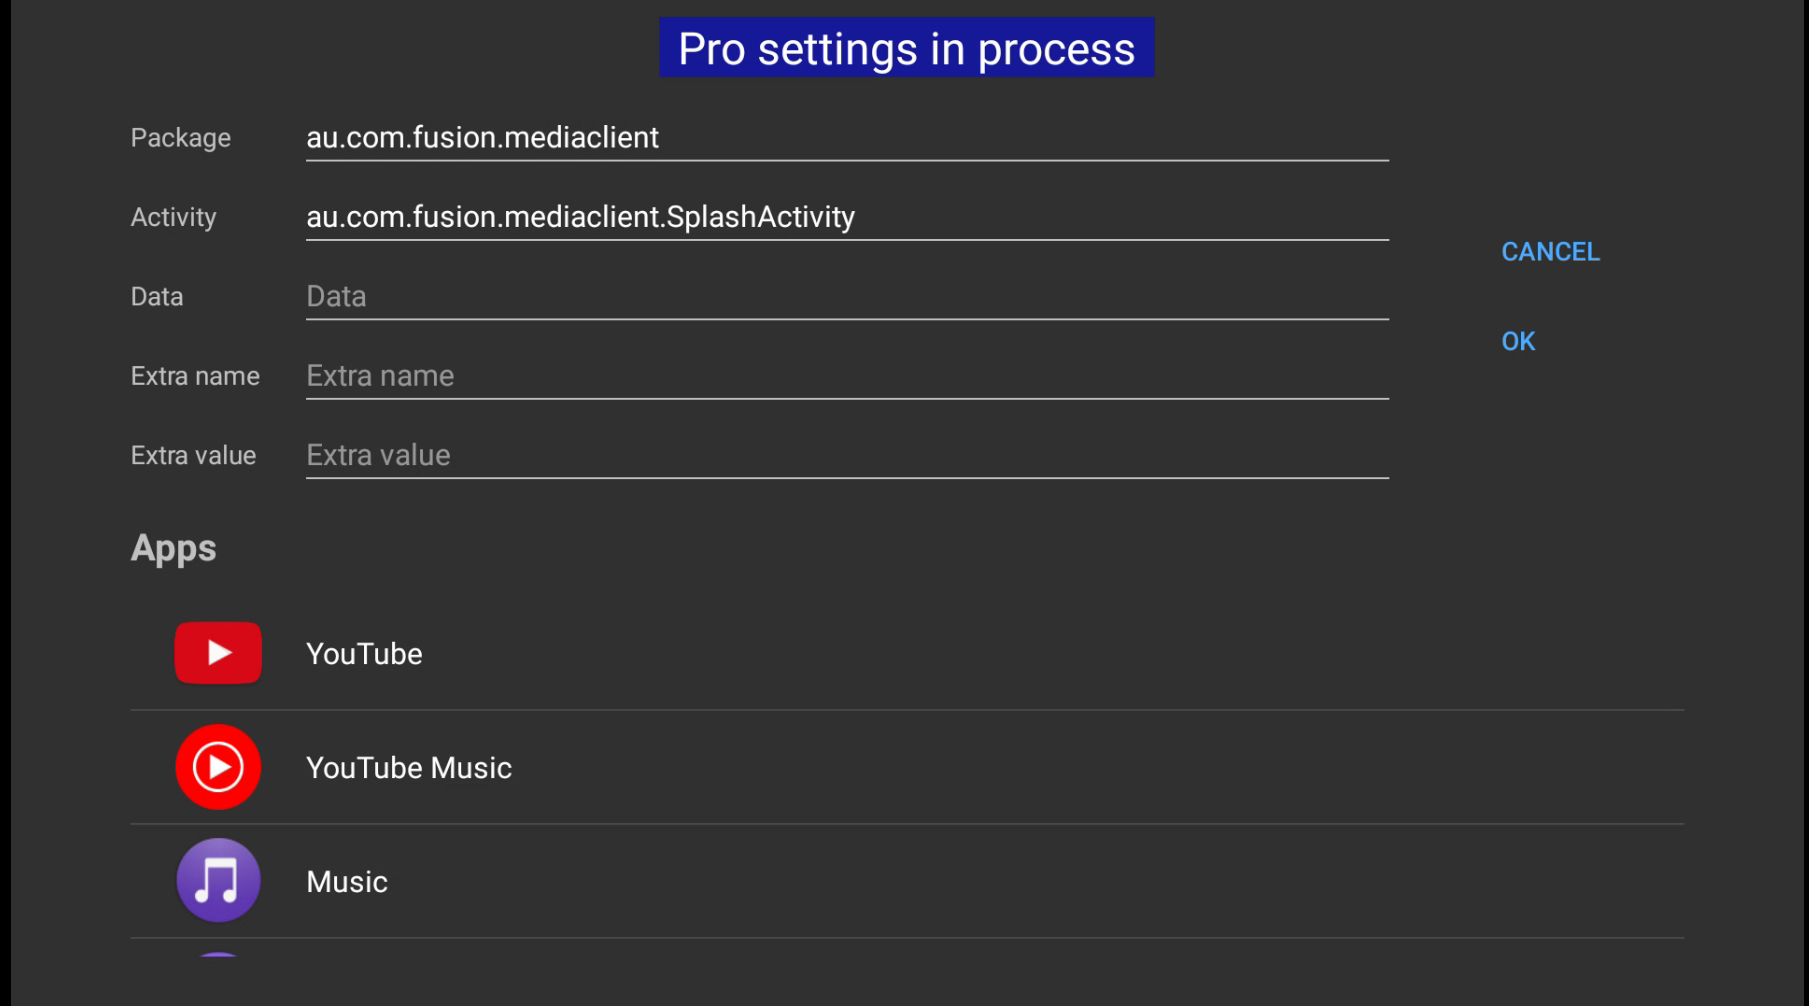
- In the package section input au.com.fusion.mediaclient and in the activity section input au.com.fusion.mediaclient.SplashActivity and press ok
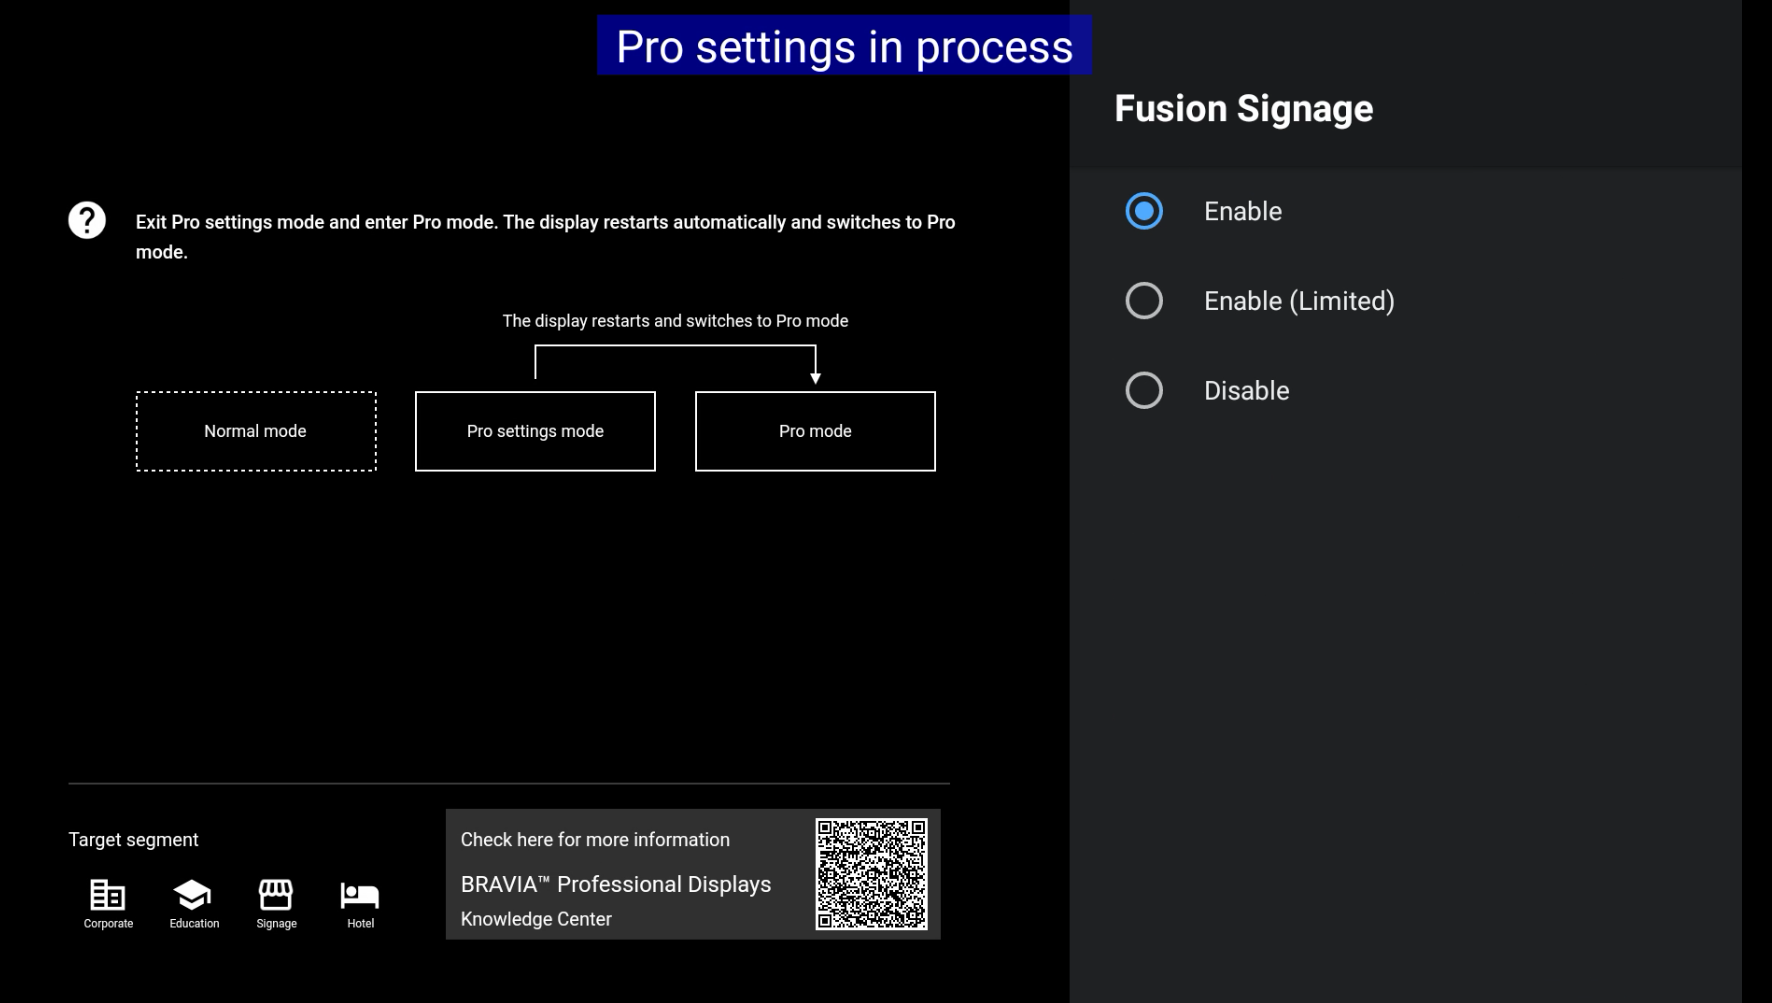
- Go back into the pro settings and scroll down to apps
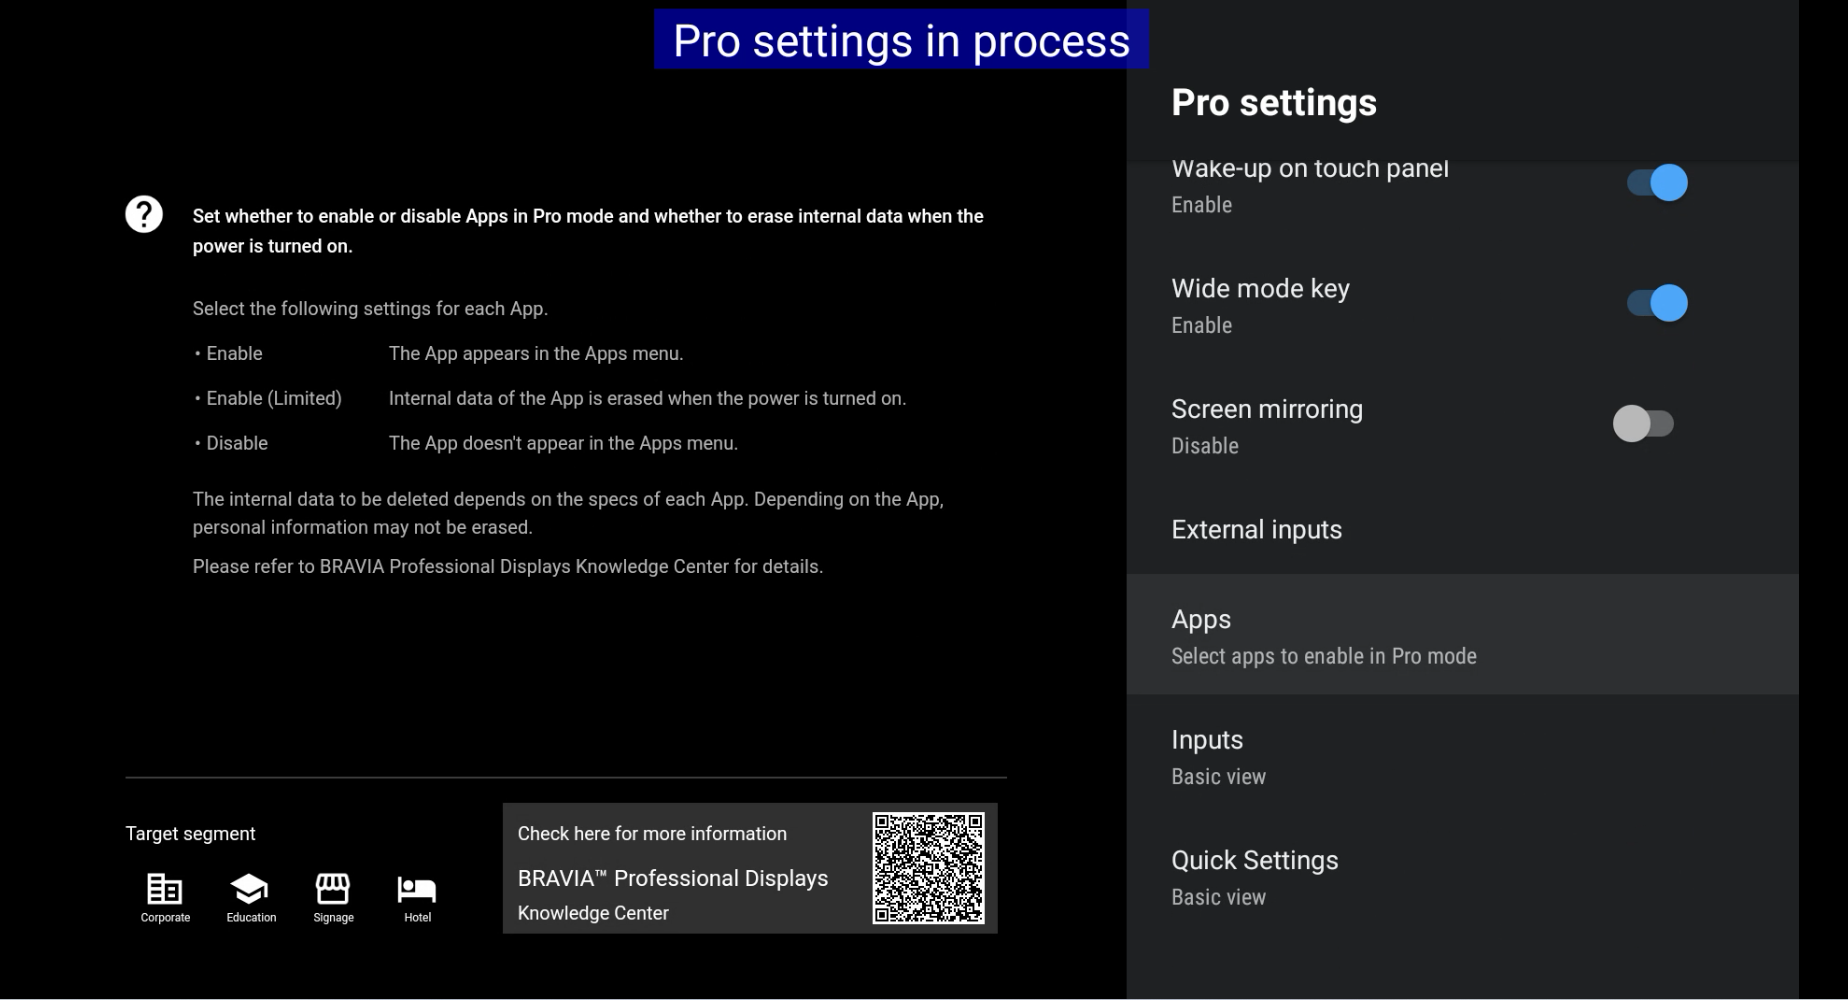
- Ensure Fusion signage is enabled.
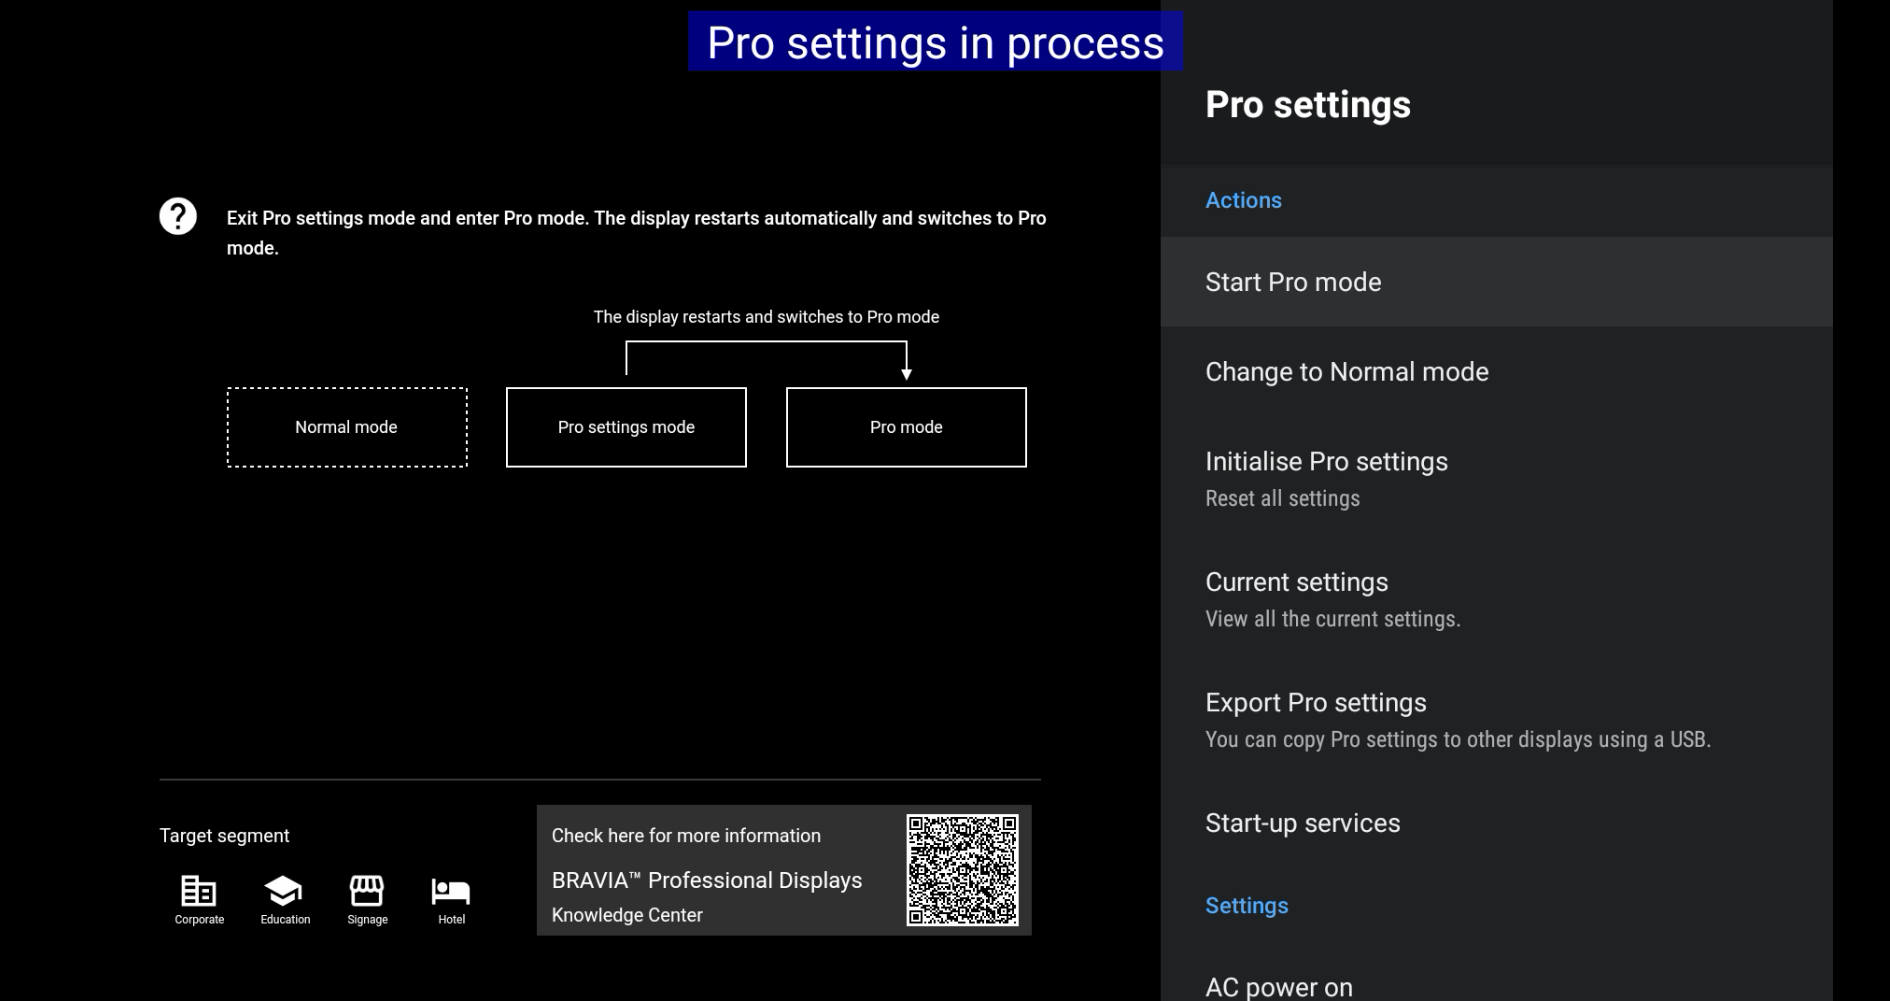
- Once finished you must switch back to Pro Mode, the pro settings mode watermark will disappear and the Fusion Signage app will auto boot on every start-up. (Note - it takes about 30 seconds for the app to boot up). To switch to Pro Mode go to settings -> pro settings -> Start Pro mode.
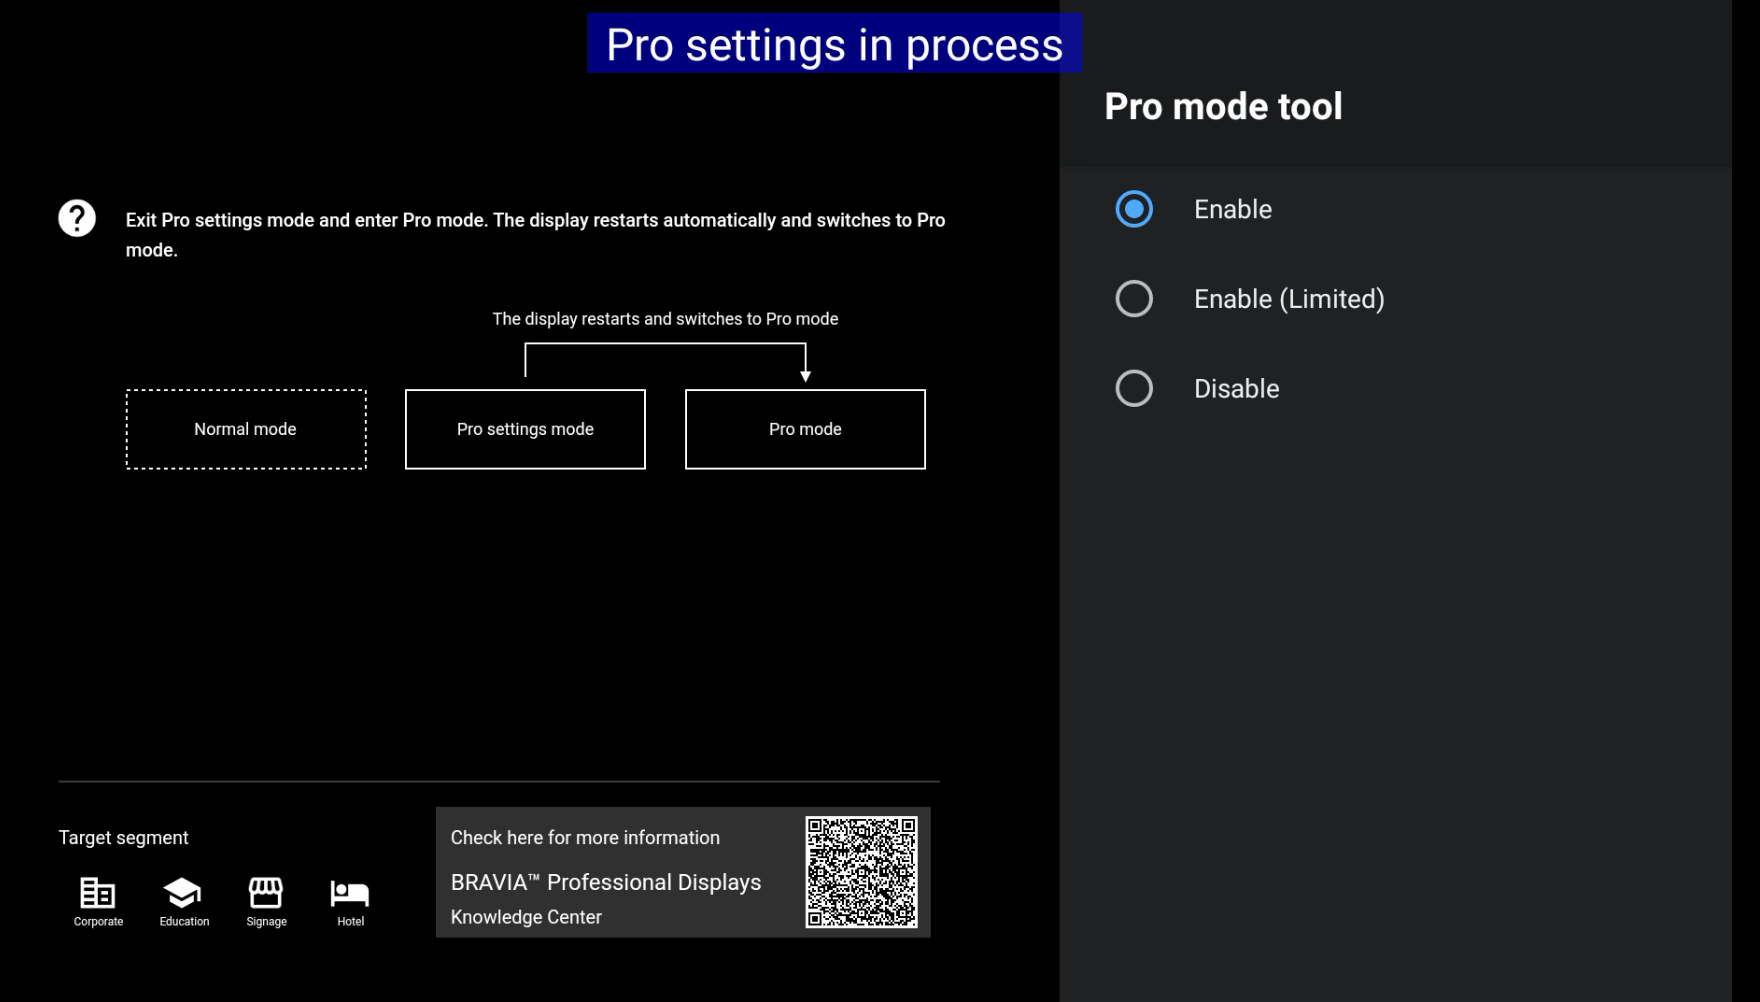
In the same section where you enable the Fusion Signage app, by enabling the Pro Mode Tool it will place a helpful shortcut on the home screen where you can quickly switch to pro settings mode from pro mode.
Adding the app shortcuts to the startup homepage
- On the homepage navigate to the + icon under favourite apps and select both the Fusion Signage app and the pro mode tool if you have it enabled.
Software and Firmware updates
It is recommended that you keep your screens software and firmware updated to the most current versions, allowing you to access any new features sony releases and to apply any bug fixes.
Set screen to automatically perform software updates
Find the instructions to set your screen to automatically perform software updates here - https://www.sony.com.au/electronics/support/articles/00028577
Updating the Firmware
When updating the firmware it is specific to the series of screen that you have. Make note of the series (it should be a code similar to BZ30J) and find the matching instructions for that series here - https://pro-bravia.sony.net/resources/index.html