Media & Folders
Media Tutorial (1min 20 secs)
Let's get started using the Manage section!
To begin, click Add Folder. We recommend naming your folder by campaign or type of content. There aren’t any hard and fast rules to this since a folder can contain Media, Playlists and Schedules, so feel free to call it anything that makes sense to you. For example, some names users have given to Media folders are, Store, Food and Specials (for a donut store, of course!).
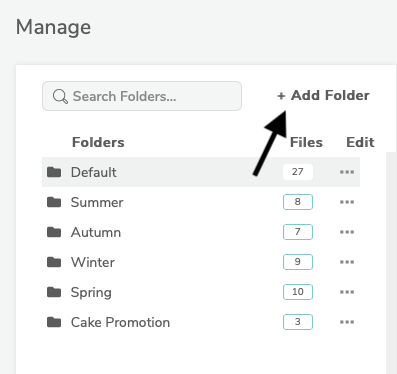
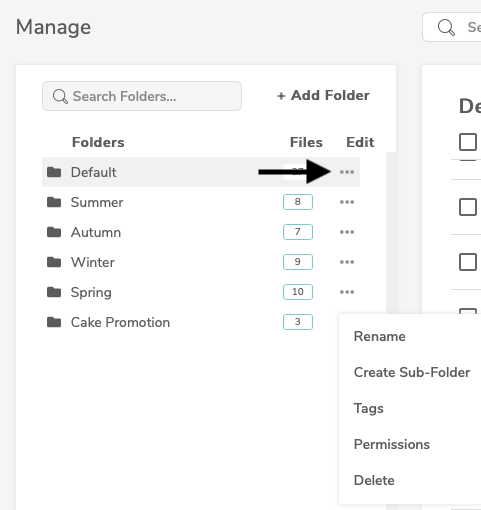
Click the 3-dot menu to Rename, Create a Sub Folder and Delete.
Add Media
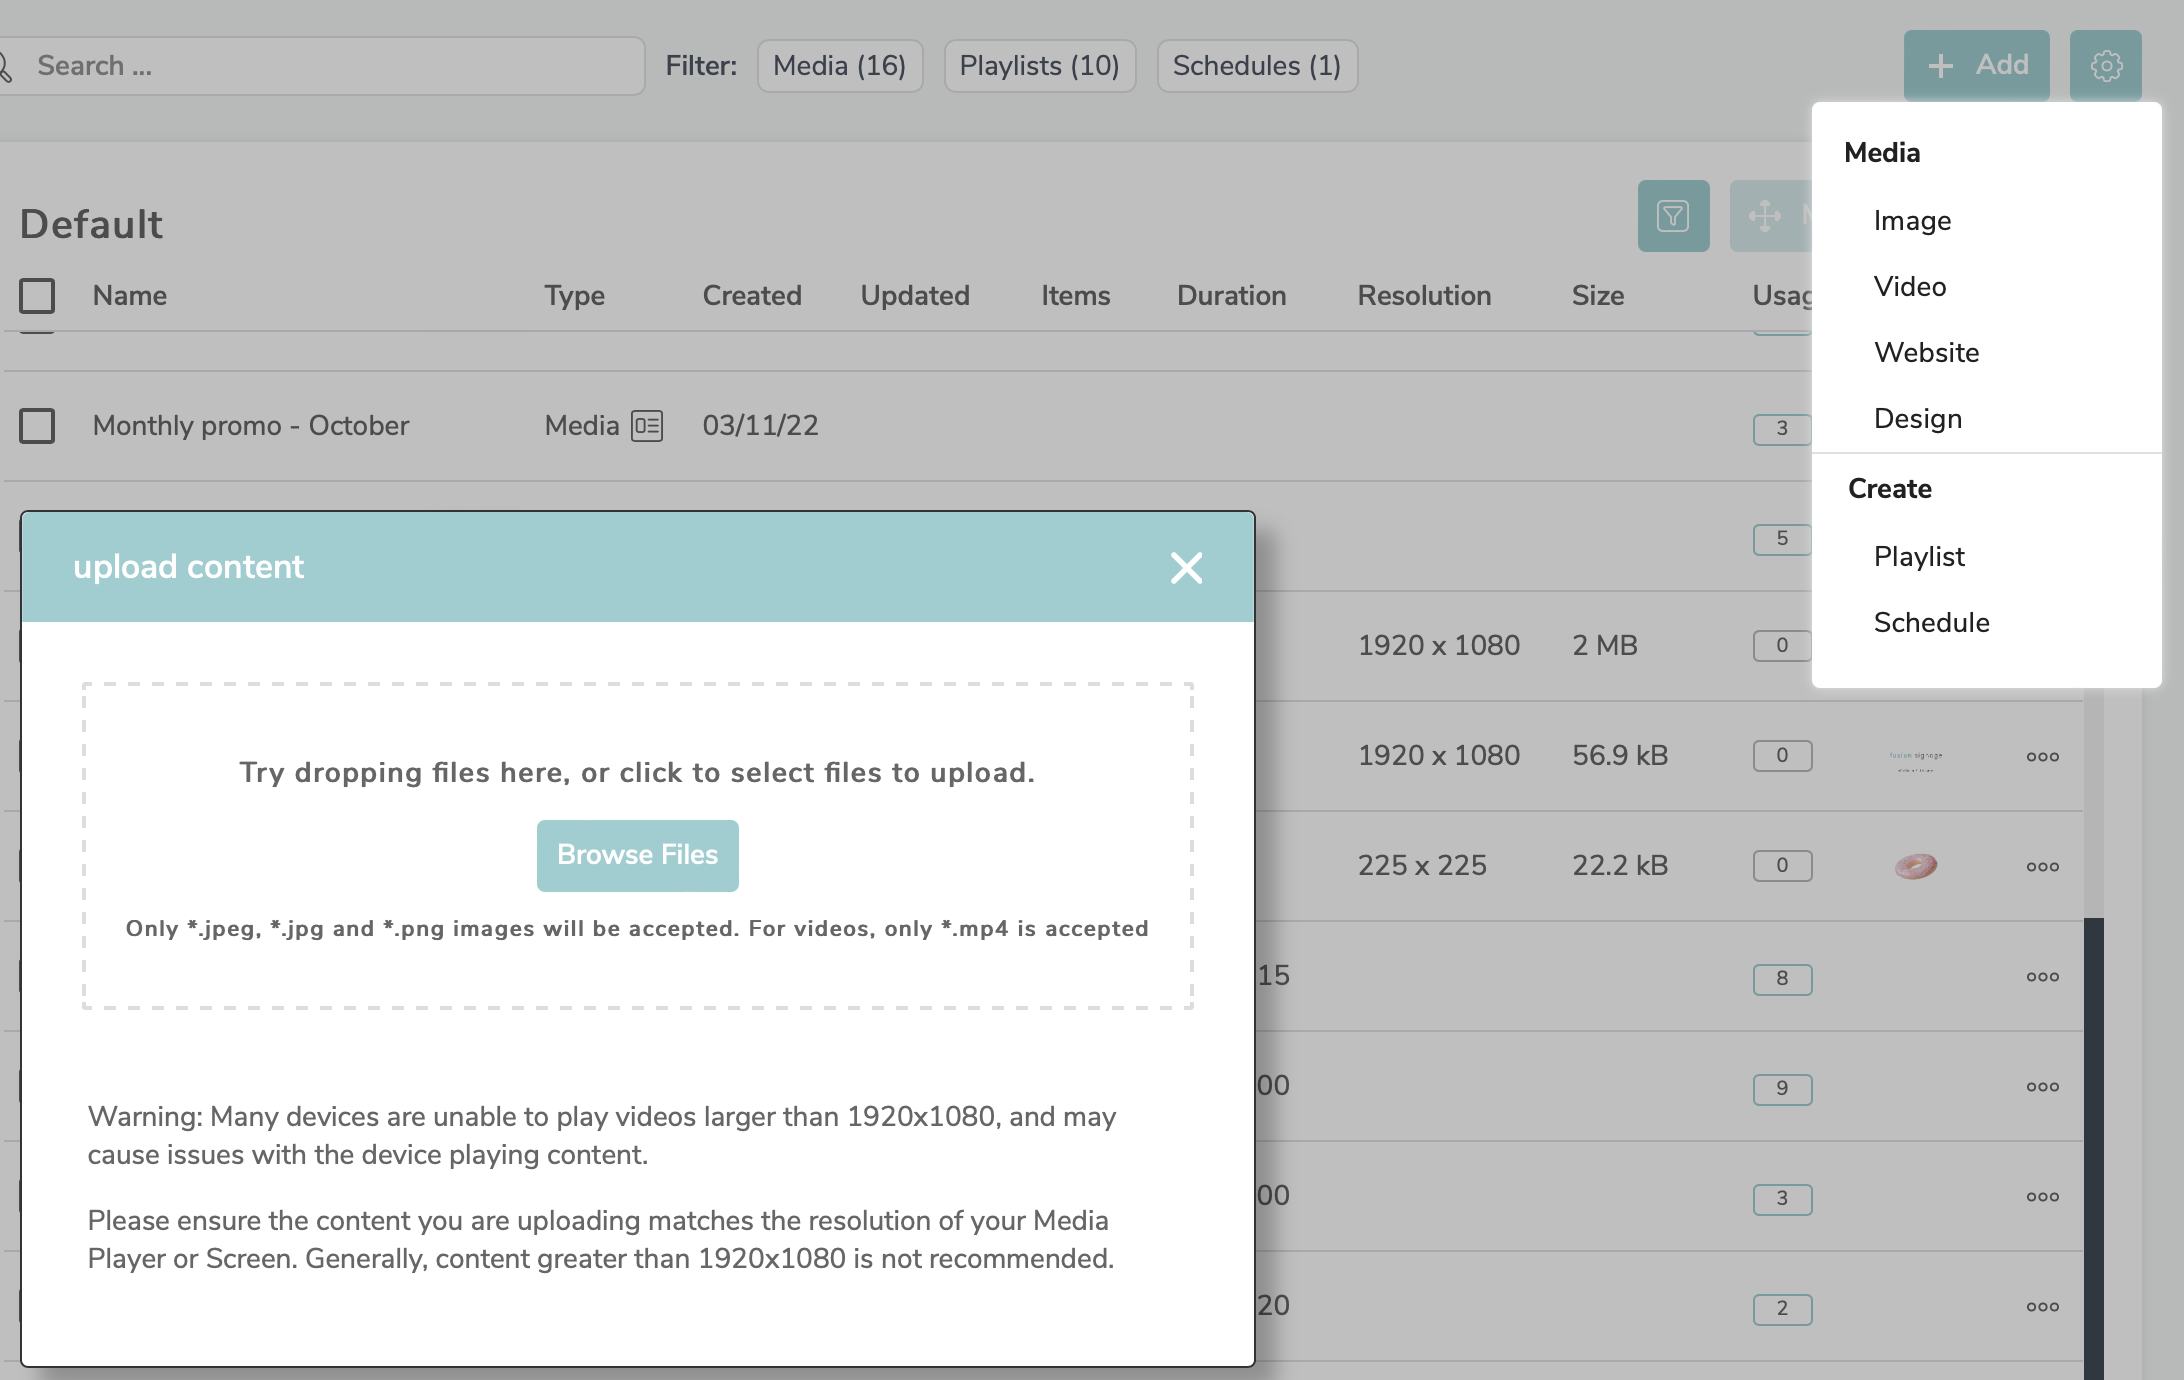
Got your Media files ready? Simply select the folder and click Add, then select the Media type (Image, Video, Website, Design or Zone). Now, you’ll see an upload screen, where you can click Browse Files to find files to upload from your computer, or simply drag and drop into your chosen Folder.
Add a Website
To add a website, select Add, then Website, and simply copy and paste the URL into the provided field and press Add. Make sure the website doesn’t require any login credentials, otherwise it may not work! You can check this by testing the link in a Private Browser window. Sneaky.
The website you are adding also needs to be iframe compatible in order to allow the content to be embedded elsewhere (some websites have certain security settings in place that restrict this). You can check whether a website is compatible by pasting the URL in an iframe tester such as this one.

Supported File Types
Recommended Media Settings
We’ll keep the tech talk quick!
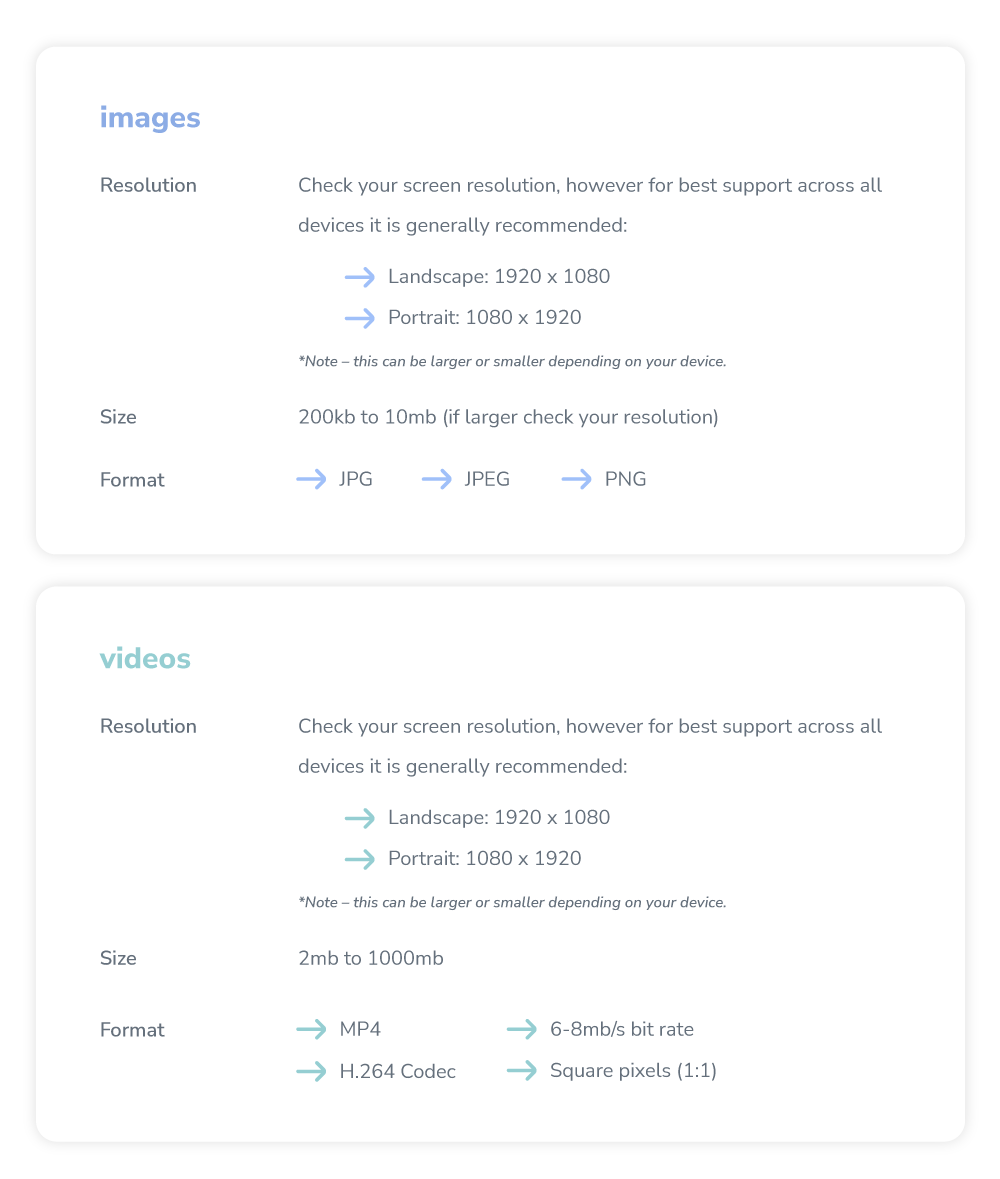
We recommend that your content is the same aspect ratio or resolution as your screen. FYI: a typical aspect ratio is 16:9 at a resolution of 1920x1080 pixels. Content should also match the orientation of the screen, either Landscape or Portrait.
There’s a 1GB limit on the file size that can be uploaded. Are your files larger than this? Compress them using a program like Handbrake. Easy-peasy!
We recommend that video files have a bit rate of 6-8mbps, exported as a mp4 (using the h.264 or h.265 codec). The codec profile is also important – as a rule, using h.264 at the baseline profile is the best method to export video files that work on all devices (Main or High profile may also work – and generally do – but some devices may have issues with them). These files should also be 1920x1080 in resolution and have square (1:1) pixels.
Media Page Explained
First, select the Media tab at the top of the page to filter to just see the Media files. You’ll now only see your Media content in the selected folder, and Playlists and Schedules will be hidden. Scram!

In the top right of the Media library, there are options to show and hide columns so you can customise what you want to be visible, as well as Move and Delete items.
You’ll need to select content by clicking the check box before Move and Delete will work.

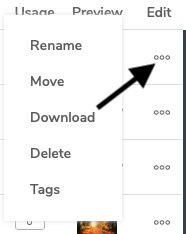
The 3-dots button under the Edit column is another way to move and delete Media. In this section, you can also rename the Media file and download the content.
For a more detailed rundown on each column, click here.
Keep in mind that any content deleted from your Media Library will also be deleted from any Playlist it was assigned to!